Category: Trip Planning

  • Start Planning A Trip (2026): The Complete Guide

    start here

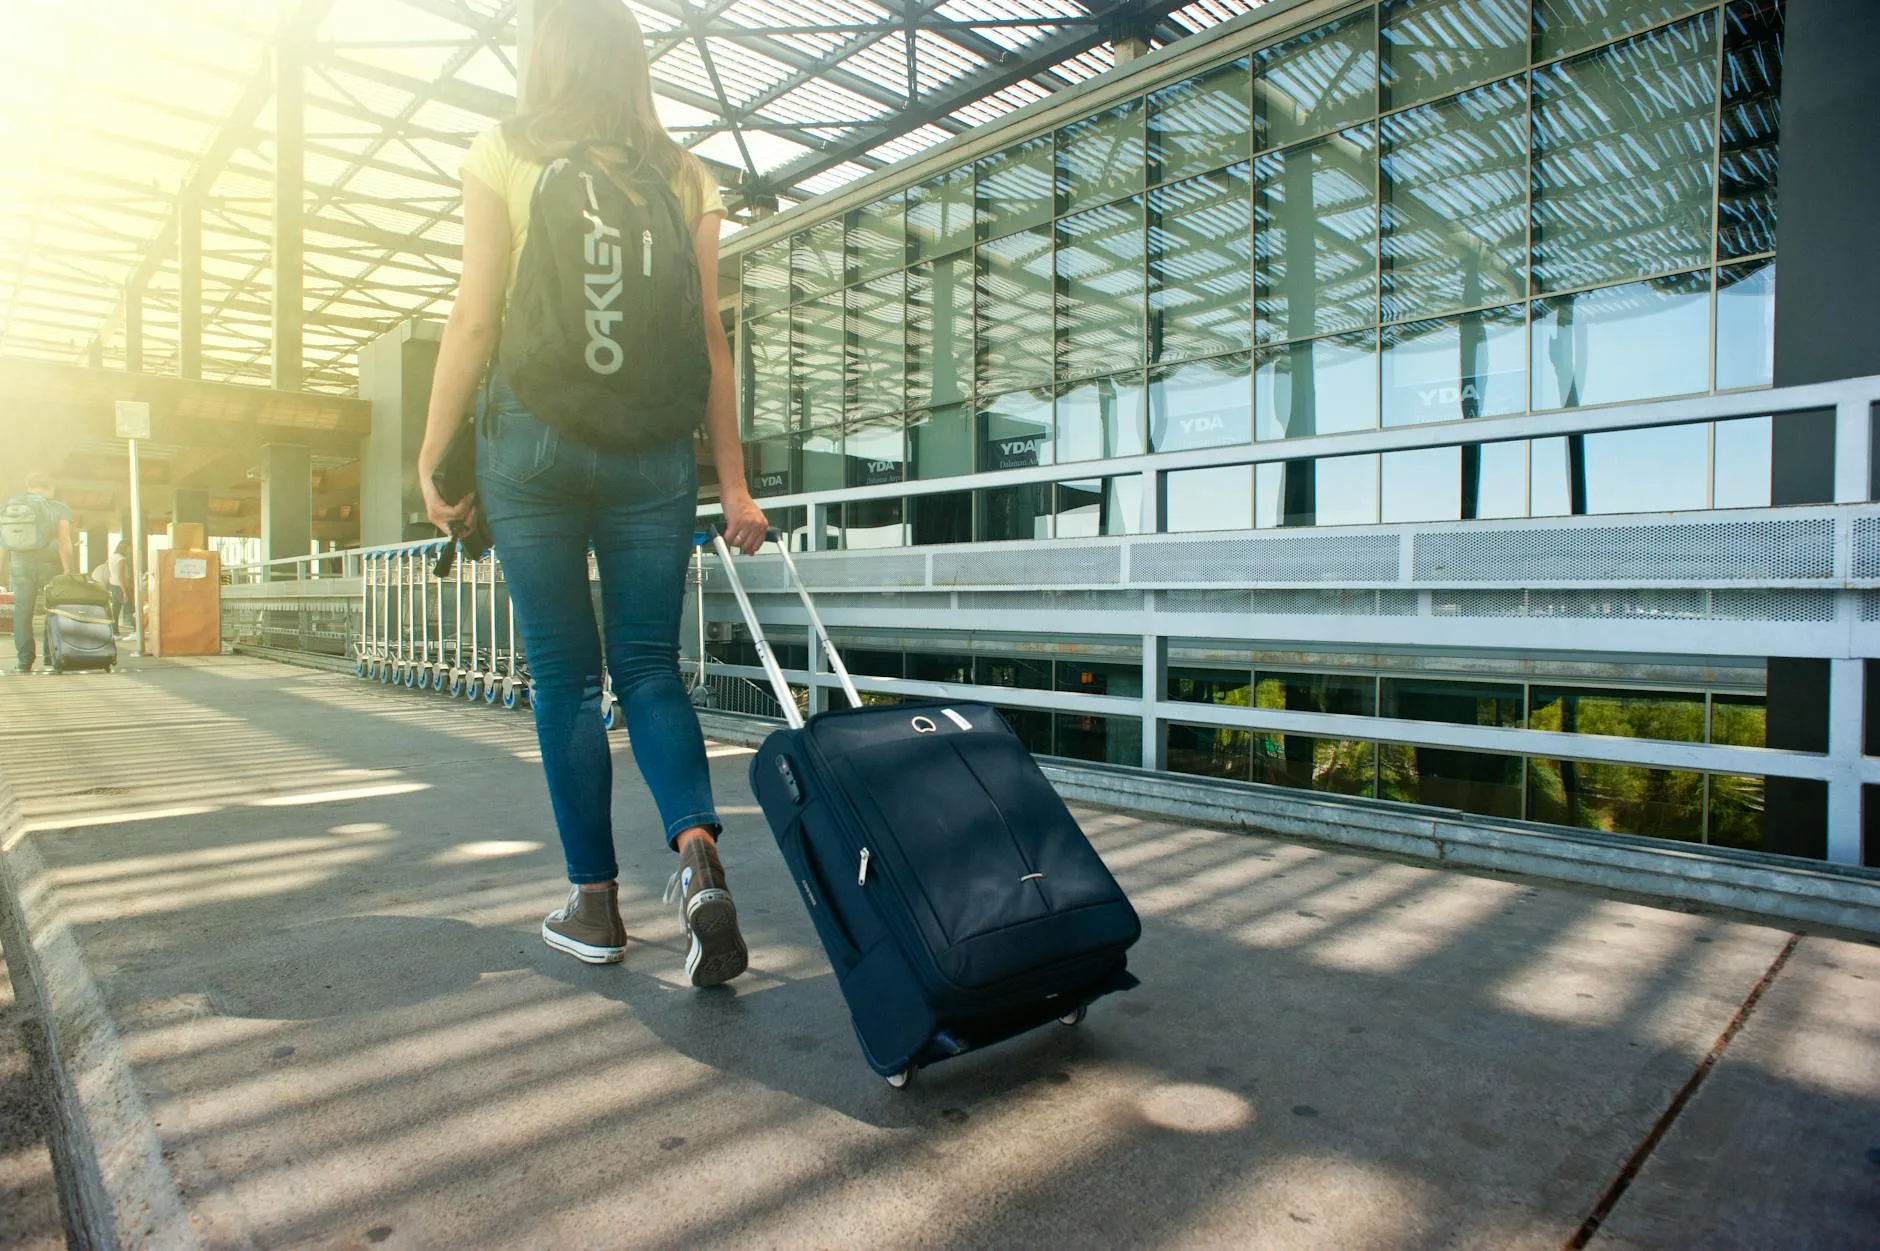
    Start Planning A Trip Here: Plan Smart, Book Right, Prepare with Confidence.

    person opening a map on the floor preparing to start planning a trip

    Written By:

    Published On:

    Last Modified:

    You’ve officially stumbled onto the mothership. This is your no-BS launchpad to start planning a trip without losing your mind, your wallet, or your soul.

    Most people wing it, get overwhelmed, or end up rage Googling “how to book trains in Italy at 2am.” Don’t be that person.

    Whether you’re dreaming about sushi in Tokyo or surfing in Portugal, this guide has your back from spark to suitcase.

    Planning a trip should feel exciting, not like assembling IKEA furniture without instructions.

    We’re talking real advice from the trenches. What to do, when to do it, and how not to fuck it up.

    This is your complete guide to start planning, booking, and preparing like a pro.

    Ready to skip the fluff and actually make this trip happen? Let’s go. ✈️

    About the Author

    A man in sunglasses and headphones leaning casually against a column in a European plaza with historic buildings and cobblestone streets.

    The first time I tried to start planning a trip to Europe, I ended up crying in a Paris metro station, clutching a baguette like a life raft and cursing at the ticket machine in three languages. None of them were helpful.

    I’ve missed flights by minutes and ferries by days. Booked a hostel that turned out to be a squat. Once rented a manual car in Sicily with exactly zero clue how to drive stick. Ever stalled out on a mountain road with goats watching you judgefully? I have.

    But travel taught me faster than school ever did. You fuck up, you fix it, you learn.

    Over the last decade, I’ve zigzagged across continents, hopped trains in the Balkans, couchsurfed in Istanbul, slept in castles, caves, and one unforgettable yurt outside Ulaanbaatar.

    Somewhere along the way, I stopped winging it so hard and started making smarter choices, building flexible plans that actually worked, and helping others do the same.

    I wrote this guide because too many smart people feel dumb when they start planning a trip. Analysis paralysis, a thousand tabs open, everyone online shouting different advice. I’ve been there. It sucks.

    So now I build guides that cut through the noise. They’re not sponsored fluff or influencer BS. They’re real from someone who’s learned through trial, error, and sheer stubbornness.

    Why me? I’ve been at this for over ten years. Writing guides, building itineraries, and helping thousands of travelers plan better trips that don’t wreck their wallets or their sanity.

    This isn’t theory. It’s field-tested, jet-lagged, occasionally wine-fueled truth.

    This guide is for planners who overthink, dreamers who procrastinate, and wanderers who want adventure without the migraine. It’s for anyone who wants their next trip to feel like freedom, not a logistical hellscape.

    If you want to start planning a trip without losing your mind, you’re in the right place. Let’s get your boots on the ground and your head out of the chaos. ✈️

    Chapter 1: Clarify Your Travel Purpose and Priorities

    road between pine trees

    Why the Hell Are You Going?

    Look, if you don’t know why you’re going on this trip, you’re already setting yourself up to waste time and money.

    The world is massive.

    You can’t see all of it in two weeks unless you want your vacation to feel like a hostage situation with train snacks.

    Get Specific or Get Lost

    Are you chasing museums or mezze?

    Do you want to hike the Dolomites or sip wine in a Croatian fishing village?

    Be honest.

    Here’s how to lock it in:

    1. Pick a vibe: Relaxation, adventure, culture, food coma? Choose.
    2. Choose a pace: Are you into slow mornings or full-throttle sightseeing?
    3. Define your musts: List 3 things that would make the trip worth it. That’s your anchor.
    4. Think emotionally: Do you want to reconnect, escape, learn, or reset? Let that shape the route.
    5. Skip the FOMO: You’ll never see everything. Don’t even try.

    Clarity Makes Everything Easier

    Now that you’ve defined your purpose, everything else gets easier.

    Destinations, budgets, packing, even your mood swings all flow better when you know what the hell you’re trying to get out of this.

    What’s Next: The Timeline Tamer

    Next up, we’re breaking down the timeline.

    Because knowing your “why” is great, but if you don’t know when to book flights or how early to get travel insurance, you’ll end up planning like a stoned backpacker in Prague.

    👉 Dive deeper into clarifying your travel purpose and priorities here.

    Chapter 2: Know Your Planning Timeline and Key Milestones

    direction sign on mountain trail

    Timing Is Everything (So Don’t Screw It Up)

    Nothing ruins a trip faster than realizing your dream Tuscan villa is booked solid or flights just doubled in price because you waited too long.

    Europe rewards the well-timed and punishes the clueless.

    Your Master Game Plan

    Here’s how to avoid rookie mistakes:

    1. 6–12 months out: Lock in those big-ticket dates. If you’re doing Oktoberfest or the Edinburgh Fringe, you plan early, or you sleep on the sidewalk.
    2. 4–6 months out: Book flights. This is your window before prices go full highway robbery.
    3. 2–3 months out: Grab lodging and rail passes. Train reservations in France don’t book themselves.
    4. 1 month out: Sort your travel insurance, currency, and itinerary drafts.
    5. 2 weeks out: Confirm bookings, check passport expiry, and laugh smugly at your past disorganized self.

    You Just Bought Yourself Peace of Mind

    When you break planning into chunks, you stay ahead of the chaos. There is no last-minute scrambling, no ugly surprises, just smooth, sexy efficiency.

    What’s Next: The Where

    Now that you’ve got your timeline dialed in, it’s time to actually choose where the hell you’re going.

    Chapter 3 discusses destinations, vibes, and how to avoid ending up in the most boring town in Belgium.

    👉 Check out the full Planning Timeline and Milestone Breakdown here.

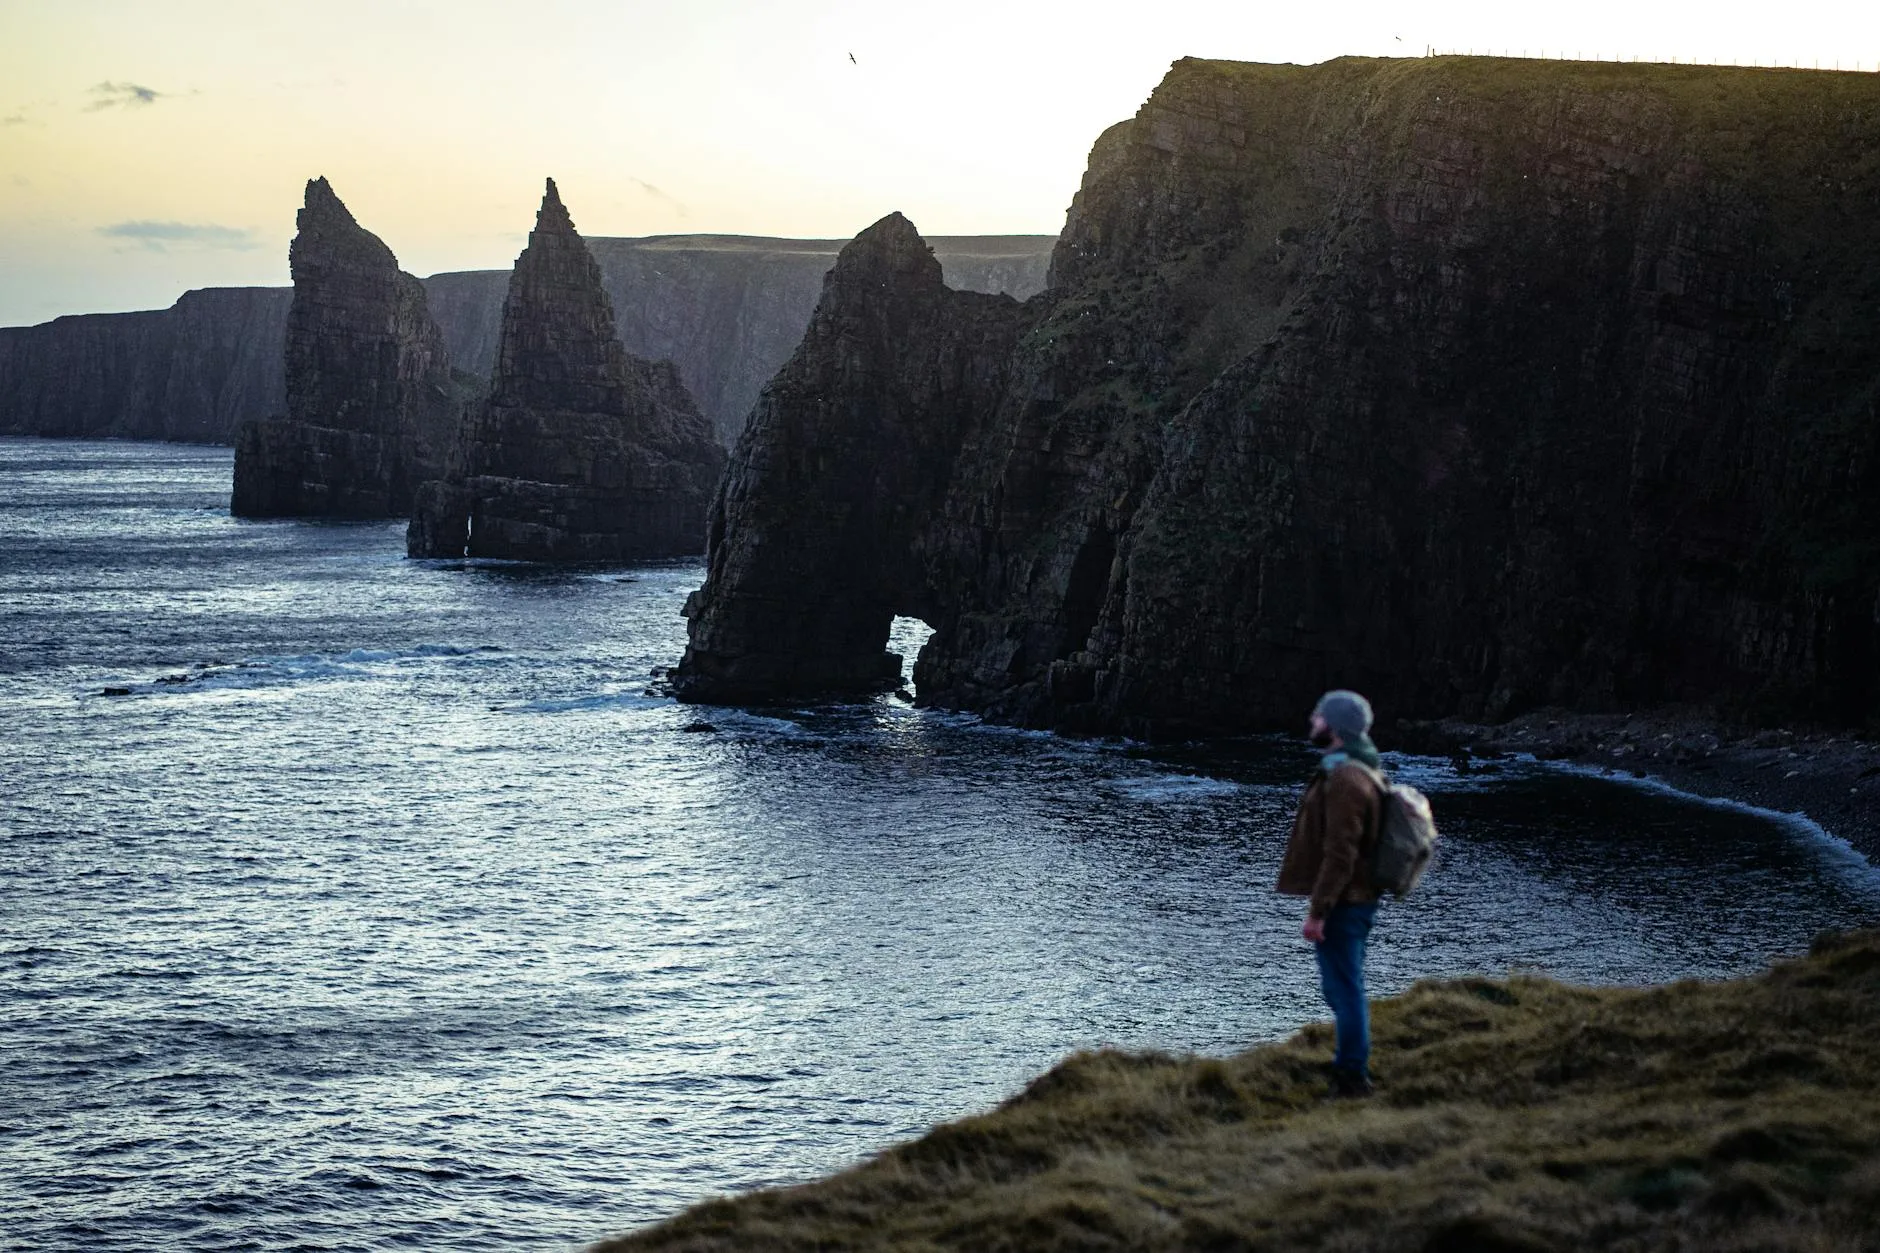
    Chapter 3: Research and Choose the Right Destination

    man in black dress shirt sitting on chair using macbook

    Not Every Place Deserves Your Passport Stamp

    Europe is a buffet, not a checklist. Pick the wrong spot and you’ll be sipping €12 cappuccinos surrounded by souvenir shops and bored retirees.

    How to Sniff Out the Good Stuff

    Here’s how to find a place that fits your vibe, not just your Instagram:

    1. Match it to your purpose: Want quiet hikes? Skip Barcelona. Want late-night chaos? Don’t go to Bruges.
    2. Stalk shoulder season: May and September are your friends. Cheaper, fewer crowds, and you can still feel your toes.
    3. Check travel time: If it takes 3 flights and a donkey to get there, skip it.
    4. Research beyond the blogs: Read forums. Watch YouTube walks. Message that friend who backpacked through Slovenia and won’t shut up about it.
    5. Gut check it: If it sparks zero excitement, move on. You don’t owe Paris anything.

    You’ve Got Taste, Use It

    You’re not picking a cereal. You’re picking where you’ll eat, sleep, get lost, and maybe cry a little. Choose like it matters.

    What’s Next: Where You Sleep Matters Too

    Now that you’ve found your dream city, town, or weird alpine village, we’ll figure out where to set up camp.

    In Chapter 4, we’ll talk about home bases, day trips, and how to not end up next to a nightclub when you just want to sleep.

    👉 Get the full Destination Research and Selection Guide here.

    Chapter 4: Pick the Best Home Base for Your Trip

    photo of camels resting on ground

    Where You Sleep Changes Everything

    Your home base is the lens through which you’ll see the whole trip. Pick the wrong one and you’ll spend half your vacation trapped on local buses next to a guy eating tuna out of a can.

    How to Choose a Killer Home Base

    Here’s how to find a spot that works with your trip, not against it:

    1. Think central, not cute: That adorable hilltop village? Gorgeous. Also, two hours from everything.
    2. Check transit options: Trains, trams, ferries, whatever. You want to move freely, not play transit roulette.
    3. Match it to your energy: Want nightlife? Stay in the thick of it. Want peace? Get out of the center.
    4. Research day trips: Pick a base that unlocks multiple nearby spots without making you change beds every night.
    5. Test logistics: Before you book, map it out. What looks charming online may be an uphill slog with a suitcase in real life.

    Sleep Smart, Travel Smarter

    The right base saves you time, stress, and money. It also makes your mornings better and your nights way less annoying.

    What’s Next: Fill It In

    Now that you’ve got a solid HQ, it’s time to fill your days with stuff that actually excites you. In Chapter 5, we’ll get into how to find the right things to do without ending up in tourist hell.

    👉 Learn how to choose the perfect home base for your trip here.

    Chapter 5: Find What to Do and Build Around Your Interests

    signpost to stuttgart s museum of modern art

    Your Trip, Your Weird Obsessions

    You’re not in Europe to check boxes. You’re here to chase the stuff that lights you up.

    Whether that’s medieval architecture, underground jazz clubs, or bakeries with croissants that make you weep.

    Hunt Down the Good Shit

    Here’s how to find stuff you actually care about:

    1. Dig beyond Google: Use Reddit threads, niche blogs, and Instagram geotags to uncover hidden gems.
    2. Theme your days: One day for food, one for history, one for walking until your calves cry. Keeps things fresh.
    3. Book a few experiences early: A pasta-making class in Bologna? Worth it. A canal cruise in peak July? Book now or cry later.
    4. Leave white space: Spontaneity’s where the magic lives. Leave a few afternoons open.
    5. Follow your cravings. If all you want is to find the best Neapolitan pizza in Naples, lean into it. There’s no shame in that.

    It’s About Depth, Not Volume

    You don’t need to cram 37 attractions into one day. You need to walk away with stories, not a sore neck from staring at monuments all day.

    What’s Next: Build the Flow

    Now that you’ve found your must-do moments, it’s time to stack them in a way that doesn’t feel like boot camp. In Chapter 6, we’ll lay out your itinerary without killing your vibe.

    👉 Explore how to find meaningful things to do based on your interests here.

    Chapter 6: Map Out Your Itinerary Without Overplanning

    man taking photo of the great pyramid

    Don’t Be a Slave to the Schedule

    You didn’t fly across the world to stress over a spreadsheet. A good itinerary keeps you moving without making your trip feel like a military op in Florence.

    How to Build an Itinerary That Doesn’t Suck

    Here’s how to plan your days without killing the vibe:

    1. Plan one anchor activity per day: Just one must-do. The rest? Bonus.
    2. Group by geography: Don’t zigzag across Rome like a caffeinated squirrel. Cluster your stops.
    3. Build in flex time: You’ll want to nap. Or drink. Or chase a street musician across Lisbon. Leave space for that.
    4. Use Google Maps and offline apps: Save places. Map your routes. Look like a genius.
    5. Listen to your energy: Don’t schedule the Louvre the morning after a wine crawl. You’re not a superhero.

    Loose Plans, Big Wins

    The goal is freedom, not fatigue. A well-balanced itinerary makes room for magic and keeps you sane.

    What’s Next: Count Your Money

    Now that you’ve got a loose plan in place, it’s time to talk money. In Chapter 7, we’ll break down how to budget like a grown-up without sucking the fun out of your trip.

    👉 Learn how to map out a flexible, smart itinerary here.

    Chapter 7: Budget Like a Pro Without Killing the Vibe

    a person holding a container full of money

    Be Broke on Purpose

    You don’t have to burn through your savings or eat sad sandwiches on a park bench every day.

    A smart budget means you get what you actually want out of your trip, without panicking every time the bill arrives.

    How to Make a Budget That Doesn’t Feel Like a Prison Sentence

    Here’s how to plan your money like a badass:

    1. Start with your total number: Know how much you’re willing to blow before you start booking anything.
    2. Break it into chunks: Lodging, food, activities, booze, spontaneous stupid stuff. Give each category a limit.
    3. Track as you go: Use an app. Or a sticky note. Just something to see where your euros are flying.
    4. Save on the boring stuff: Flights and hotels? Be ruthless. That frees up cash for the wine tasting in Santorini.
    5. Leave wiggle room: Because yes, you will find something unexpected that you just have to do.

    Spend Intentionally, Not Emotionally

    Budgeting isn’t about saying no to fun. It’s about saying yes to the right stuff. The stuff you’ll still be talking about long after your bank account recovers.

    What’s Next: Take Off Like a Pro

    Now that you’ve got your money sorted, it’s time to talk flights. Chapter 8 shows you how to book flights the smart way so you don’t pay double just because you got impatient.

    👉 Grab the complete guide to budgeting for your trip here.

    Chapter 8: Book Your Flights the Smart Way

    a screen with departure information mounted on wall

    Don’t Get Fleeced in the Skies

    Flights are usually the first thing you book, and the first place you can totally screw up.

    Book wrong and you’ll either blow your budget or spend 14 hours on layovers in airports that smell like wet carpet.

    Tricks for Nailing the Perfect Flight

    Here’s how to fly smarter, not broker:

    1. Search incognito: Your browser’s watching. Stop feeding the algorithm.
    2. Use flight tools: Google Flights, Skyscanner, and Momondo are your new travel agents.
    3. Flex your dates: Leaving on a Tuesday can save you hundreds. No joke.
    4. Consider nearby airports: Flying into Milan instead of Venice might save your ass and your wallet.
    5. Don’t wait too long: That magical deal? It’s not coming back. If it looks good, book it.

    You’re Now a Seat-Hunting Ninja

    You just learned how to outsmart the system, dodge price traps, and get where you want without selling a kidney. You legend.

    What’s Next: Where You Sleep Matters (Again)

    With your flight locked down, let’s figure out where you’ll crash once you land.

    Chapter 9 is all about picking the right place to stay without ending up next to a techno club or a haunted pensione.

    👉 Dive into the full Smart Flight Booking Guide here.

    Chapter 9: Choose the Right Place to Stay

    charming outdoor cafe at hotel agli alboretti

    Where You Crash Can Make or Break Your Trip

    Your accommodations aren’t just a place to drop your bags. They shape your mornings, your sleep, your mood, and occasionally, your belief in basic plumbing.

    How to Book a Spot That Doesn’t Suck

    Here’s how to avoid regrets and weird stains:

    1. Location first: You want to be near the action, not in the suburbs with a scenic view of a parking lot.
    2. Check reviews for real info: Skip the star rating. Dig into the comments for clues on noise, beds, and suspicious smells.
    3. Match the stay to your vibe: Party hostel? Boutique hotel? Lakeside Airbnb with goats? Choose what fits.
    4. Know what’s included: Free breakfast? Laundry? Fast Wi-Fi? Don’t assume anything.
    5. Book directly when possible: Sometimes it’s cheaper. Sometimes you get free wine. Both are wins.

    Sleep Like You Mean It

    You now know how to pick a stay that works for your goals, your budget, and your sanity. No horror stories. No sleepless nights.

    What’s Next: Feed Your Face Without Stressing

    Alright, your bed is sorted. Next, we dive into one of the best parts of travel: eating. Chapter 10 covers how to plan meals without making it feel like a damn chore.

    👉 Check out the complete guide to picking the right place to stay here.

    Chapter 10: Plan Your Meals Without Overplanning

    cooked foods on wooden plate

    Eat Well, But Don’t Be a Control Freak

    Food is half the reason you travel. But if you’re scheduling every bite three weeks in advance, you’re going to miss out on that tiny trattoria you stumble across after two glasses of wine.

    How to Plan Meals Without Sucking the Joy Out of It

    Here’s how to stay fed without turning into a spreadsheet zombie:

    1. Pick one must-try meal per day: Just one. Anything else is a bonus from the food gods.
    2. Make reservations where it counts: Michelin stars? Trendy tapas bars in San Sebastián? Book that.
    3. Leave gaps for spontaneity: That hole-in-the-wall falafel joint? You won’t find it in a guidebook.
    4. Use Google Maps and save spots: Tag them ahead of time. Then let the day guide you.
    5. Eat like a local: Breakfast might be a croissant and a coffee. Roll with it. You’re not in Kansas (unless you are, in that case enjoy your corn).

    Feed Your Curiosity, Not Just Your Stomach

    You’ve now got a flexible plan that lets you chase cravings, follow scents, and still hit your culinary bucket list. And that’s the sweet spot.

    What’s Next: Do More Than Eat and Sleep

    Now that you’ve figured out where and how to eat without losing your mind, we’re diving into the good stuff: what you actually do.

    Chapter 11 is all about booking activities that match your style, not someone else’s checklist.

    👉 Full guide to planning meals without overplanning is right here.

    Chapter 11: Lock In Activities That Fit Your Travel Style

    scenic bridge over canal in comacchio italy

    Do What You Actually Want to Do

    You didn’t fly across the damn ocean to follow a checklist of other people’s dream days. Your trip should reflect your travel style, not some influencer’s highlight reel.

    How to Choose Activities Without Selling Your Soul

    Here’s how to fill your days without regretting them:

    1. Pick what lights you up: Street art in Berlin? Cheese-making in the Alps? You do you.
    2. Book a few key things in advance: Big-ticket stuff sells out. Don’t wing the Colosseum or that flamenco show in Seville.
    3. Balance high and low energy: Don’t pair a four-hour hike with a wine tasting unless you want to pass out in a vineyard.
    4. Avoid activity overload: You’re not a tour group. Leave time for naps, cafés, and people-watching.
    5. Follow your curiosity, not FOMO: Skip that cathedral if you’d rather explore the food market. It’s your trip, not a pilgrimage.

    Curated, Not Crammed

    You’ve now got a loose, smart lineup of activities that actually excite you. You’ll come back with memories, not just ticket stubs and blisters.

    What’s Next: Get Moving Without Losing It

    Up next, we sort out how the hell you’re getting around once you land. Chapter 12 covers local transportation, so you’re not stuck figuring out metro maps while hangry and jetlagged.

    👉 Read the full guide on choosing the right activities for your travel style here.

    Chapter 12: Sort Out Local Transportation Before You Arrive

    photo of train in railroad

    Don’t Get Stuck at the Station

    Nothing crushes your travel buzz faster than standing in a foreign train station, holding a ticket you can’t read, wondering if you’re about to end up in the wrong country.

    Local transport can be amazing, or a total mindfuck if you don’t prep.

    How to Get Around Like a Local (or At Least Fake It)

    Here’s how to handle transit like a pro:

    1. Research how locals move: Metro in Paris. Trams in Budapest. Feet in Venice. Know what works where.
    2. Download the right apps: Citymapper, Google Maps offline, local rail apps. Don’t rely on signs alone.
    3. Learn a few transport basics: How to validate a ticket. What “Zone 3” means. When that train platform changes for no reason.
    4. Buy in advance when it makes sense: Eurail passes, airport shuttles, or timed-entry bus tickets. Saves time and stress.
    5. Map routes to your activities: Don’t assume things are close. Sometimes “10 minutes away” means a steep uphill death march.

    Transit Without Tears

    Now you know how to get from Point A to that wine bar in Point B without getting wildly lost or scammed. You’re ready to roll.

    What’s Next: Paperwork Is Not Optional

    Next up is the not-so-sexy but absolutely crucial part: documents. In Chapter 13, we’ll get your passports, bookings, and travel insurance sorted so you don’t end up stranded or denied entry.

    👉 Check out the full guide to local transportation here.

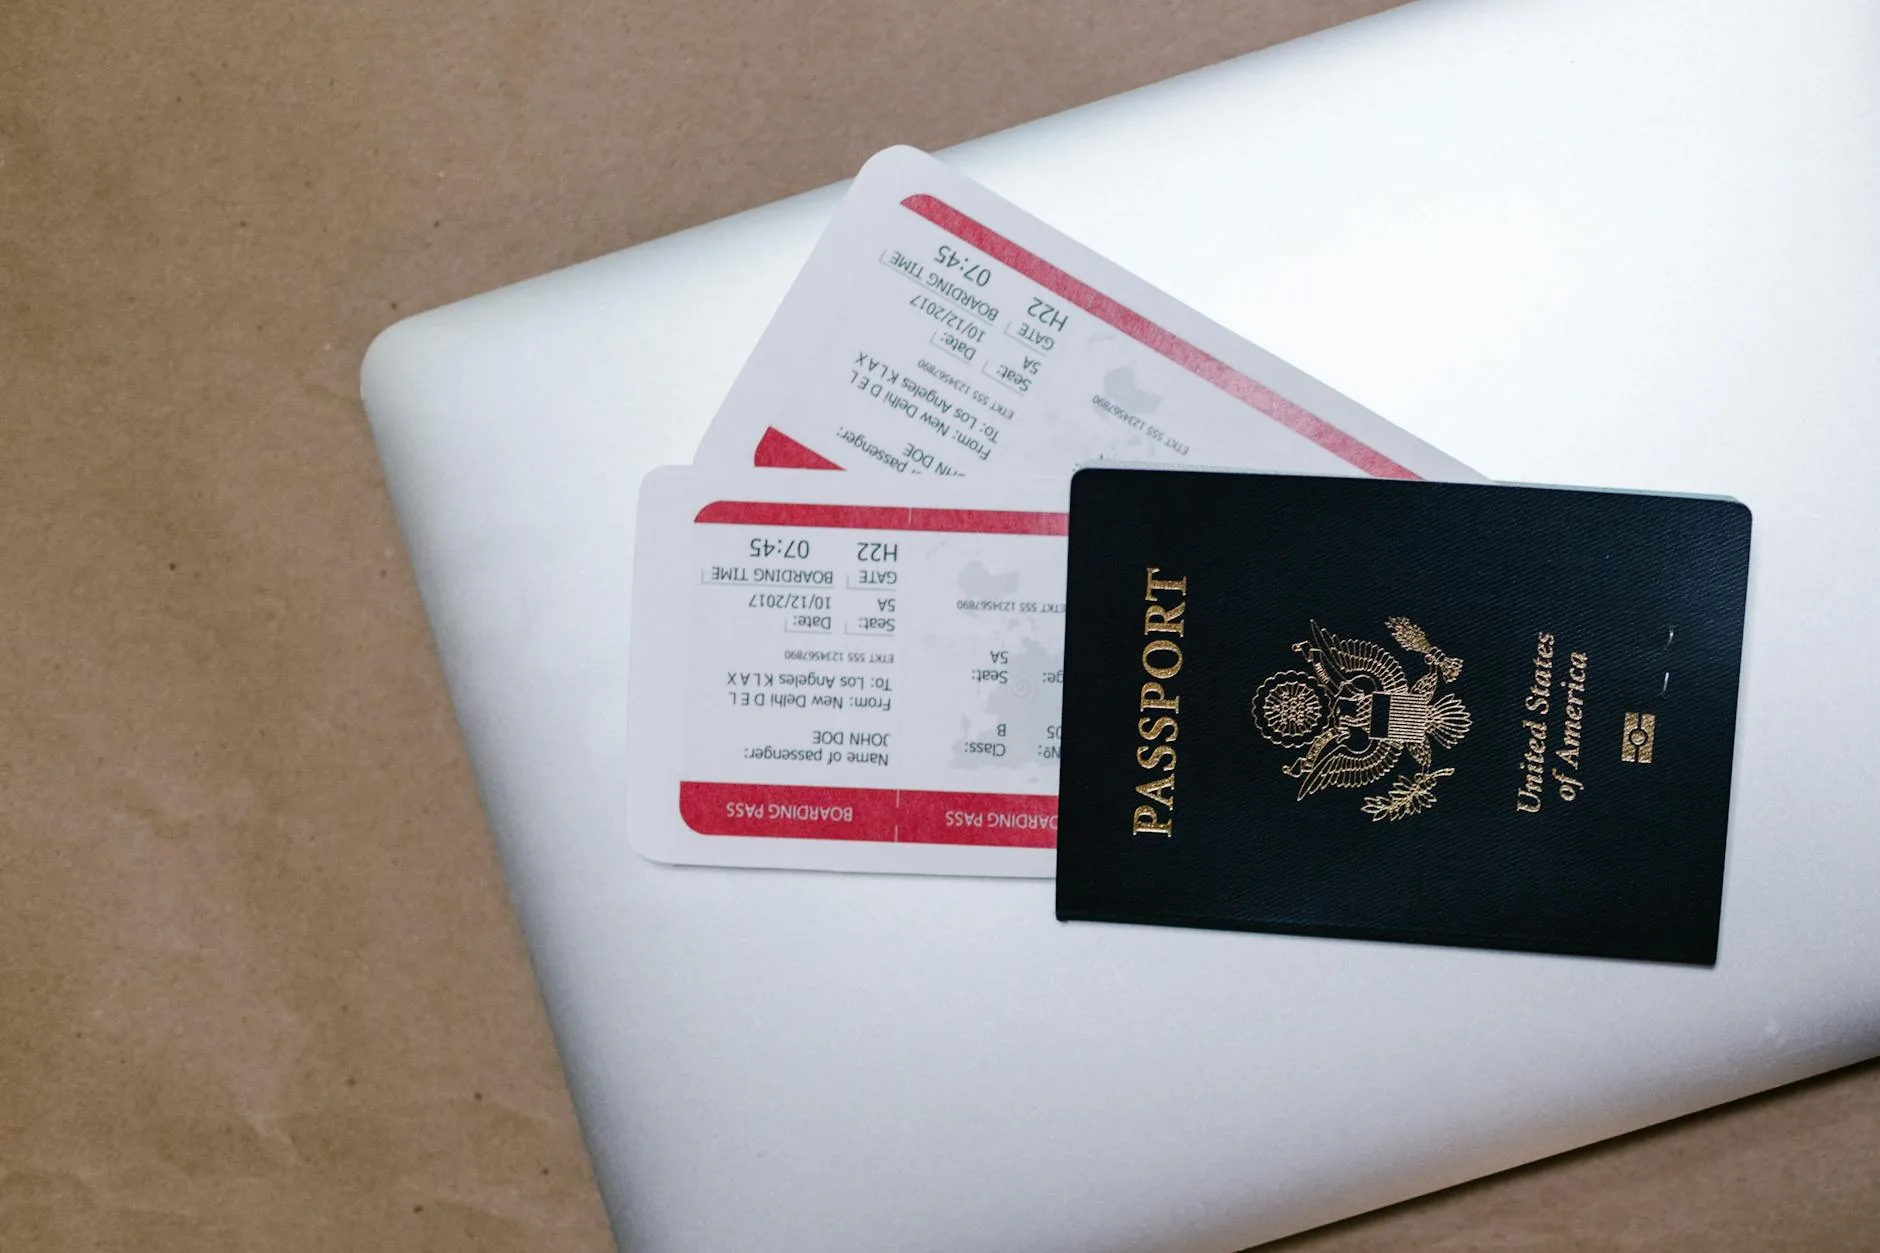
    Chapter 13: Organize Your Travel Documents and Paperwork

    person putting a passport on bag

    Paperwork Is Boring…Until You Need It

    You might think paperwork is the least sexy part of travel. And you’d be right.

    But forget one document and suddenly you’re the poor bastard crying at the Ryanair gate while your flight takes off without you.

    Don’t Be That Traveler

    Here’s how to get your paper game tight before you leave:

    1. Double-check your passport: Not just that you have it, but that it’s valid for at least six months. No exceptions.
    2. Print and save everything: Flights, hotels, insurance, reservations. Digital’s great until your phone dies.
    3. Use cloud storage: Upload your key docs to Google Drive, Dropbox, or wherever. Backup equals peace of mind.
    4. Have your travel insurance sorted: Print the policy. Know what’s covered. Don’t wait until your ankle’s swollen in Split.
    5. Know your visa rules: Just because you can enter Spain doesn’t mean you can bounce into Turkey with zero prep.

    Now You’re Paperproof

    You’ve now got your document ducks in a row. No surprises at the border, no scrambling in customs. Just smooth, confident travel vibes.

    What’s Next: Pack Like a Legend

    Now that your admin life is in order, let’s get your physical stuff in line. Chapter 14 dives into strategic packing so you don’t show up in Iceland with only flip-flops and regret.

    👉 See the full Travel Documents and Paperwork Checklist here.

    Chapter 14: Pack Strategically for Your Destination

    a person kneeling on floor with a backpack holding a pouch

    Pack Like You’ve Done This Before

    Packing is where dreams go to die if you’re not careful.

    Bring too much and you’ll curse your suitcase on every cobblestone street.

    Bring too little and suddenly you’re hunting for socks in a Slovakian grocery store.

    Smart Packing for Smart Travelers

    Here’s how to pack without losing your damn mind:

    1. Know your weather: Check multiple sources and pack for what’s actually coming. Mediterranean sun is different than Scottish drizzle.
    2. Use packing cubes: Game changer. Keeps your stuff neat and your sanity intact.
    3. Pack layers, not bulk: One good jacket beats three hoodies. Trust me.
    4. Limit your shoes: Three pairs max: walkers, casual, and maybe something nice. Europe’s not impressed by your sneaker collection.
    5. Don’t forget the chargers and meds: Plug adapters, prescriptions, earplugs. The little stuff that can ruin your day if forgotten.

    You’re Ready to Roll

    You now know how to pack light, smart, and stylish enough to not look like a lost camper in a Paris café. That bag should serve you, not the other way around.

    What’s Next: Stay Alive, Stay Well

    Now that your suitcase is set, it’s time to make sure your body and brain are, too. Chapter 15 is all about prepping for safety and health so you don’t spend your trip dealing with disasters or bad sushi.

    👉 Check out the full guide to strategic packing here.

    Chapter 15: Prioritize Safety and Health Before You Leave

    woman wearing mask on train

    Don’t Let a Cold or a Scam Ruin Your Trip

    You can’t enjoy a wine tasting in Tuscany if you’re barfing in a hotel bathroom. And nothing kills a vibe faster than realizing your wallet’s been lifted on a crowded tram.

    Staying healthy and safe isn’t paranoid. It’s just smart travel.

    Prep Like a Pro Without Going Full Prepper

    Here’s how to keep your body and brain in good working order:

    1. Get your vaccines sorted: Some places require them. Others strongly suggest them. Either way, better safe than feverish.
    2. Bring a mini first aid kit: Painkillers, band-aids, meds for your gut. Europe’s got pharmacies, but not always open ones.
    3. Register your trip if needed: Especially for longer stays or sketchier regions. Check your country’s travel advisory site.
    4. Learn local emergency numbers: 112 in the EU covers most bases. Don’t rely on memory when you’re panicking.
    5. Use a money belt or RFID wallet: You’re not paranoid if pickpockets really are everywhere. Looking at you, Barcelona.

    Stay Healthy, Stay Sharp

    Now you’ve got the tools to dodge disasters and bounce back from bumps. It’s not about fear. It’s about staying in the game.

    What’s Next: Power Up Your Tech

    With your health and safety on point, let’s talk gadgets, apps, and tools that’ll keep your trip smooth and connected. Chapter 16 covers the travel tech worth packing.

    👉 Check out the full Safety and Health Prep Guide here.

    Chapter 16: Set Up Your Travel Tech and Tools

    passenger taking selfie on a ferry with cityscape

    Your Phone Is Your Best Travel Buddy

    You don’t need to be glued to your screen, but having the right tech can save your ass abroad. From translations to train schedules, good tools turn chaos into confidence.

    Don’t Leave Home Without These

    Here’s how to tech up without turning into a gadget-hoarder:

    1. Download key apps: Google Maps (offline), Rome2Rio, XE Currency, Google Translate, and whatever your airline uses.
    2. Get a local SIM or eSIM: Don’t pay your carrier’s absurd roaming fees unless you like financial pain.
    3. Use cloud storage: Store all docs in Google Drive or Dropbox. If your phone dies, your trip doesn’t.
    4. Carry a portable charger: Your battery will die right before your train info disappears. Stay juiced.
    5. Bring the right plug adapter: One universal adapter, not five sketchy ones from the airport kiosk.

    Tech Smart, Not Tech Obsessed

    Now you’ve got the essentials to stay connected, informed, and sane. You’re not a robot, you’re just well-equipped.

    What’s Next: Handle Your Cash Flow

    Next up, we tackle money. Chapter 17 is about managing your finances while you travel so you don’t blow it all in week one and survive on instant noodles in Vienna.

    👉 Check out the full Travel Tech and Tools Setup Guide here.

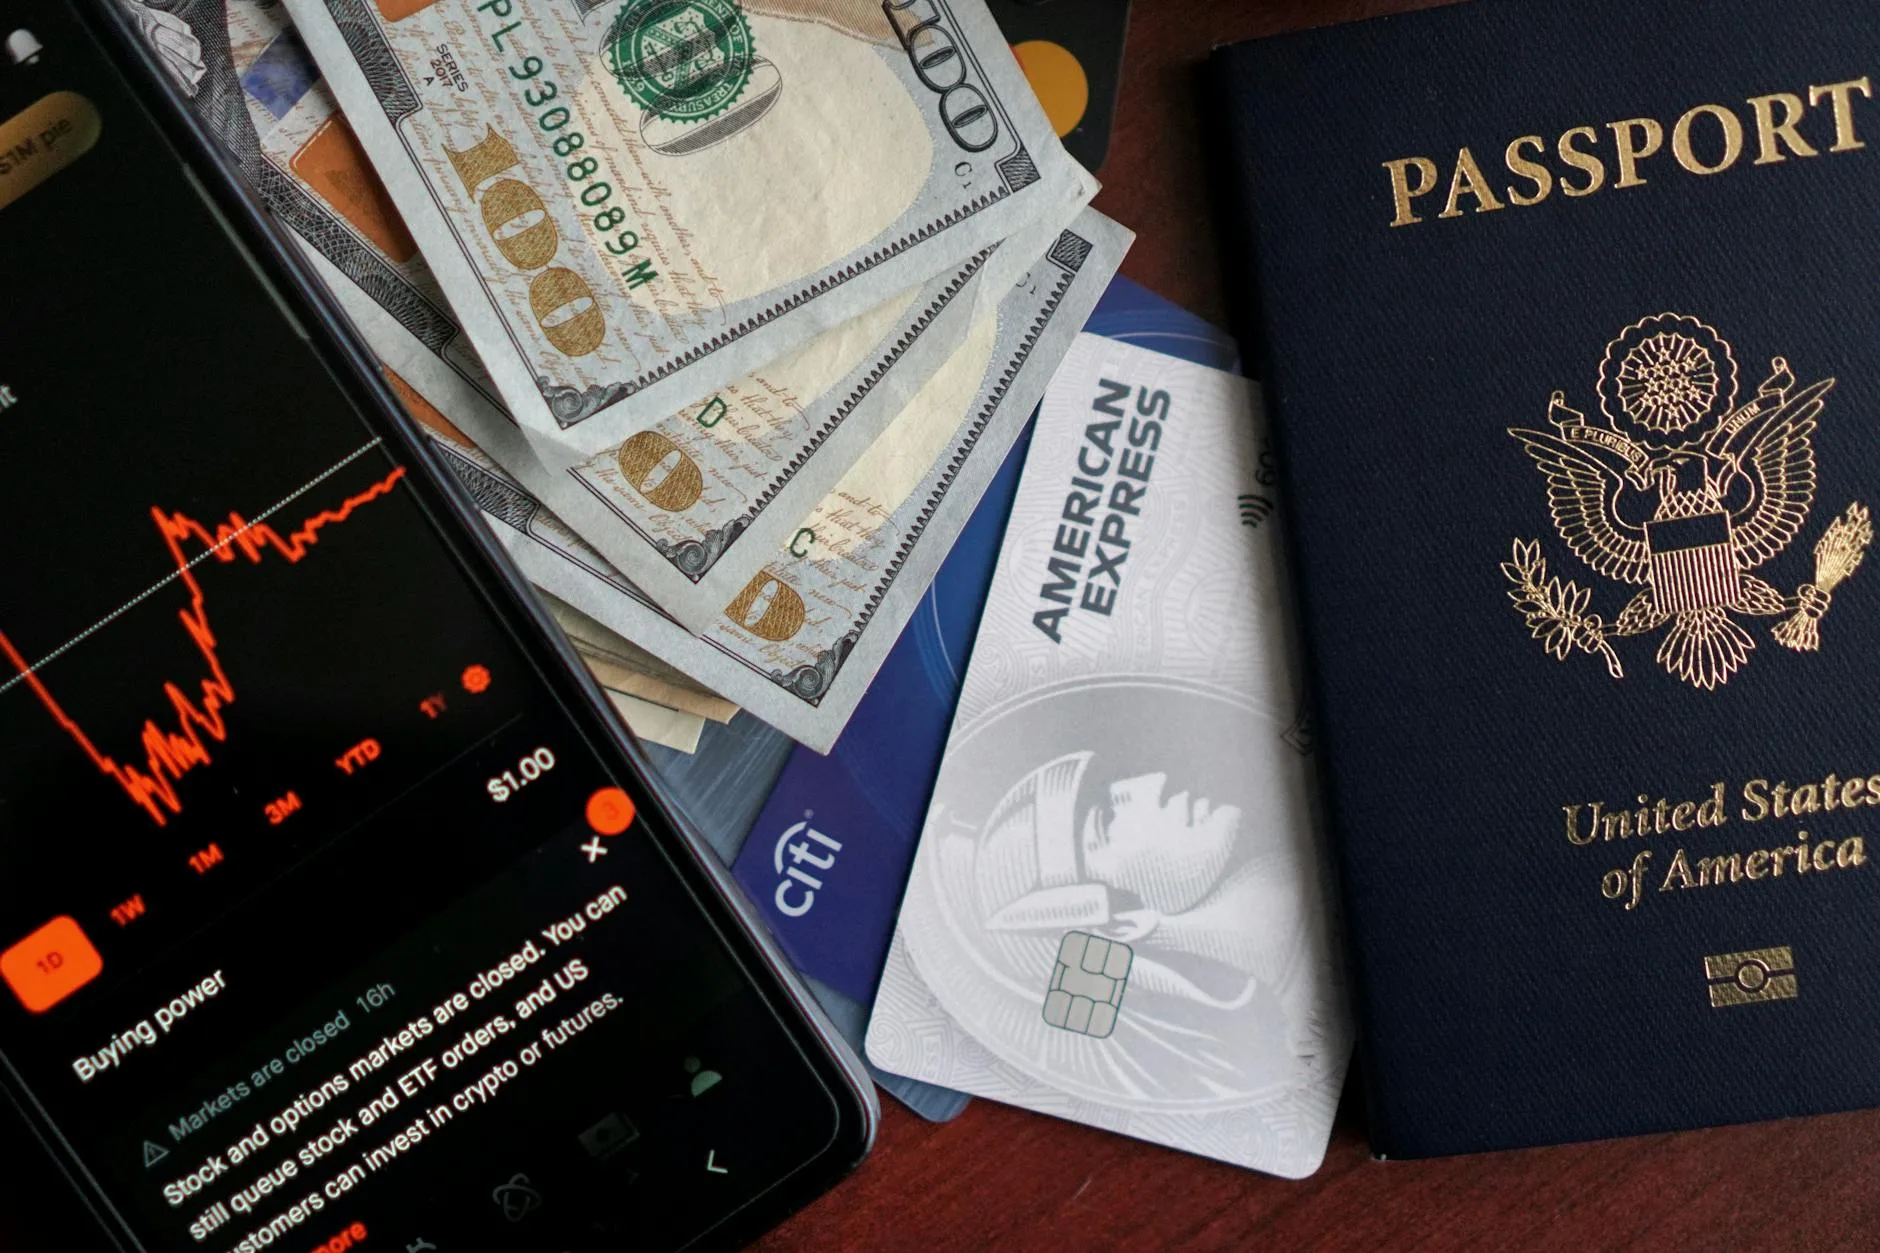
    Chapter 17: Manage Your Money On the Road

    atm booth with neon signage

    Don’t Go Broke Before You Hit Week Two

    Money disappears faster when you’re sipping Aperol in a piazza or buying “just one more” round of Belgian beer. Without a game plan, your budget will burn faster than a Parisian croissant.

    Keep Your Finances in Check (Without Killing the Fun)

    Here’s how to stay flush and avoid ATM meltdowns:

    1. Use multiple cards: Bring at least one debit and one credit. Shit happens. Backups save lives.
    2. Tell your bank you’re traveling: Unless you enjoy fraud alerts locking your card mid-tapas crawl.
    3. Withdraw cash strategically: Use reputable ATMs. Avoid ones that look like they’ve been installed by a guy named Luca in an alley.
    4. Track spending daily: Just five minutes at night. Know where your money’s going so it doesn’t vanish.
    5. Avoid dynamic currency conversion: Always pay in local currency. It’s not a “convenience” when you’re getting screwed on the exchange rate.

    You’re Now a Financial Ninja

    With a smart mix of tools, awareness, and street smarts, you’ll keep your money safe and your spending in check, without sacrificing your gelato fund.

    What’s Next: Tie It All Together

    You’ve prepped, packed, booked, and budgeted. Now it’s time to double-check everything before takeoff. Chapter 18 is your final pre-departure checklist so nothing slips through the cracks.

    👉 Get the complete guide to managing your money while traveling here.

    Chapter 18: Run Through Your Final Pre-Departure Checklist

    thoughtful couple writing in notebook while moving house

    Don’t Let a Dumb Mistake Tank Your Trip

    You planned, packed, and prepped like a travel god. But if you forget your passport or show up at the wrong airport terminal, none of it means jack. This is your final sweep before wheels up.

    Your Last-Minute Travel Sanity List

    Run through this list before you head out:

    1. Triple-check your passport and ID: Don’t just assume it’s in your bag. Look.
    2. Confirm all your bookings: Flights, hotels, trains, tours. You don’t want surprises when you land.
    3. Charge all your gear: Phone, charger, headphones, Kindle. A dead device is dead weight.
    4. Prep your travel outfit: Comfortable, layer-able, and pocketed for snacks.
    5. Take out some cash: Have local currency for when the cab doesn’t take cards or the coffee shop only takes coins.

    👉 Check out this list of things to do before leaving for a trip.

    Appendix: Destination-Specific Travel Guides.

    Africa

    The Most Epic 7 Day Morocco Itinerary (2026)

    Asia

    The Most Epic 10 Day Bali Itinerary (2026)

    The Most Epic 3 Day Kyoto Itinerary (2026)

    Europe

    The Most Epic 7 Day Croatia Itinerary (2026)

    The Most Epic 7 Day Ireland Itinerary (2026)

    North America

    The Most Epic 5 Day Banff Itinerary (2026)

    The Most Epic 7 Day Costa Rica Itinerary (2026)

    South America

    The Most Epic 10 Day Peru Itinerary (2026)

  • 27 Things To Do Before Leaving For A Trip (2026)

    27 Things To Do Before Leaving For A Trip (2026)

    a purple and black pattern

    27 Things To Do Before Leaving For A Trip

    woman walking on pathway while strolling luggage

    Written By:

    Published On:

    Last Modified:

    Table of Contents

    You’ve booked the flights, flexed on your packing cubes, maybe even printed an itinerary. But then the night before takeoff, your brain starts playing a greatest-hits reel of forgotten items and half-finished to-dos. If only you had a list of things to do before leaving for a trip.

    Did you lock the back door? Where the hell is your passport? Is that train from Rome to Florence actually booked, or did you just think about booking it over a Negroni?

    This is the moment when smart travelers turn to a real list, not the crumpled Post-it in your jeans. Because the last thing to do before leaving for a trip should not be panic-googling “what to do before I travel” at 2 AM.

    One missed detail and suddenly you’re the idiot trying to check in at the wrong airport or begging for Wi-Fi at a rural bus station with 2% battery.

    This guide is your insurance policy against that chaos. Every thing to do before leaving for a trip is laid out here, simple and savage.

    Pack your snacks, charge your gear, and let’s get your shit together.

    1. Avoid Airport Meltdowns: Check Your Passport

    person putting a passport on bag because they checked their passport which is one of the things to do before leaving for a trip.

    You know what’s worse than a flight delay? Being denied boarding because your passport expires next month. No refund. No sympathy. Just you, your suitcase, and the crushing shame of a rookie mistake.

    One crucial thing to do before leaving for a trip is to check your passport like your vacation depends on it. Because it does.

    Most countries won’t let you in unless your passport is valid for at least 6 months beyond your return date. That’s not a suggestion. That’s the law. Miss it and you’ll be watching sunsets on Google Earth.

    Here’s exactly what to do so you don’t end up grounded like a dumbass:

    • Pull out your passport. Not tomorrow. Not when you’re packing. Now.
    • Look at the expiration date. If it’s less than 6 months from the date you return home, you’re in trouble.
    • Double-check entry rules. Some countries are stricter than others. Look up your destination on the official government travel site.
    • Renew ASAP if needed. Regular renewal can take 8 to 11 weeks. Expedited costs more but might save your whole trip.
    • Check visas too. Some visas are tied to your passport number and expire when your passport does.
    • Make a digital copy. Scan the photo page and upload it to a secure cloud folder. Email it to yourself too.

    This might sound basic, but it’s the thing to do before leaving for a trip that separates seasoned travelers from sobbing airport amateurs. Don’t be the latter.

    2. Skip the Border Drama: Know Your Visa Rules

    person holding an opened passport

    Imagine landing in Bangkok only to get marched back onto the plane because you didn’t sort your visa. That’s not adventure. That’s amateur hour with a side of wasted cash.

    Knowing if you need a visa is a non-negotiable thing to do before leaving for a trip. It’s what turns “global explorer” into something more than a Tinder bio.

    Countries play by their own rules. Some roll out the welcome mat. Others want forms, fees, and full-blown bureaucracy. Screw this up and your dream trip turns into an expensive layover.

    Here’s how to not get deported before you even unpack:

    • Google “visa requirements for [your nationality] + [destination].” Do this for every country on your itinerary, including layovers. Some transit visas are sneaky bastards.
    • Check official government or embassy websites. Skip the random blog posts. Go straight to the source for accurate, current info.
    • Find out the type of visa you need. Tourist? Business? Volunteer? Getting the wrong type can mess you up at immigration.
    • Apply early if needed. Some take weeks and need appointments. Some require mailing your passport. That’s not something you want to discover two days before departure.
    • Print or save digital copies of approvals. Visas on arrival? Screenshots won’t always cut it. Have a printed copy in your bag.
    • Don’t rely on airport Wi-Fi. If your visa is electronic, download it before you fly. Or better yet, print it like it’s 2007.

    This is a thing to do before leaving for a trip that can literally decide whether your adventure begins or ends in the immigration queue. Respect the red tape. Or pay the price.

    notebook planner with travel planning accessories

    Lose your passport in a street market? Get pickpocketed on a train in Naples? Congrats. You’ve just entered bureaucratic hell without a map.

    One absolute thing to do before leaving for a trip is to back up your most important documents. Because when shit hits the fan, a few smart files can save your trip, your identity, and your sanity.

    Paper copies feel old-school, but border agents and embassy clerks still love them. And digital backups? That’s your parachute when your bag pulls a Houdini.

    Here’s how to protect your trip from tech fails and real-life chaos:

    • Gather your essentials. That means your passport, visa pages, travel insurance, vaccine card, flight confirmations, hotel bookings, and any weird permits.
    • Scan or photograph each document. Make sure text is sharp and readable. Don’t half-ass it.
    • Save them in at least two places. Upload to a secure cloud service like Google Drive or Dropbox. Then email them to yourself just in case.
    • Print hard copies. Yep, paper. Keep them in a separate part of your bag from the originals. If you’re traveling with someone, give them a set too.
    • Password-protect your files. Especially if your docs include personal info or payment details. Use a trusted app or zip them with encryption.
    • Label your files clearly. “IMG_9382.jpg” means nothing when you’re panicking. Use names like “Passport_Front_2026.pdf” so you can find them fast.

    You don’t want your trip derailed by a stolen wallet or a dead phone. This is a thing to do before leaving for a trip that future-you will thank you for, probably while muttering in a consulate office.

    4. Protect Your Wallet (and Your Organs): Get Travel Insurance

    brown leather wallet and us dollar banknote

    You might think you don’t need it. That’s cute. Until you slip on wet tile in Thailand and suddenly owe $12,000 for a ride in a questionably sterilized ambulance.

    Buying travel insurance is a no-brainer thing to do before leaving for a trip. It’s the parachute you never want to use but will be damn glad you packed.

    Missed flights, lost luggage, stolen gear, or surprise surgery? Covered. Peace of mind so you can actually enjoy your adventure? Priceless.

    Here’s how to buy the right policy without getting screwed:

    • Start by researching providers. Good options include SafetyWing, World Nomads, and Allianz. Read recent reviews and compare coverage.
    • Make sure it includes medical. Aim for at least $100,000 in emergency coverage and evacuation. If it doesn’t include that, it’s useless.
    • Add extras based on your plans. Renting a scooter? Doing adventure sports? Check the fine print. Some policies treat bungee jumping like a felony.
    • Look for trip interruption and cancellation. Life happens. If a family emergency pulls you home early, you want reimbursement, not regret.
    • Buy it before you depart. Don’t wait until you’re sipping an overpriced airport coffee. Coverage usually kicks in after purchase, not retroactively.
    • Print and save your policy. Keep a physical copy with your passport and a digital one on your phone. Bonus points if you memorize the emergency number.

    This isn’t about paranoia. It’s about not letting one bad day nuke your entire trip. It’s the thing to do before leaving for a trip that turns “oh shit” into “no problem.”

    5. Avoid Travel-Day Panic: Confirm Every Damn Booking

    person using macbook pro on white table

    You booked it all weeks ago. Cool. But if your hotel “accidentally cancels” your reservation or your flight quietly changes airports, you’re gonna have a bad time.

    Double-checking your bookings is a core thing to do before leaving for a trip. It’s how you stop travel chaos before it ever begins.

    Even the best-laid plans fall apart when you assume the system works. It doesn’t. Airlines reschedule. Hotels overbook. Tours ghost you like a bad date.

    Here’s how to make sure everything is locked in before you walk out the door:

    • Pull up every confirmation email. Flights, trains, buses, hotels, hostels, car rentals, tours, museum tickets. All of it.
    • Cross-check your dates. Make sure everything lines up with your departure and return. Check time zones. That 1 AM flight might be on a different day.
    • Log in to provider websites. Don’t just trust the email. Go to the airline or hotel site and verify your reservation is active and correct.
    • Check seat assignments and baggage. Some budget airlines love surprise fees. Pre-pay or re-book seats if needed.
    • Save all confirmations. Screenshot every booking and drop it into a travel folder on your phone. Internet isn’t guaranteed everywhere.
    • Call if something seems off. Weird confirmation numbers, missing names, or spelling errors? Call now, not from the airport check-in line.

    Doing this gives you total control over your travel day. It’s a thing to do before leaving for a trip that keeps your journey smooth and your blood pressure low.

    6. Skip the Airport Line Freakout: Check In Early

    photo of people in airport

    You show up at the airport, sweaty and late, and surprise, your seat’s been bumped and now you’re begging a gate agent for mercy. Yeah, no thanks.

    Checking in early is a dead-simple thing to do before leaving for a trip that can save your seat, your sanity, and your snack budget.

    Most airlines open check-in 24 hours before takeoff. If you wait, they’ll happily give your spot to some standby rando while you sip lukewarm coffee in a corner.

    Here’s how to lock in your spot like a pro:

    • Set a reminder 24 hours before your flight. Use your phone, your calendar, or tattoo it on your arm. Whatever works.
    • Check in on the airline’s website or app. Use your booking number and last name. Boom. Done in 90 seconds.
    • Choose your seat. Don’t let the system toss you in a middle seat next to a guy eating tuna salad. Pick what’s left and be grateful.
    • Add bags if needed. This is usually cheaper than waiting until you’re at the check-in counter with a pissed-off line behind you.
    • Download or print your boarding pass. Save it to your phone’s wallet app or go old-school with a paper copy. Bonus: no scrambling at security.
    • Screenshot everything. Just in case the app crashes or your Wi-Fi ghosts you at the gate.

    This isn’t just a detail. It’s a thing to do before leaving for a trip that gives you control before the airport starts testing your patience.

    7. Keep Your Card Working Abroad: Tell Your Bank

    buildings with glass windows

    Nothing kills the vibe faster than your card getting declined at a noodle stand because your bank thinks you’ve been kidnapped in Vietnam.

    Telling your bank where you’re headed is a boring but essential thing to do before leaving for a trip. Skip it and your “treat yourself” moment might become a panicked call from a hostel lobby at 2 AM.

    Banks love blocking “suspicious activity.” You know what looks suspicious? Buying street tacos and a ferry ticket in a country you didn’t mention.

    Here’s how to keep your money flowing without drama:

    • Log in to your bank or credit card app. Most have a section to add travel notifications.
    • Enter every country you’re visiting. Yes, even layovers. Don’t give them an excuse.
    • Add the correct dates. Be generous. Include buffer days in case plans shift or your return gets delayed.
    • Double-check it saved. Some apps love to pretend you didn’t just spend five minutes typing your itinerary.
    • Write down emergency contact numbers. If something still gets flagged, you’ll want that info fast.
    • Tell a real human if needed. If the app doesn’t offer this feature, call your bank directly. Yes, with a phone. It still works.

    This one tiny thing to do before leaving for a trip can be the difference between dinner and awkwardly asking your hostel mates for a loan. Don’t let the system block your fun.

    8. Don’t Get Stranded Over a Coffee: Grab Some Local Cash

    people exchanging money

    You land, stumble off the plane, and the cabbie only takes cash. Suddenly, you’re the sweaty foreigner begging for an ATM and a little dignity.

    Grabbing local currency ahead of time is a smart thing to do before leaving for a trip. It keeps you fed, mobile, and out of dumb situations where your credit card is just plastic decoration.

    Cards fail. ATMs run dry. And not every café in the world wants your Visa, no matter how smug you feel about those travel points.

    Here’s how to make sure you don’t end up broke and hangry on arrival:

    • Check your destination’s cash culture. Some countries are cash-heavy. Google “how cash-friendly is [country]” and prepare accordingly.
    • Withdraw a small amount before you go. Enough for your first 24 hours: transport, food, tips, maybe a beer. Think $50–100 worth in local currency.
    • Use your bank’s partner ATMs if possible. You’ll dodge crazy fees. Look up networks like Global ATM Alliance or partner banks abroad.
    • Avoid airport exchange counters. Their rates suck and their fees are daylight robbery. Only use them in emergencies.
    • Keep small bills and coins. Not every vendor can break a crisp $50 equivalent. Especially that old guy selling dumplings.
    • Split your stash. Keep some in your wallet and the rest stashed safely in your bag. If one gets jacked, you’ve got backup.

    This is one of those things to do before leaving for a trip that feels minor until you’re standing at a ticket machine that only accepts coins. Be the traveler with options, not the one searching for Wi-Fi and a miracle.

    9. Slim Your Wallet, Save Your Ass: Prep Your Travel Cards

    person holding black card holder

    Nothing screams “tourist target” like fumbling through a thick wallet at a busy metro station while locals breeze past like you’re in slow motion.

    Streamlining your wallet is a clutch thing to do before leaving for a trip. It keeps your essentials tight, secure, and ready when it counts.

    You don’t need your library card in Laos or five expired gift cards in Lisbon. You need speed, access, and a backup plan when shit goes sideways.

    Here’s how to get your wallet travel-ready:

    • Empty everything out. Dump your wallet on the table and sort like you’re Marie Kondo-ing your life.
    • Keep only the essentials. Bring 1 or 2 credit cards, 1 debit card, your ID, your passport if you carry it, and a small stash of local cash.
    • Bring a backup card. Hide it in a separate spot from your main wallet. Use it only if things go south.
    • Use a travel-friendly wallet. RFID-blocking, slim, and easy to stash in a front pocket or money belt.
    • Take photos of all your cards. Front and back. Upload to an encrypted cloud folder. If you lose one, you’ll have the info ready for a fast cancel and replace.
    • Ditch the receipts. They’re trash waiting to happen. Keep your finances digital unless you need proof for taxes or expense reports.
    • Know your PINs. Some countries still use chip-and-PIN terminals. If you forgot your code, you’re toast at the register.

    This is a thing to do before leaving for a trip that saves time, prevents theft, and lets you look like you’ve done this before, even if you haven’t.

    10. Stay Functional Abroad: Pack Your Meds

    pexels-photo-208512.jpeg

    You can’t enjoy Paris with a migraine or trek through Peru while your stomach’s waging civil war. Trust me, you don’t want to play “find the pharmacy” in a language you don’t speak.

    Packing medications is a brutally underrated thing to do before leaving for a trip. You might not need them, but when you do, you’ll thank past-you for being a genius.

    Local pharmacies vary wildly in what they stock and how they operate. Some are chill. Others treat aspirin like contraband.

    Here’s how to pack smart and stay upright:

    • Make a list of what you take regularly. Prescriptions, supplements, over-the-counter must-haves. Start with what you can’t function without.
    • Get enough for the full trip plus extra. Add at least 3–5 days of buffer in case of delays. No one wants to beg for blood pressure meds at a Guatemalan bus terminal.
    • Keep everything in original packaging. Customs loves clear labels. Pill bottles with your name and dosage can save you a ton of questions.
    • Bring a copy of your prescriptions. Especially for controlled substances. Have your doctor write a note explaining what it is and why you need it.
    • Pack a basic travel med kit. Painkillers, allergy meds, motion sickness pills, antidiarrheals, rehydration salts, Band-Aids. Just do it.
    • Stash it in your carry-on. Bags get lost. Your meds should not. If it’s life-saving, it stays with you at all times.
    • Check destination rules. Some countries ban meds you’d find at any CVS. Google “[drug name] + [country] customs rules” and avoid international drama.

    It’s not sexy, but this is a thing to do before leaving for a trip that keeps your body from betraying you halfway around the globe. Travel is hard enough without explosive food poisoning.

    11. Don’t Catch Weird Shit Abroad: Hit a Travel Clinic First

    black and silver stethoscope on a person s hand

    You’re not made of iron. Your immune system isn’t ready for everything. And no one wants to learn the word for “rabies” mid-panic in rural Vietnam.

    Visiting a travel clinic is a smarter-than-it-sounds thing to do before leaving for a trip. It’s about prepping your body like you prep your bags: with zero tolerance for regret.

    Some countries come with bonus features like malaria, typhoid, or “that thing you get from unwashed lettuce.” Let a pro tell you what to dodge and how.

    Here’s exactly how to get protected before liftoff:

    • Book your appointment 4 to 6 weeks out. Some vaccines need time to kick in. The earlier, the better.
    • Find a certified travel clinic. Not your basic urgent care. Look for places that specialize in international travel medicine.
    • Bring your itinerary. The nurse doesn’t care that you’re “doing Southeast Asia.” Tell them exactly where you’re going, for how long, and what you’re doing.
    • Get recommended vaccines. This might include hepatitis A and B, typhoid, yellow fever, or Japanese encephalitis if you’re going remote. Don’t cheap out here.
    • Ask about malaria prevention. If it applies, you’ll need pills. Some are daily. Some are weekly. All can save your ass.
    • Request a general health kit. Many clinics offer travel packs with rehydration salts, antibiotics, or altitude sickness meds. Say yes.
    • Update your routine shots. Tetanus, MMR, flu, if it’s been a decade, get poked.

    Yeah, needles suck. But so does being bedridden 9,000 miles from home. This is one thing to do before leaving for a trip that could literally save your life.

    12. Outsmart Dead Zones: Download Offline Maps and Translators

    person using google maps application through black android smartphone

    No Wi-Fi, no signal, no clue where you are. Welcome to your personal episode of Lost, starring you and your useless phone.

    Downloading offline tools is a must-do thing to do before leaving for a trip. Because when tech fails (and it will), you need something better than blind hope.

    Don’t rely on roaming or prayer to get you through a maze of side streets or menus written in ancient glyphs.

    Here’s how to set yourself up like a digital MacGyver:

    • Download offline maps. Use Google Maps and tap your destination. Hit “Download” and save the whole area. Do this for each city or region you’ll visit.
    • Try Maps.me too. It’s free, works offline, and has super-detailed trails and routes. Great for off-grid wanderers.
    • Get a translation app. Google Translate is king. Download the language packs so you can translate signs, menus, and awkward small talk without internet.
    • Turn on “conversation mode.” It lets you speak and hear real-time translations. Pure magic when you need directions or order food that won’t murder your stomach.
    • Test it before you go. Don’t wait until you’re standing in a dim train station at 11 PM. Make sure it actually works without signal.
    • Bookmark key phrases. Save ones you’ll use: “Where’s the bathroom,” “No meat please,” and “Is this train going to [city]?”

    Tech should be your travel sidekick, not your weak link. This is one thing to do before leaving for a trip that makes you look way more put together than you probably are.

    13. Save Your Digital Life: Back Up Your Phone and Files

    close up photo of a person s hand holding a flash drive

    Drop your phone in a Thai river? Get it snatched on a bus in Buenos Aires? Boom. Photos, notes, and your entire brain are gone.

    Backing up your phone is a non-negotiable thing to do before leaving for a trip. It takes 10 minutes and could save you from a digital faceplant.

    Your memories, bookings, passwords, and contacts live on that device. If it dies, gets stolen, or ends up under a tuk-tuk, what’s your plan?

    Here’s how to cover your digital ass like a grown-up:

    • Back up your phone to the cloud. iPhone users: Settings → iCloud → Back Up Now. Android: Settings → Google Backup → Back Up Now.
    • Double-check your photos. Make sure they’ve synced to Google Photos, iCloud, or wherever you store them.
    • Export your key docs. Save a copy of travel insurance, flight itineraries, passport scans, and tickets to a cloud folder like Google Drive or Dropbox.
    • Enable Find My Phone. For iPhone: Settings → Find My → Turn it on. For Android: Settings → Security → Find My Device.
    • Sync your notes and contacts. Use your cloud account to make sure everything is saved. If you have passwords stored in Notes, lock that shit down.
    • Pack a digital backup. Upload important files to a USB drive or SD card and stash it in your bag just in case the cloud ghosts you.
    • Update your apps. Old versions can crash at the worst times. Do this while you’ve still got decent Wi-Fi.

    This thing to do before leaving for a trip isn’t glamorous. But when your phone takes a dive and you still have access to your life, you’ll feel like a damn genius.

    14. Stay Online Abroad: Set Up Your Phone Before You Land

    woman sitting on sofa while looking at phone with laptop on lap

    Nothing says “lost tourist” like standing outside a train station, staring at your dead signal and hoping Wi-Fi will save your ass.

    Getting international phone service or an eSIM is a crucial thing to do before leaving for a trip. It keeps you connected when you actually need to be, like calling your Airbnb host or finding the nearest bathroom.

    Avoid surprise roaming charges and the pain of trying to buy a SIM card at a sketchy kiosk while jetlagged and drooling.

    Here’s how to get your phone ready like a damn pro:

    • Check if your phone is unlocked. Call your carrier or Google your model. If it’s locked, you can’t use foreign SIMs or eSIMs. Fix it now.
    • Decide on SIM vs eSIM. Physical SIMs are fine but old-school. eSIMs are digital, instant, and less likely to get lost under your hostel bed.
    • Use a global eSIM app. Try Airalo, Holafly, or Nomad. Buy a plan for your destination, install the profile, and boom—you’re connected when you land.
    • Set your phone to use the eSIM for data. Go to Settings → Cellular → Default Data Line and switch it to the eSIM.
    • Turn off data roaming for your primary SIM. Avoid surprise bills that look like a car payment.
    • Download the eSIM QR code before you leave. Some setups need Wi-Fi. Don’t try doing it in-flight or on the airport curb.
    • Test it. Make sure you can browse the web, message, or use Maps before you go off-grid.

    This is the kind of thing to do before leaving for a trip that keeps you out of trouble and in control. Because getting lost is fun, unless it’s avoidable and completely your fault.

    15. Plan Without Killing the Vibe: Build a Loose Itinerary

    vittoriano monument in rome with clear blue sky

    Winging it sounds romantic until you’re starving, lost, and everything’s closed on a random Tuesday.

    Sketching a basic game plan is a solid thing to do before leaving for a trip. It gives your travels structure without turning you into a tour group zombie.

    You don’t need to schedule every bathroom break. Just enough of a plan to avoid wasting your best days making dumb decisions.

    Here’s how to build a chill-but-smart itinerary:

    • Block out your travel days. Flights, trains, long bus rides. Mark those first so you don’t try to squeeze a museum visit between two border crossings.
    • List must-see places. Pick 1 or 2 big things per day max. Any more and you’re not sightseeing, you’re speedrunning.
    • Add buffer time. Leave space to get lost, linger over wine, or deal with crap that takes longer than expected.
    • Map your days loosely. Group activities by neighborhood or area. Don’t cross a city four times in one afternoon. Your feet will revolt.
    • Check for closures and weird hours. Some spots shut down on Mondays or take long lunch breaks like it’s 1742.
    • Pin your stops on Google Maps. Helps you spot gaps, overlaps, and that amazing ramen shop next to your hostel.
    • Write it down somewhere. Phone note, spreadsheet, napkin, it doesn’t matter. Just don’t rely on memory.

    This thing to do before leaving for a trip makes room for magic and keeps you from wasting half a day wondering what the hell to do next.

    16. Stay Safe Without Being Weird: Share Your Travel Plans

    green and white male gender rest room signage

    If you vanish into the wilds of Colombia with no backup plan and no one knows where you went, that’s not adventurous. That’s just dumb.

    Sharing your trip details is a basic but lifesaving thing to do before leaving for a trip. It doesn’t make you paranoid, it makes you smart enough to not become a Netflix documentary.

    Your mom, your best friend, your weirdly organized coworker, someone should know your general game plan.

    Here’s how to do it without being dramatic:

    • Pick a trusted contact. This should be someone who won’t lose your info or panic if you miss a text.
    • Send them your itinerary. Flights, accommodation names, dates, and general city timelines. Nothing too detailed, just enough to track you if shit hits the fan.
    • Include emergency contacts. Add your travel insurance details, embassy numbers, and local emergency numbers if you’ve got them.
    • Share your passport and visa copies. Digital versions only. No need to make them your personal vault, just a backup in case of theft.
    • Keep them updated if plans change. If you suddenly decide to hike through Montenegro or sail to Sicily, shoot them a quick update.
    • Set check-in points. You don’t need to text daily, but a “still alive” message every few days doesn’t hurt.

    This is one thing to do before leaving for a trip that takes five minutes and can make all the difference when things go sideways. Stay free, but don’t disappear like a dumbass.

    17. Keep Your Home from Smelling or Burning: Unplug and Trash Out

    focus photo of yellow paper near trash can

    Nothing says “welcome home” like a fridge full of moldy takeout or the scorched scent of a toaster that fried itself while you were in Bali.

    Taking care of your space is an overlooked but essential thing to do before leaving for a trip. It saves you from returning to a science experiment or a surprise visit from the fire department.

    Your future self wants a clean, safe place to crash. Not a hazmat scene.

    Here’s how to shut things down the smart way:

    • Unplug all non-essential appliances. Think toaster, coffee maker, TV, laptop chargers, lamps. Keeps your house from playing with fire and cuts down your electric bill.
    • Take out all trash. Every bin. Bathroom, kitchen, desk. Unless you like the smell of warm banana peels and regret.
    • Run the garbage disposal. Toss in a lemon slice if you’re fancy. Just don’t leave old pasta festering in there.
    • Clear the fridge of perishables. Milk, veggies, leftovers, anything that can rot or grow legs. Toss or give it to a friend.
    • Set your thermostat. No need to heat or cool an empty home. Find an energy-saving temp and lock it in.
    • Check your smoke alarms. Fast test. Make sure they’re working. Because being gone doesn’t stop a short circuit.
    • Close windows and lock all doors. Last walk-around before you head out. Give everything a tug to be sure.

    It’s not sexy, but it’s one thing to do before leaving for a trip that turns your return into a relief, not a disaster.

    18. Keep Your Mail from Screaming “I’m Not Home!”

    selective focus photography of a mailbox

    A pile of unopened mail is basically a flashing neon sign that says “rob me.” It’s also a great way to lose important bills or that Amazon return refund you forgot about.

    Setting up a mail hold or forwarding is a smart-as-hell thing to do before leaving for a trip. It protects your stuff, your privacy, and your peace of mind while you’re off living your best life.

    Also, nothing kills post-trip bliss like wading through three weeks of junk mail and overdue notices.

    Here’s how to keep your mailbox in check:

    • Decide how long you’ll be gone. If it’s over a week, set up a mail hold. If it’s longer or indefinite, forward that shit.
    • Visit your local post office site. In the U.S., that’s USPS.com. You can schedule a mail hold or set up forwarding in about five clicks.
    • Set the start and end dates. Don’t forget the end date or your mail might keep chilling in post office limbo.
    • Choose how to receive held mail. Pick up in person or have it delivered in a bundle once you’re back.
    • Update your forwarding address. If you’re moving around or gone for a while, forward mail to a trusted friend or a temporary address.
    • Tell your neighbors. If they’re cool, ask them to keep an eye out. Nothing beats human eyes when it comes to keeping sketchy stuff in check.
    • Don’t forget packages. Some carriers (like UPS or FedEx) need separate instructions. Log in and pause or reroute those too.

    It’s a tiny thing to do before leaving for a trip, but it saves you from theft, late fees, and coming home to a mailbox stuffed like a Thanksgiving turkey.

    19. Keep Your Dog Alive and Plants Green: Line Up Care

    orange tabby cat lying on floor

    You don’t want to be sipping cocktails in Morocco while your cat’s back home plotting your demise because you forgot to arrange food. Or water. Or literally anything.

    Lining up care for your living things is a no-excuses thing to do before leaving for a trip. Pets and plants can’t fend for themselves, and you don’t need a guilt trip waiting for you when you get back.

    Also, dead succulents are depressing as hell.

    Here’s how to make sure everything survives in your absence:

    • Make a list of who needs care. Pets, plants, aquariums, sourdough starter. If it’s alive, it counts.
    • Ask someone you trust. Neighbor, friend, reliable teenager. Pick someone who won’t forget in 24 hours or feed your dog a Pop-Tart.
    • Leave clear instructions. Feeding schedules, walk times, meds, plant watering routines. Be specific. “A little” water means different things to different people.
    • Do a walk-through with them. Show where the food is, how the litter box works, and which plants are dramatic little divas.
    • Stock up on supplies. Make sure you’ve got enough food, litter, poop bags, and whatever else they’ll need while you’re gone.
    • Give emergency contacts. Vet info, backup person, and where you’ll be in case things go sideways.
    • Offer a thank-you gift. A souvenir, a bottle of wine, or at least a strong “I owe you.” Don’t be that freeloader.

    This is a thing to do before leaving for a trip that takes a little time but a lot of stress off your return. Nothing ruins a vacation buzz like a wilted ficus and a pissed-off pug.

    20. Dress Smart, Not Sweaty: Plan Your Travel Outfit Like a Boss

    group of people walking near clear glass window with a view of white airplane parked during daytime

    You think that cute new jacket is airport-ready until you’re stuck in security peeling off layers like a human onion. Comfort always wins at 35,000 feet.

    Choosing the right outfit is an underrated thing to do before leaving for a trip. It keeps you warm when the plane turns into a freezer and comfy when the gate agent delays your flight just for fun.

    You’re not walking a runway. You’re crossing continents.

    Here’s how to dress like a savvy traveler, not a sweaty amateur:

    • Start with breathable layers. A T-shirt, light sweater or hoodie, and a packable jacket covers all the weird climate swings airports throw at you.
    • Wear your bulkiest items. That puffer jacket or hiking boots? Put them on. Save the space in your bag for better things, like snacks.
    • Go full stretch. Joggers, yoga pants, or soft travel jeans that don’t strangle your legs. Nothing with buttons that dig into your gut during hour five of a layover.
    • Pick shoes you can slip off fast. You will take them off at security, and fumbling with laces holds up the line. Don’t be that guy.
    • Add a scarf or buff. Works as a blanket, pillow, blindfold, and fashion statement. Plus it hides whatever disaster your hair turns into mid-flight.
    • Use pockets wisely. Keep your passport, boarding pass, lip balm, and gum accessible without digging through your carry-on.
    • Avoid belts, metal, and complicated jewelry. TSA doesn’t care how cool you look. They will make you strip and explain yourself in socks.

    This is a thing to do before leaving for a trip that sets the tone for everything ahead. Look sharp, stay comfortable, and don’t smell like airport burritos by hour two.

    21. Stay Powered Up: Charge Everything Before You Go

    black android smartphones on brown wooden surface

    Nothing tests your patience like a dead phone in a foreign airport while your gate changes three times and you can’t find the Wi-Fi password.

    Charging your gear is a low-effort, high-impact thing to do before leaving for a trip. It keeps you connected, entertained, and way less likely to lose your shit when travel gets messy.

    Also, TikTok hits different at 35 percent battery and a six-hour layover.

    Here’s how to juice up like a travel veteran:

    • Charge your phone to 100 percent. Don’t rely on the Uber ride or airport lounge. Start the day at full power.
    • Top off your power bank. If it’s not fully charged, it’s just a glorified brick. Don’t carry dead weight.
    • Charge your headphones, tablet, Kindle, and laptop. Whatever you’re bringing, plug it in the night before and leave it charging while you sleep.
    • Bring every cable you need. Double-check your cords. USB-C, Lightning, micro-USB, yes, that’s still a thing.
    • Pack a wall plug with multiple ports. Bonus points if it has international adapters. Airport outlets are rare and fought over like fresh bread in a blackout.
    • Test your gear. Plug in every device to confirm it’s actually charging. Weird cords die quietly.
    • Stash your power bank in your carry-on. Don’t check it. Lithium batteries and plane cargo holds don’t mix, and TSA hates surprises.

    This is one thing to do before leaving for a trip that saves you from boredom, battery anxiety, and begging strangers for a charger like a tech-deprived raccoon.

    22. Skip the Post-Trip Stench: Purge Your Fridge

    man sitting on the ground beside an opened refrigerator

    Nothing slaps you in the face harder than the smell of two-week-old shrimp lo mein when you get home jetlagged and dreaming of toast.

    Cleaning out your fridge is an unglamorous but absolutely critical thing to do before leaving for a trip. It spares you the biohazard and makes space for the groceries you’ll eventually panic-buy when you return.

    Rotten yogurt and liquified lettuce do not make a warm welcome.

    Here’s how to de-funk your fridge before liftoff:

    • Open it up and scan everything. If it expires before you return, toss it or eat it now.
    • Check the fresh stuff. Milk, fruit, salad kits, that mystery container you’ve been avoiding. Don’t leave them behind to ferment into science projects.
    • Wipe down any spills. That sticky spot under the OJ? Clean it now or deal with a crusty mess later.
    • Empty the trash right after. Don’t let that rotting produce marinate in your kitchen while you’re off in Lisbon.
    • Unplug mini-fridges if you’re gone long. Prop the door open with a towel so it doesn’t smell like death when you come back.
    • Offer food to a friend or neighbor. Be a hero. That cheese doesn’t have to die alone.
    • Do a final check the morning of. Some last-minute yogurt always hides in the back.

    It’s a gross but necessary thing to do before leaving for a trip. You want to come home to memories and a comfy bed, not a fridge full of regret and green fuzz.

    23. Skip the Airport Shake-Down: Pack TSA-Approved Toiletries

    person standing inside building

    There’s nothing like TSA pulling out your shampoo in front of a line of strangers like it’s a bomb threat. Congrats, your moisturizer is now public property.

    Packing your toiletries right is a wildly underestimated thing to do before leaving for a trip. It keeps you moving through security like a pro and keeps your hygiene intact without drama.

    Nobody needs to start a trip with confiscated toothpaste and shame.

    Here’s how to nail the liquids game without getting flagged:

    • Use the 3-1-1 rule. All liquids, gels, creams, and aerosols must be in containers 3.4 ounces (100ml) or less.
    • Put them in one clear quart-sized zip-top bag. One bag per traveler. Yes, it must zip. TSA doesn’t do leaky pouches.
    • Only pack what you actually use. Travel-size shampoo, toothpaste, deodorant, sunscreen, contact solution. Leave the fancy stuff for checked luggage or ditch it altogether.
    • Go solid where possible. Solid shampoo, bar soap, and deodorant don’t count toward the liquid limit. Genius, right?
    • Buy reusable travel bottles. Fill them with your preferred products instead of buying overpriced mini versions. Just label them or risk brushing your teeth with conditioner.
    • Keep the bag accessible. Don’t bury it under a pile of sweaters. You’ll need to toss it in a bin at security.
    • Check TSA’s site if you’re unsure. They update often, and yes, even peanut butter counts as a gel. Don’t ask.

    This thing to do before leaving for a trip saves time, stress, and the weird feeling of having a stranger judge your skincare routine at 5 AM.

    24. Don’t Be “That Traveler”: Triple-Check Your ID, Passport, and Boarding Pass

    red check mark over black box

    There’s a special kind of horror that hits when you reach the front of the TSA line and realize your passport is still on your kitchen counter.

    Triple-checking your documents is a no-brainer thing to do before leaving for a trip. Miss this step and you’re not flying, you’re crying in an Uber back home.

    These three items are your entire life at the airport. Screw one up and the whole adventure falls apart.

    Here’s how to make sure your most important stuff stays with you:

    • Lay out your passport, ID, and boarding pass the night before. Don’t wing it. Set them in your day bag where you know they’ll be.
    • Check expiration dates. Your ID should be valid, and your passport should be good for at least six months beyond your return date.
    • Print your boarding pass even if it’s digital. Phones die. Apps glitch. A paper backup can save your spot when your screen freezes mid-scan.
    • Use a passport wallet or travel pouch. Something slim that holds all your key docs and slips easily into a zippered bag pocket.
    • Confirm your name matches across all docs. The airline doesn’t care if your friends call you “Mo.” Your ID and ticket better say “Mohammed.”
    • Do a physical check right before you leave. Touch them. Hold them. Say their names out loud if you must. This isn’t a drill.
    • Set a reminder on your phone. Something obnoxious, five minutes before you leave, that screams “GRAB YOUR DAMN PASSPORT.”

    This thing to do before leaving for a trip can mean the difference between sipping champagne at cruising altitude or rage-scrolling in your kitchen. Don’t mess it up.

    25. Outsmart Airline Hunger Games: Pack Snacks, Gum, and a Water Bottle

    colorful mexican food truck in urban setting

    Airport food is overpriced sadness in a plastic tray. Plane food? Even worse. And chewing gum is the only thing that keeps your ears from exploding mid-climb.

    Packing snacks and hydration gear is a shockingly effective thing to do before leaving for a trip. It keeps your blood sugar up, your mood decent, and your wallet intact when the in-flight meal is a mystery meat sandwich and tears.

    Nobody wants to pay $6 for a banana or beg a flight attendant for another thimble of water.

    Here’s how to feed yourself like a travel genius:

    • Pack high-protein, non-messy snacks. Think almonds, protein bars, trail mix, or dried fruit. Avoid tuna. Always avoid tuna.
    • Bring gum or mints. Helps with ear pressure during takeoff and landing, and keeps your breath in check after six hours of recycled air.
    • Use a refillable water bottle. Empty it before security, then fill it at a fountain or café gate-side. Stay hydrated without buying overpriced airport water.
    • Avoid liquids and sauces. TSA doesn’t care if it’s “just hummus.” If it’s spreadable, it’s suspicious.
    • Pack enough for layovers. Delays happen. Terminal food options close. You’ll thank yourself when it’s midnight in Frankfurt and the vending machines are broken.
    • Choose stuff that won’t stink. Please don’t be the person who cracks open hard-boiled eggs mid-flight. Humanity begs you.
    • Keep everything in a small pouch. Easy access means no digging through your carry-on like a raccoon.

    This is a thing to do before leaving for a trip that keeps you functioning when the travel gods turn on you. Hungry travelers make dumb decisions. Don’t be that guy.

    26. Fight Boredom Like a Pro: Load Up Books, Podcasts, and Shows

    woman reading a book on a train

    Travel looks sexy on Instagram, but in reality? It’s long hours sitting on your ass while your brain screams for stimulation.

    Stocking up on entertainment is a clutch thing to do before leaving for a trip. It turns delays, turbulence, and hostel downtime into a vibe instead of a mental meltdown.

    Don’t count on airplane screens or hotel cable. You’ll end up watching outdated sitcoms in German.

    Here’s how to prep your brain fuel like a legend:

    • Download a couple of books. Use Kindle, Libby (free with a library card), or Audible if you prefer listening to someone else read.
    • Load your podcast queue. Comedy, travel, true crime, whatever keeps you sane. Download full episodes, streaming is flaky midair.
    • Save shows or movies offline. Use Netflix, Prime Video, or Disney+. Just hit that little download arrow before you leave Wi-Fi behind.
    • Make a playlist. One for takeoff, one for walking around new cities, and one for that “I might lose it” moment on hour 12 of your layover.
    • Bring headphones. Real ones. Noise-canceling if you can. Earbuds if you can’t. Just don’t rely on the cheap ones from the airline.
    • Pack a splitter or second pair. Share a movie with your travel buddy without playing hot potato with your phone.
    • Keep everything charged. Dead entertainment is just sadness in your pocket. See tip #21 if you ignored that one.

    This thing to do before leaving for a trip keeps your sanity intact when travel gets dull, loud, or wildly delayed. Because mental survival is just as real as physical.

    27. Lock It Down: Do One Last Home Sweep Before You Bounce

    white and red wooden house with fence

    You’re five minutes from the airport when it hits you—did you turn off the stove? Or did you just think about turning it off while brushing your teeth?

    A final walk-through is a non-negotiable thing to do before leaving for a trip. It’s your last line of defense against dumb mistakes that turn into expensive disasters.

    This isn’t paranoia. This is how you avoid coming home to a flooded kitchen or lights that have been burning for ten days straight.

    Here’s how to sweep your place like a responsible badass:

    • Walk through every room. Start at one end of your home and go room by room with fresh eyes. Look for anything on, open, or suspicious.
    • Turn off lights, fans, and electronics. Don’t let your place throw a rave while you’re gone.
    • Double-check appliances. Stovetop off, oven off, coffee maker unplugged. You are not burning down your house for an unbrewed espresso.
    • Close and lock all windows and doors. Don’t forget side doors, garage entrances, and that one bathroom window you always leave cracked.
    • Flush toilets and run a little water. Keeps the pipes fresh and prevents that lovely sewer smell welcome-home party.
    • Take a quick photo of your thermostat setting. Peace of mind and proof you didn’t crank it to sauna mode.
    • Do one last trash check. Old banana peels love to wait until day four to launch a full-blown stink rebellion.
    • Toss a few lights on timers. If you’ve got smart plugs or old-school timers, set them to mimic someone being home. Burglars hate that.

    This is the final thing to do before leaving for a trip, and yeah, it’s kind of boring. But it’s the five-minute ritual that can save you a fortune and your sanity.

    You made it.

    That’s 27 solid things to do before leaving for a trip, because showing up at the airport half-prepped with mystery liquids and no charger is not the vibe.

    Travel’s chaotic enough without self-sabotage. Prep well and you get to stress less and experience more. That’s the whole damn point.

    So tell me, what’s the first thing on this list you’re going to knock out? Passport check? Travel snacks? Power bank? Drop it in the comments or scream it into the void. Either way, handle your business. ✈️

  • Managing Money While Traveling (2026): The Complete Guide

    Managing Money While Traveling (2026): The Complete Guide

    a purple and black pattern

    Managing Money While Traveling: The Complete Guide

    financial travel essentials with passport and cards

    Written By:

    Published On:

    Last Modified:

    Let’s be real. Nothing kills a trip faster than running out of cash halfway through a wine-soaked night in Rome.

    Managing money while traveling isn’t glamorous, but neither is getting your card declined in a Vietnamese noodle stall. Or paying a 12% “convenience fee” because you didn’t read the fine print at that touristy ATM.

    This guide is your no-BS toolkit for staying flush on the road, without living like a monk or fighting over Wi-Fi to check your bank balance.

    Whether you’re trekking through Peru or tapping your way across Tokyo, knowing how to handle cash, cards, and costs is survival 101.

    Get it right and you’ll travel farther, stress less, and actually enjoy your damn trip.

    Managing money while traveling can be simple if you know what to do, when to do it, and how not to get screwed along the way.

    Let’s dive in and turn you into a money-savvy traveler who knows how to spend smart and still splurge on that sunset cocktail.

    About the Author

    a man and woman taking a selfie in front of water with buildings and a dome whilst pondering the excellent decisions they made while completing travel destination research and their travel itinerary and their travel accommodations

    I wrote this guide because I used to be the idiot who forgot to tell his bank he was traveling, then spent two hours in a Moroccan café trying to unfreeze his account over sketchy Wi-Fi and mint tea. Managing money while traveling was a skill I learned the hard way, one overdraft at a time.

    After over a decade of budget-hopping across five continents, I’ve made every financial mistake you can imagine and a few you probably can’t. Now, I help other travelers avoid the same expensive lessons, without turning every trip into a spreadsheet nightmare.

    This guide is for the solo backpacker trying to make euros stretch, the digital nomad juggling currencies, and the vacationer who doesn’t want their beach time ruined by bank alerts. If you want to stop stressing about cash and start actually enjoying your trip, you’re in the right place.

    Managing money while traveling doesn’t have to suck. You just need the right plan, the right tools, and someone who’s already stepped in all the potholes for you.

    Step 1: Know Your Budget and Daily Spending Limits

    close up photo of somebody managing money while traveling

    💸 Why Your Budget Isn’t Optional

    If you don’t know how much you can spend each day, you’re basically flying blind with your wallet. And that’s how people end up broke in Prague with nothing but a magnet and regrets.

    Managing money while traveling starts with getting your shit together before you leave. This is where you figure out how much you really have to spend and how not to blow it all on overpriced smoothies in Bali.

    🛠️ How to Build a Realistic Travel Budget

    Here’s how to make sure your trip doesn’t become a financial horror story:

    • Add up your total trip funds. Know what you’ve got to work with from the start.
    • Break it down by day. Divide your budget by the number of travel days so you know what’s safe to spend daily.
    • Account for splurges. Want that hot air balloon ride? Cool. Just budget for it so you’re not eating instant noodles for a week afterward.
    • Set aside an emergency stash. This is for lost phones, stolen bags, or a night in a real hotel when the hostel turns into a rave.
    • Use a basic app or a Google Sheet. Nothing fancy. Just something to help you track without wanting to throw your phone.

    ✅ Keep It Tight, Keep It Right

    Knowing your daily spending limits keeps you grounded and guilt-free. It gives you permission to enjoy without accidentally setting fire to your bank account.

    💳 Next Up: Choose the Right Financial Weapons

    Now that you’ve got your budget locked in, it’s time to pick the right tools to actually spend it. In Step 2, we’ll cover the best travel cards and accounts to help you dodge fees and carry your cash like a pro.

    Step 2: Choose the Best Travel-Friendly Cards and Accounts

    crop passenger using card machine in taxi car

    💳 Why Your Card Choices Matter

    Using the wrong bank card abroad is like walking into a bar and ordering the most expensive drink just to look cool. Except here, the drink is ATM fees and surprise conversions that eat your lunch money.

    Managing money while traveling starts with choosing financial tools that don’t screw you. Good cards save you cash, reduce stress, and keep you from having to Venmo your mom from a gas station in Croatia.

    🧰 How to Pick the Right Cards and Accounts

    Here’s how to set yourself up for financial survival abroad:

    • Get a debit card with no foreign transaction or ATM fees. Charles Schwab and Wise are traveler favorites.
    • Use a credit card that earns rewards and avoids international fees. Think Chase Sapphire Preferred or Capital One Venture.
    • Set up travel alerts. If your bank thinks you got kidnapped every time you use your card, you’re doing it wrong.
    • Open a backup account. Stuff happens. A second account gives you options if one card gets eaten by a sketchy machine.
    • Use mobile banking apps. You want to check balances and move money without needing a laptop and a VPN.

    ✅ Stack the Deck in Your Favor

    The right combo of cards and accounts can save you hundreds over a trip and give you peace of mind when shit goes sideways. You’ve got options. Use them.

    💱 Next Up: How Not to Get Robbed by Currency Exchange

    Now that your financial weapons are locked and loaded, let’s talk about exchanging money without getting fleeced. Step 3 will show you how to handle currency like a local and spot the tourist traps a mile away.

    Step 3: Handle Currency Exchange Without Getting Ripped Off

    black and silver calculator beside silver coins

    💱 Why Exchange Rates Can Wreck Your Budget

    Currency exchange is one of those sneaky travel pitfalls that feels small until it punches your wallet in the face. One bad rate or shady booth, and suddenly your beer fund is gone.

    Managing money while traveling means learning how not to get hosed just for switching dollars to euros or baht to yen. The good news? It’s easier than you think.

    🪙 Smart Ways to Exchange Currency Without Getting Screwed

    Here’s how to keep more of your cash when swapping currencies:

    • Avoid airport kiosks. They’re convenient like a trap is convenient to a mouse.
    • Use ATMs from major banks. You’ll usually get the best rates here with fewer hidden fees.
    • Always choose local currency when prompted. That “convert to your home currency” option is a ripoff in disguise.
    • Check exchange rates before you travel. Use apps like XE or Google to know what’s fair.
    • Carry a little backup cash in USD or EUR. It can save your ass in places with limited ATM access.

    ✅ Keep More, Lose Less

    Now you know how to swap money without looking like a tourist with a target on their back. It’s a key part of managing money while traveling like a pro.

    💵 Next Up: Use Money Like a Local

    Once you’ve got your hands on the right currency, it’s time to talk tactics. Step 4 shows you how to balance cash, cards, and mobile payments so you’re never caught off guard or offline.

    Step 4: Use Cash, Cards, and Mobile Payments Strategically

    mobile-phone-money-banknotes-us-dollars-163069.jpeg

    💵 Why Payment Strategy Saves Your Ass

    Some places are cash-only, others won’t even glance at your crumpled bills. If you don’t have a system, you’re either stuck washing dishes in a street café or blowing your budget in one tap.

    Managing money while traveling means knowing which tool to use and when. It’s not just about what you carry. It’s about how you spend without screwing yourself.

    🧾 How to Spend Smart With Every Method

    Here’s how to stay nimble with your money while avoiding rookie mistakes:

    • Use cards for big purchases. Hotels, trains, and expensive meals love plastic. So should you.
    • Keep cash for small shops, street food, and tipping. Some of the best bites and experiences are cash-only.
    • Don’t carry all your cash at once. Split it between your wallet, day bag, and hidden stash.
    • Use mobile payments where they’re common. Places like Scandinavia or Singapore run on tap-to-pay.
    • Have a payment backup. Because that sleek café in Lisbon might just “not accept cards today.”

    ✅ Know What to Use, and When

    Now you’ve got the spending flow figured out. Cards for control, cash for flexibility, mobile for speed. That’s managing money while traveling with a bit of swagger.

    📲 Next Up: Keep Your Spending in Check

    Alright, you’ve got the money and know how to use it. Next, in Step 5, we’re diving into the tech that keeps your wallet from bleeding out while you’re too busy chasing sunsets.

    Step 5: Track Spending in Real Time With Helpful Tools

    couple people woman desk

    📊 Why Real-Time Tracking Matters

    You don’t need to be an accountant, but you do need to know where your damn money’s going. Managing money while traveling without tracking it is like driving blindfolded and hoping for the best.

    Daily tracking doesn’t kill the fun. It keeps you in control, so you can say yes to adventure without waking up broke in Budapest.

    📱 Tools to Keep You on Top of Your Finances

    Here’s how to track spending without making it a second job:

    • Use Trail Wallet or TravelSpend. Both are made for travelers and don’t make you feel like a bean counter.
    • Set daily alerts on your banking apps. Know when you’re creeping up on your limit before you hit the edge.
    • Categorize your spending. Food, transport, booze: know what’s draining the tank.
    • Log purchases nightly. Just five minutes before bed keeps your budget tight.
    • Review weekly. See trends, adjust, and stop hemorrhaging money on things you don’t even remember buying.

    ✅ Budgeting Without Killing the Vibe

    Now you’ve got the tools to stay informed without becoming obsessive. This is the backbone of managing money while traveling like someone who’s got their shit together.

    🧯Next Up: When Things Go Sideways

    Because sometimes, despite all your prep, stuff still hits the fan. In Step 6, you’ll learn how to plan for emergencies and keep financial disasters from ruining your trip.

    Step 6: Plan for Emergencies and Financial Backups

    person holding burning money

    🧯 Why You Need a Backup Plan

    No one likes to think about losing their wallet in a crowded bazaar or getting their card cloned in a sketchy ATM. But if you travel long enough, shit happens.

    Managing money while traveling isn’t just about budgets and apps. It’s about being ready when things go sideways at 2 a.m. in a country where no one speaks English and your phone’s dead.

    🛠️ How to Prepare for Money Mayhem

    Here’s how to make sure a financial crisis doesn’t end your trip:

    • Keep a stash of emergency cash. Hide it in your shoe, bag liner, or that weird secret pocket you always forget about.
    • Carry a second card. If one gets lost or blocked, the other saves your ass.
    • Save a digital copy of your card and ID. Email it to yourself or store it in an encrypted app.
    • Know how to contact your bank fast. Have their number saved offline.
    • Use a trusted friend or family member as a backup. They can wire you money or help fix things if you’re in a jam.

    ✅ Stay Ready So You Don’t Have to Panic

    You just learned how to prep like a seasoned traveler, not a clueless tourist. With a few simple steps, managing money while traveling becomes something you handle, not something that handles you.

    🧳 Spend Smart, Travel Far

    You’ve got the tools to keep your cash from evaporating between train tickets and tapas. From building a daily budget to dodging ATM fees and planning for “oh shit” moments, you’re ready.

    Managing money while traveling doesn’t mean being cheap. It means being sharp so you can say yes to more without worrying about what’s left in your account.

    You don’t need to be perfect, just prepared. That’s what keeps the trip going when the plan falls apart.

    If you’ve got tips, horror stories, or a favorite budget app I missed, drop it in the comments. Let’s make travel smarter together.

  • Travel Tech and Tools (2026): The Complete Guide

    Travel Tech and Tools (2026): The Complete Guide

    a purple and black pattern

    Travel Tech and Tools: The Complete Guide

    man wearing black leather jacket holding smartphone

    Written By:

    Published On:

    Last Modified:

    ⭐ 4.7 (based on 53 reader ratings)

    Let’s face it, travel tech is amazing until your phone dies, your charger doesn’t fit the outlet, and you’re trying to navigate Tokyo using a blurry screenshot. Tech should solve problems, not create them.

    You don’t need to bring a drone, three cameras, and a laptop just to backpack through Spain. But you do need smart, reliable tools that make travel smoother and screw-ups less likely.

    Travel packing in 2026 isn’t just about rolling your socks and choosing the right backpack. It’s about bringing the kind of tech that keeps you powered, connected, and out of deep, chaotic shit.

    Whether you’re a seasoned traveler or someone who panics at the sight of a universal adapter, this guide is for you. We’re talking apps, gadgets, data plans, and the underrated magic of a good portable charger.

    This isn’t fluff. You just landed on a deep-dive, no-nonsense guide to travel tech that’ll actually help you plan better and stress less.

    Travel packing is evolving, and if you don’t pack smart, you’ll end up wasting time, money, or both. And nobody wants to be that person crying over a dead phone at a closed metro station in Paris.

    Let’s gear you up, get you organized, and make sure your tech works for you, not against you.

    About the Author

    a man and woman taking a selfie in front of a pyramid

    I wrote this guide because I’ve been that idiot sweating in a foreign train station with 3% battery, no charger, and zero clue where to go. Travel tech saved my ass more than once, and now I’m here to pay it forward.

    Over a decade of living out of backpacks, hopping continents, and accidentally learning how adapters work has taught me what gear’s worth its weight. I’ve fumbled through every possible mistake so you don’t have to.

    People listen to me because I’ve done the legwork, the guesswork, and yes, even the dumb work. I’ve helped thousands of travelers streamline their packing, upgrade their travel tech, and avoid looking like confused extras in their own vacation stories.

    This guide is for the overpackers, the underprepared, the anxious planners, and the go-with-the-flow types who still want their phone to work when it matters. Whether you’re a digital nomad or just trying to find decent Wi-Fi in Venice, this one’s for you. 🌍

    Step 1: Choose the Right Devices to Bring With You

    capturing nature with smartphone by lake is a great way to appreciate travel tech

    📱 Why Your Devices Matter More Than You Think

    Your gear can make or break your trip. Bring the wrong tech and you’re stuck with dead batteries, blurry photos, and a growing hatred for your own packing decisions.

    🎒 The Must-Pack Device Checklist

    Keep it simple. You don’t need a NASA control panel in your carry-on. You need the travel tech tools that work, last, and don’t turn into expensive paperweights:

    • Smartphone: The MVP. Maps, bookings, translations, entertainment, and access to your travel documents all in one.
    • Noise-canceling earbuds: Block out crying babies, screaming bus brakes, and your own poor life choices.
    • Portable charger (10,000mAh minimum): Your phone will betray you at the worst moment. This little guy won’t.
    • E-reader or tablet: Lighter than books, easier on your spine, great for long hauls.
    • Lightweight laptop or none at all: Only bring one if you actually need it. If you’re not working, leave it behind.

    🔌 Pack Smart, Travel Smarter

    The right tech keeps you connected, entertained, and sane. You don’t need everything. You need the right travel tech.

    📲 Next Up: App It Before You Pack It

    Now that your gadgets are sorted, let’s talk about the apps that make them useful. Step 2 is all about loading your phone with digital magic before you even hit the airport.

    Step 2: Load Up Essential Travel Apps Before You Go

    crop couple with map on smartphone

    📲 Why Apps Are the Real MVPs

    Your phone’s only as smart as the apps you put on it. Skip this step and you’ll be that traveler begging for Wi-Fi just to figure out how to get from the airport to your hostel.

    🧠 Download These Before Takeoff

    Think of these like your digital survival kit. Don’t overthink it. Just get them on your phone before you run out of time or signal:

    • Google Maps: Download offline maps for everywhere you’re going. Your future self stuck on a shady street at midnight will thank you.
    • Google Translate: Can’t speak Hungarian? No problem. Point your camera at a menu and order like a pro.
    • Rome2Rio: Figure out how to get anywhere using anything. Bus, train, ferry, yak—this app has it.
    • XE Currency: Don’t do math with jet lag. This app keeps your conversions clean.
    • Your airline’s app: Flight alerts, mobile boarding passes, and stored travel documents that actually show up when you need them.

    📁 Stay Ready So You Don’t Have to Get Ready

    You’ve now got the apps that solve problems before they start. No guesswork, no panicked Googling at the gate, no paper boarding passes dissolving in the rain.

    🌐 Next Up: Plug In and Stay Online

    Cool, your phone is locked and loaded. But apps are useless without power and a data plan. Step 3 is all about making sure you can actually use your travel tech once you’re on the move.

    Step 3: Stay Connected With the Right Adapters and Data Plans

    black wall plugs

    🔌 Why Being Disconnected Abroad Sucks

    It’s all fun and games until your charger doesn’t fit, your SIM card doesn’t work, and your travel documents are trapped in a dead phone. Being offline in a new country feels like trying to read Braille with ski gloves on.

    🌍 How to Actually Stay Connected

    Here’s how not to screw this up. Pack smart, plan ahead, and avoid roaming charges that feel like ransom notes:

    • Buy a universal adapter: One solid adapter that works in 150+ countries beats carrying five cheap ones that spark when you plug them in.
    • Grab an eSIM or local SIM: Skip your home carrier’s soul-crushing roaming fees. eSIMs are easy and fast if your phone supports them.
    • Turn off data roaming: Unless you enjoy surprise bills that ruin your post-trip high, just shut it off.
    • Use Wi-Fi wisely: Download your travel documents and offline content before leaving your hotel. Don’t rely on train station Wi-Fi unless you like buffering.
    • Pack an extra charging cable: Because they always break. Always.

    ⚡ Power Up, Stay Online

    Now you’ve got the power and connection to make all your travel tools actually work. Your tech’s alive, your data flows, and your travel documents stay within reach.

    ⏰ Next Up: Get Your Digital Life Together

    Next we’ll dive into tools that keep your itinerary from looking like a crime scene. Step 4 is all about staying organized and on schedule without becoming a full-blown spreadsheet zombie.

    Step 4: Use Tools to Stay Organized and On Schedule

    black cellphone showing icons

    🧠 Why Organization Saves Your Sanity

    Ever tried finding a train platform in a rush with no signal and zero clue where your ticket is? That chaos isn’t charming. It’s exhausting.

    🧳 Tools to Keep Your Shit Together

    These travel tech apps and systems won’t make you Type-A overnight, but they will help you travel like someone who has their act (mostly) together:

    • TripIt or Wanderlog: Dump your bookings, reservations, and plans here. One app, all your chaos.
    • Google Calendar: Set up alerts for flights, check-ins, or that food tour you forgot you booked.
    • Notion or Evernote: Create a simple doc to store travel documents, emergency contacts, and “oh right” info.
    • Shared folders (Google Drive or Dropbox): Great for keeping everything accessible if your phone dies or your travel buddy needs the details.
    • To-do or checklist app: Tick off things like visas, vaccinations, and hostel confirmations. Travel karma rewards the prepared.

    🗂️ Organized Travelers Win

    You don’t have to be a control freak to stay on top of things. You just need to know where your travel documents are and when your damn train leaves.

    🔒 Next Up: Protect Your Gear and Sanity

    You’ve got everything in order. Now let’s make sure it stays safe, charged, and ready for whatever the road throws at you. Step 5 is about keeping your tech from becoming dead weight.

    Step 5: Keep Your Tech Safe, Charged, and Travel-Ready

    black android smartphones on brown wooden surface

    🔐 Why Tech Protection Is Non-Negotiable

    Travel throws curveballs. Whether it’s a spilled drink, a sneaky pickpocket, or a charger that dies mid-transfer, your tech is always one mishap away from being totally useless.

    💼 How to Keep Your Gear Safe and Functional

    Here’s how not to cry in an airport lounge because your phone, laptop, or travel documents are toast:

    • Use a padded tech organizer: Keep cords, chargers, and devices in one spot so you’re not digging through your bag like a raccoon.
    • Get a waterproof case or pouch: Rain, beach, beer spills… your stuff deserves protection.
    • Label your gear: Slap your email or phone number on everything. Lost doesn’t have to mean gone forever.
    • Backup your data: Sync your photos, travel documents, and notes to the cloud daily. Your memories are worth more than your gear.
    • Power up every night: Start each day fully charged. The world is cruel to 5% battery travelers.

    🔋 Stay Ready for Anything

    Your travel tech is now safe, juiced, and prepped to roll with the punches. No more panic-charging at cafés or praying for dry weather.

    You’ve built your digital travel tech toolkit. Now go out there and actually use it.

    🧳 Tech-Savvy, Chaos-Free, Let’s Roll

    You don’t need to be a digital nomad wizard to travel well. You just need travel tech that works, apps that help, and a plan that doesn’t implode mid-transit.

    You learned how to pick the right devices, prep your apps, stay connected without selling a kidney, organize like a pro, and keep your tech alive through the madness.

    This guide’s not about perfection. It’s about not totally losing your mind when your charger vanishes and your travel documents are MIA.

    Got questions, tips, or a hilarious travel tech fail? Drop a comment. I read them all and occasionally laugh out loud at the chaos you brave souls share. 😎

  • Travel Health and Safety (2026): The Complete Guide

    Travel Health and Safety (2026): The Complete Guide

    a purple and black pattern

    Travel Health and Safety: The Complete Guide

    stunning night view of metz cathedral and river

    Written By:

    Published On:

    Last Modified:

    You’re not here to get food poisoning in Bangkok or get your phone snatched in Rome. You’re here for sunsets, street food, and maybe a little soul-searching.

    But let’s be real. Travel can go sideways fast if you’re not paying attention to the basics of travel health and safety.

    Lose your passport, your meds, or your wallet and suddenly that dream trip feels a lot like a logistical nightmare. You don’t want to be the person crying in a hostel lobby because you skipped the fine print.

    This is your no-bullshit, deep-dive guide to travel health and safety. It’s packed with everything you need to know to stay healthy, stay safe, and stay in the game.

    Whether you’re backpacking solo or splurging on a boutique villa, this guide has your back. It’s part street-smart survival manual, part wellness checklist.

    Let’s get into the stuff that actually matters so you can travel smarter, not sketchier.

    a man and woman taking a selfie while enjoying how well they picked a travel home base

    About the Author

    I wrote this guide after spending one too many nights hugging a toilet in Morocco and once waking up in Prague with my debit card gone and a hangover the size of Texas. Travel is wild, beautiful, unpredictable, and it’ll eat you alive if you don’t know the basics of travel health and safety.

    I’ve spent the last 15 years living out of backpacks, dodging scams, surviving mystery street meat, and helping thousands of travelers do the same without losing their minds or their luggage. I’ve guided people through riots, food poisoning, and the occasional monkey attack.

    You can trust me because I’ve fucked it up so you don’t have to. I’ve turned my hard-earned bruises into battle-tested advice.

    This guide is for the first-timers, the solo wanderers, the digital nomads, and anyone who wants to actually enjoy their trip instead of Googling “do I need a rabies shot?” from a bus station in Peru.

    If you want to feel confident, not clueless, when it comes to travel health and safety, this one’s for you. Grab a coffee (or a beer) and let’s dig in. 🍻

    Step 1: Know the Health and Safety Risks of Your Destination

    palm trees behind white lifeguard post

    🌍 Know Before You Go

    You wouldn’t walk into a jungle without bug spray or into a Paris metro without watching your damn pockets. Same goes for knowing what health and safety curveballs a destination might throw your way.

    Every country comes with its own quirks and chaos. Some have mosquitos the size of helicopters, others have water that’ll gut-punch your insides. Knowing this stuff in advance isn’t just smart, it’s survival.

    ✅ How to Research Travel Health and Safety Risks

    1. Check your government’s travel advisories: They’re not always sexy, but they’ll flag political unrest, disease outbreaks, and areas you should maybe not wander into drunk.
    2. Read recent traveler forums: Reddit, Lonely Planet’s Thorn Tree, and even Facebook groups dish the raw, unfiltered dirt.
    3. Look up local laws and customs: That vape pen might be legal at home, but land you in jail in Dubai.
    4. Search for regional health risks: Malaria, Zika, bad air quality, mystery meat. Google is your pre-trip vaccine.
    5. Know the seasons: Monsoons, heat waves, and wildfire seasons can turn a dream trip into a soggy mess or a smoke-filled hellscape.

    🧠 What You Just Learned

    If you can look up the best pizza in Naples, you can take five damn minutes to check if you’ll need Imodium or a tetanus shot. Staying ahead of travel health and safety risks means fewer surprises and more sangria.

    🗂️ Next Up: Paperwork and Peace of Mind

    Now that you know what you’re walking into, it’s time to prep the boring but crucial stuff. We’re talking documents, insurance, and emergency contacts. The stuff that saves your ass when things go sideways.

    Step 2: Prepare the Right Documents, Insurance, and Emergency Info

    man and woman looking at the document

    📄 Get Your Shit Together Before You Go

    No one likes paperwork, but losing your passport in a country where you don’t speak the language is a whole new level of panic. Travel health and safety isn’t just about dodging germs, it’s about having your life in order when things hit the fan.

    Before you head out, set yourself up like a pro. It’s not sexy, but it might save your ass.

    🧰 Must-Have Docs and Details

    1. Make physical and digital copies of your passport, visa, and vax records: Email them to yourself and store ’em in the cloud.
    2. Buy travel insurance: Not optional. Medical bills abroad can wreck your bank account faster than a shopping spree in Tokyo.
    3. Write down emergency contacts: Include someone back home and the local embassy info. Don’t rely on just your phone.
    4. Know your insurance details: What’s covered, what’s not, and how to actually file a claim without losing your mind.
    5. Keep a cheat sheet: Medications, blood type, allergies, especially if you’re going somewhere where charades won’t cut it.

    🔐 What You Just Learned

    You’re now armed with the boring but badass essentials of travel health and safety. This is the grown-up part of travel that separates the tourists from the travelers.

    🧠 Coming Up: Stay Cool, Not Paranoid

    Next, we’re getting into the art of awareness. How to stay alert without acting like a twitchy weirdo. Because being present beats being pickpocketed.

    Step 3: Stay Aware Without Being Anxious

    group of people having neon party

    👀 Look Sharp, Not Sketchy

    You don’t need to turn into Jason Bourne to travel smart. But walking around glued to your phone or blasting your earbuds in a sketchy alley? That’s tourist Darwinism.

    Travel health and safety is about awareness without anxiety. You want to clock the weird vibes, not spiral into panic mode over every loud noise or local side-eye.

    🧠 Tips to Stay Aware Without Losing Your Cool

    1. Ditch the noise-canceling headphones when walking: Save the soundtrack for the train.
    2. Trust your gut: If a situation feels off, it probably is. Walk away, no drama.
    3. Know the common scams: Google “top travel scams in [destination]” and get familiar with the tricks.
    4. Scan your surroundings often: Not like you’re hunting spies, just enough to know who’s around you.
    5. Stay sober-ish in unfamiliar areas: Booze and new neighborhoods rarely mix well after midnight.

    😎 What You Just Learned

    You can be chill and still stay safe. Awareness is a muscle. Use it, don’t overwork it.

    💻 Up Next: Lock Down Your Gear and Data

    In the next section, we’re going deep on how to protect your stuff, both physical and digital. Because losing your passport sucks, but losing your phone and every damn photo? That’s heartbreak.

    Step 4: Keep Your Belongings and Digital Data Secure

    vibrant street market scene with food cart

    🧳 Protect Your Shit Like a Pro

    There’s nothing romantic about canceling credit cards from a hostel bunk while your bank freezes your account. Whether it’s a pickpocket in Lisbon or a sketchy Wi-Fi network in Hanoi, your stuff and your data are prime targets.

    Travel health and safety isn’t just about germs and scams. It’s also about locking down your gear so your trip doesn’t get derailed by avoidable chaos.

    🔒 How to Keep Your Stuff and Data Safe

    1. Use a money belt or hidden pouch: Yes, it feels dorky. Yes, it works.
    2. Pack a lock: Great for hostel lockers, zippers, and suspiciously flimsy hotel safes.
    3. Back up your photos and documents: Cloud storage is your best friend. Use it before a drunk night leads to a lost phone.
    4. Use a VPN: Public Wi-Fi is like a candy store for hackers. Don’t log in to your bank account raw.
    5. Don’t flash your gear: Keep your phone, camera, and laptop low-key. This ain’t Coachella.

    🔐 What You Just Learned

    If you don’t secure your stuff, someone else will gladly do it for you. Being a little paranoid now saves a lot of headache later.

    🧘‍♂️ Coming Up: Keep That Body Running

    Next, we’re diving into keeping your body in one piece. Hydration, rest, and not eating every damn street taco you see. Because your trip isn’t worth much if you spend it curled around a toilet.

    Step 5: Take Care of Your Body on the Road

    person holding fresh coconut with straw

    💪 Keep Your Meat Suit Running

    You can’t soak up sunsets or rage through night markets if your body feels like garbage. Travel health and safety starts with treating yourself like the precious, hangry little gremlin you are.

    Skipping sleep, chugging airport beers, and eating that sketchy roadside sushi might feel adventurous, until you’re laid out for three days in a questionable guesthouse.

    🥗 Body Basics While Traveling

    1. Stay hydrated: Especially on flights and in hot climates. Hangovers don’t count as hydration.
    2. Get decent sleep: Earplugs and a sleep mask can turn a noisy dorm into a Zen palace. Or at least a less terrible place.
    3. Eat real food sometimes: Mix in a vegetable between the gelato and empanadas. Your gut will thank you.
    4. Move your body: Walk, stretch, swim, dance in a club, just don’t sit like a sloth all day.
    5. Wash your damn hands: It’s basic. It works. Do it often.

    🧠 What You Just Learned

    Your body is your ride for the whole trip. Take care of it like you would a rental car in your name with no insurance.

    🕵️‍♀️ Next: Trust Yourself, But Bring Receipts

    In the next section, we’re talking instincts. Knowing when to listen to your gut, and when to double-check that your gut isn’t full of crap. Intuition is great, but facts are better.

    Step 6: Trust Your Gut, But Back It Up With Facts

    man and woman holding hands

    🧠 Gut Checks and Google Searches

    Your instincts are solid. They’ve kept you alive this long. But travel health and safety isn’t just about vibes, it’s about checking those vibes against reality.

    Sometimes your gut says “hell no,” and you walk away from a weird alley or a dodgy cab. Other times your gut says “YOLO,” and suddenly you’re in a tuk-tuk with a guy named Snake headed to an undisclosed location. Let’s balance that out, yeah?

    🕵️‍♂️ How to Trust Smart and Travel Smarter

    1. Research neighborhoods before you wander: Just because it looks cute on Instagram doesn’t mean it’s safe after dark.
    2. Ask locals you trust: Hostel staff, guides, even that friendly bartender—they usually know where not to go.
    3. Use review sites and travel forums: If 20 people say the same tour is a scam, it probably is.
    4. Don’t ignore red flags: If something feels off, don’t explain it away. Get out.
    5. Balance caution with curiosity: Say yes, but know what the hell you’re saying yes to.

    💡 What You Just Learned

    Your gut is your co-pilot, not your GPS. Use your instincts, but back them up with real info so you’re not flying blind in unfamiliar territory.

    You’ve made it through the essentials of travel health and safety. Now go be bold, be smart, and stay alive long enough to tell a damn good story.d keep your travel documents (and your head) ready for anything.

    ✈️ Don’t Be the Cautionary Tale

    You’ve now got the guts, the gear, and the know-how to keep your trip from going full dumpster fire. Travel health and safety isn’t sexy, but neither is puking on a ferry or getting hacked in a café.

    We covered how to prep your documents, spot sketchy shit, dodge scams, guard your tech, and keep your meatbag of a body in working order.

    You don’t need to be paranoid. You just need to not be clueless.

    Got thoughts? Something I missed? Drop a comment and let’s make this guide even sharper for the next poor soul trying to survive airport sushi. 🍣💀

  • Travel Packing (2026): The Complete Guide

    Travel Packing (2026): The Complete Guide

    a purple and black pattern

    Travel Packing: The Complete Guide

    person overlooking bustling urban street

    Written By:

    Published On:

    Last Modified:

    Overpacking is the gateway drug to travel misery. Lugging a 70-pound suitcase up a Lisbon hill will make you question every life choice.

    Too little, and you’re raiding a Polish pharmacy for deodorant that smells like glue. The sweet spot? It exists, and we’re gonna find it.

    Travel packing isn’t just about rolling socks and praying your shampoo doesn’t explode. It’s the difference between a smooth trip and a logistical hellscape.

    This is your complete guide to travel packing. No fluff, no nonsense, just the good stuff from someone who’s been on both sides of the baggage claim carousel.

    Packing smart saves money, reduces stress, and keeps you focused on the real reason you travel: the adventure.

    This guide will help you pack light, right, and with enough style to not scream “tourist” from a mile away. Let’s get your gear dialed in.

    About the Author

    A man in sunglasses and headphones leaning casually against a column in a European plaza with historic buildings and cobblestone streets, clearly very happy with his travel budget

    I wrote this travel packing guide because I used to pack like a drunk raccoon in a panic. Ten shirts for a weekend trip, no charger, and once, a snorkel for a city break.

    After a decade of airport security fails, cobblestone regrets, and backpack zipper blowouts, I finally cracked the code on smart travel packing. Now I’m passing that hard-earned wisdom to you.

    I’ve been living out of a carry-on for over 12 years, hopping continents and dodging baggage fees like a pro. My passport looks like it got into a bar fight and my gear is always dialed.

    This guide is for anyone who’s tired of Googling “how to pack a suitcase” at 2 a.m. before a flight. It’s for travelers who want to roam light, free, and a little more like they’ve done this before.

    If you’ve ever sworn at your suitcase or ended up wearing hotel slippers to dinner, this one’s for you.✈️

    Step 1: Know Your Destination, Climate, and Activities

    man wearing black hoodie carries black and gray backpacker near trees during foggy weather. He is clearly did a good job travel packing

    🌍 Get Real About Where You’re Going

    Travel packing for a beach in Bali ain’t the same as prepping for a week in Reykjavík. If you don’t know what you’re walking into, you’ll either freeze your ass off or sweat through everything you own.

    🔎 Do Some Recon

    Know before you throw stuff in a bag. Here’s how to not screw it up:

    1. Check the weather from at least three sources. One of them is lying.
    2. Look up cultural norms so you don’t end up underdressed at a mosque or overdressed in Tulum.
    3. Map out your activities so your wardrobe actually fits your plans. Hiking boots at the opera? Hard pass.
    4. Scan your travel documents and keep digital backups in the cloud. Lost passports kill vibes.
    5. Ask a local or seasoned traveler what people actually wear there. Forums and Reddit are gold for this.

    ✅ Plan Smart, Stress Less

    You just learned how to avoid rookie mistakes and pack for what’s real, not what you wish the trip would be. Get this part right and you’ll look and feel like you belong, wherever you land.

    🧳 Up Next: Your Bag, Your Battle

    Now that you know what’s coming, it’s time to pick the right luggage to haul it all. Backpacks, rollers, duffels, next step is choosing the right beast for the journey.

    Step 2: Choose the Right Luggage for Your Trip

    a backpack standing on a snowy ground

    🧳 Luggage Can Make or Break You

    Pick the wrong bag and you’ll hate your life by day two. Your luggage isn’t just storage, it’s your travel sidekick. Get this choice wrong and even the best trip starts off with a limp.

    🎯 How to Pick the Right Travel Companion

    Don’t overthink it, but don’t wing it either. Here’s how to find your perfect baggage soulmate:

    1. Match the bag to the trip. City-hopping Europe? Go carry-on. Two weeks in Patagonia? Pack the beast.
    2. Wheels vs. straps. Rolling bags crush airports, backpacks rule uneven streets and stairs.
    3. Check airline size rules or enjoy the fun of paying to gate-check your soul.
    4. Hard shell for protection, soft shell for squeezing into overhead bins and dodging baggage fees.
    5. External pockets are gold for quick access to snacks, chargers, and travel documents without playing suitcase Jenga.

    🧠 Carry Smarter, Not Heavier

    Choosing the right bag saves your back, your money, and your sanity. You want something that works for your trip, not something you end up dragging behind like a regret.

    👕 Next Up: What the Hell to Put Inside

    Now that you’ve picked the perfect pack mule, it’s time to build a wardrobe that doesn’t suck. We’re talking layers, function, and just enough style to not look like you packed in the dark.

    Step 3: Build a Versatile, Layered Wardrobe

    a man in black jacket sitting on big rock while eating noodles

    👕 Pack Like a Traveler, Not a Tourist

    Your wardrobe shouldn’t scream “I just left the gift shop.” You need clothes that pull double duty, handle surprise weather, and still look decent after two wears and zero irons.

    🧩 Build a System, Not a Pile

    Think in layers and function, not in outfits and fashion show delusions. Here’s how to do it right:

    1. Stick to neutral colors so everything matches everything. Black, gray, navy, olive, your new best friends.
    2. Layer like a damn onion. One jacket, two base layers, boom. You’re ready for most of Earth.
    3. One week rule. Pack enough for seven days and do laundry if you’re going longer. You’re not moving.
    4. Skip bulky stuff. Fleece > hoodie. One packable down jacket = hero status.
    5. Dress for where you’re going, not where you wish you were. Sandals in Iceland is a cry for help.

    🎒 Style Meets Sanity

    You just learned how to dress like someone who’s traveled before. Flexible, layered, ready for cold nights, warm days, and whatever else the road throws at you, all while leaving space for your travel documents and dignity.

    🧼 Next Stop: Travel Packing Like a Pro

    Now that you’ve got the wardrobe game figured out, it’s time to decide what goes in first. Essentials only, then the fluff. Priorities, people.

    Step 4: Pack Essentials First, Then Add Extras

    two black leather bags sitting on a chair next to the ocean

    🧠 Start With the Stuff You Can’t Travel Without

    If you pack your bag backwards, starting with the fun stuff, you’ll run out of room for the actual essentials. Then you’re stuck choosing between toothpaste or clean underwear. Don’t be that person.

    📋 Prioritize Like a Pro

    Essentials keep you alive, comfortable, and not gross. Get those in first:

    1. Medications and travel documents go in a safe, easy-access spot. Lose them and your trip’s on fire.
    2. Toiletries Keep them travel-sized, sealed, and TSA-friendly.
    3. Chargers, adapters, and cables. No power = no photos, no maps, no fun.
    4. Underwear and socks. More than you think, but not enough to clothe a village.
    5. Daily must-haves like glasses, contacts, or that one shirt you always wear. Yes, pack that.

    ✅ Now You’re Ready to Add the Extras

    Once the travel packing core gear’s in, then you can toss in the “maybe” stuff. You’ve earned your scarf, your second pair of jeans, and maybe even that weird travel pillow that looks like a pool noodle.

    🧩 Coming Up: Gear That Keeps You Sane

    Next, we’re talking tools, packing cubes, compression bags, and the little hacks that keep your bag from looking like it exploded. Time to organize the chaos.

    Step 5: Use Packing Tools to Save Space and Stay Organized

    unrecognizable person packing clothes

    🎒 Tools Are Your Packing Superpower

    Your bag doesn’t have to be a chaotic black hole of tangled cords and underwear. The right tools turn your luggage from a mess into a mobile command center.

    🧰 Gear Up Like a Packing Ninja

    These tools don’t just save space, they save your sanity:

    1. Packing cubes keep your stuff sorted and stackable. Your future self will thank you.
    2. Compression bags squeeze your clothes down like a vacuum-sealed burrito. Great for bulky layers.
    3. Toiletry kits with compartments keep your toothbrush from kissing your razor. Hygiene matters.
    4. Cable organizers prevent the “where the hell is my charger” dance at 1 a.m.
    5. A dedicated pouch for travel documents makes airport life 200% less annoying.

    🧼 Order Is Everything

    You now know how to keep your bag from looking like it got hit by a tornado. With the right tools, you’ll pack faster, find things quicker, and stop overthinking your socks.

    👜 Up Next: The Bag You Never Let Go

    Next, we’re talking about your personal item, the one thing you keep close. It’s not just a carry-on. It’s your lifeline, your in-flight survival kit, and where the real essentials live.

    Step 6: Keep a Personal Item With Must-Haves

    standing person wearing yellow and red vest

    👜 Your Personal Item Is Your Survival Kit

    Checked bags get lost. Overhead bins fill up. The only bag you’re guaranteed to have within arm’s reach is your personal item. Treat it like your travel life depends on it, because it kind of does.

    🎯 Pack It Like a Boss

    This isn’t just about snacks and headphones. This is the stuff that keeps you alive, sane, and functioning at 35,000 feet:

    1. Travel documents: Passport, boarding pass, wallet. If you forget these, just go home.
    2. Medications and health items you actually need, not just “maybe” stuff.
    3. Noise-canceling headphones or at least good earplugs. Screaming babies are not optional.
    4. Chargers, power bank, and a phone cable that isn’t frayed and sad.
    5. Comfort kit: Eye mask, lip balm, hand sanitizer, and gum. It’s the little things that matter at hour eight of a red-eye.

    🧠 Keep It Close, Keep It Smart

    You just learned how to pack a personal item that earns its seat under the damn chair. With your essentials in reach, you’re ready for anything the travel gods throw your way.our stuff safer, and your mornings way less stressful.

    🎯 Don’t Pack Like a Rookie

    You’ve got the blueprint now. Pack light, pack smart, and don’t forget your damn charger.

    From choosing the right bag to keeping your travel documents safe and your underwear sorted, this guide covered the stuff that actually matters.

    You don’t need 12 outfits for a 5-day trip. You need layers, essentials, and maybe a little grace when things go sideways.

    If this travel packing guide helped, or if you think I forgot something you swear by, drop a comment. I want to hear your travel hacks, wins, and wild packing fails.

  • Travel Documents (2026): The Complete Guide

    Travel Documents (2026): The Complete Guide

    a purple and black pattern

    Travel Documents: The Complete Guide

    close up shot of a passport and tickets on top of a laptop

    Written By:

    Published On:

    Last Modified:

    You can have the best itinerary in the world, but if you forget any of your travel documents, your whole trip can go straight to hell. Picture yourself at the airport, bags packed, excitement high, and then *boom* you’re denied boarding because your passport expires in three months. Rookie move.

    Travel documents aren’t sexy, but they’re the spine of your adventure. Without them, you’re not going anywhere but back home to sulk and eat sad airport food.

    This is the internet’s no-BS, full-throttle guide to getting your travel documents in order for 2026. We’re talking passports, visas, insurance, confirmations, backups. The works.

    Because missing paperwork is more than a hassle. It can cost you time, money, and your sanity.

    This guide exists to save your trip before it even starts. And yeah, it’ll make you feel like a travel ninja while doing it.

    Let’s get your docs in line so you can focus on the fun stuff. ✈️

    About the Author

    a man and woman taking a selfie while realizing they did a great job picking travel experiences

    I wrote this guide because I’ve seen too many travelers cry at the gate while their flight leaves without them. Hell, I’ve been that poor bastard once. Maybe twice. Travel documents are boring until they’re the only thing that stands between you and your dream trip.

    I’ve spent many years living out of backpacks, chasing tuk-tuks, and navigating foreign visa offices with a hangover. I know what works and what blows up in your face. Trust me, I’ve lost more boarding passes than I care to admit.

    People ask me about travel documents more than they ask about food recs or where to find the best beach. And if I had a dollar for every “do I need a visa for X?” email, I could retire in Bali and sip cocktails all damn day.

    This guide is for anyone who’s ever panicked at check-in, scrambled to find a vaccine card, or had that oh-shit moment at immigration. It’s for the planners, the procrastinators, and the wanderers who just want things to go smoothly for once. ✌️

    Step 1: Check Your Passport and Visa Requirements

    person holding an opened passport which is also one of many travel documents

    🛂 Your Passport Is Your Golden Ticket

    Your passport isn’t just a fancy photo ID. It’s the one thing standing between you and getting stuck in the airport food court eating cold sandwiches while your friends are sipping wine in Rome.

    📋 How to Not Screw Up Your Passport and Visa Situation

    Before you even think about booking a flight, do these five things:

    1. Check the expiration date: Make sure your passport is valid for at least six months past your travel dates. No one cares that it looks fine.
    2. Look for blank pages: Some countries won’t let you in if your passport is full. They don’t want your ink-stained life story.
    3. Research visa requirements: Just because you can show up doesn’t mean you should. Every country plays by its own rules.
    4. Apply early: Visa processing can take weeks or months. Don’t assume you can bribe a consulate officer with good vibes.
    5. Print and back it all up: Put those travel documents in the cloud, your bag, your mom’s email. Be annoying about it..

    🧠 Get This Locked Down Before You Go

    A little passport prep now means no frantic calls to embassies later. You’ve just knocked out one of the most important pieces of your travel documents arsenal.

    🩺 Next: Don’t Let a Stomach Bug Derail Your Trip

    Now that your passport and visa game is strong, it’s time to get your health documents and travel insurance sorted. Because nothing ruins a trip faster than hospital bills in a country where you don’t speak the language.

    Step 2: Organize Health Documents and Insurance

    smartphone on a map and confetti on a white surface

    🩺 Health Stuff Is Boring, Until You Need It

    Nothing kills the travel buzz like getting sick abroad with no clue what’s covered, who to call, or where to go. One bad oyster and suddenly you’re Googling “emergency room in Thai” with shaky hands and zero signal.

    📑 How to Prep Your Health Docs Like a Pro

    Save yourself a world of pain by knocking out these essentials:

    1. Print your travel insurance policy: Yes, paper. Your phone might die mid-crisis.
    2. Know what’s covered: Read the damn fine print. If it doesn’t cover scooters, cliffs, or street food, get a better plan.
    3. Bring your vax records: Some countries still care, especially if you’re coming from a yellow fever zone.
    4. Pack prescriptions: In original bottles. With your name on them. Customs loves drama.
    5. Upload everything: Stash your health-related travel documents in the cloud, in your inbox, and on a USB drive for good measure.

    🧠 Stay Ready So You Don’t Have to Get Ready

    Now you’re not just hoping you’ll stay healthy, you’ve got a damn game plan. Your health documents are dialed in and your insurance won’t leave you hanging.

    📄 Next: Lock Down Your Trip Details

    Up next, we’re diving into confirmations and backups. Because losing your flight info or hotel address in a dodgy Wi-Fi zone is a special kind of hell.

    Step 3: Prepare Travel Confirmations and Backup Copies

    brown leather duffel bag

    🧾 Proof or You’re Screwed

    You show up at your Airbnb, sweaty and jet-lagged, only to realize you don’t have the address. Or worse, the host canceled while you were mid-flight. Travel confirmations are your lifeline when everything else goes sideways.

    📂 What to Back Up So You Don’t Freak Out Later

    Get your act together with these five power moves:

    1. Print every major booking: Flights, hotels, car rentals. Paper doesn’t glitch.
    2. Screenshot the details: Especially if you’re relying on apps. Screenshots work offline.
    3. Organize emails: Create a “travel” folder in your inbox. Don’t make yourself dig through newsletters and spam.
    4. Save to the cloud: Dropbox, Google Drive, whatever. Just make sure it syncs before you leave.
    5. Share with someone you trust: If you go off-grid, someone should know where the hell you’re supposed to be.

    🧠 Your Digital Paper Trail is Now Solid

    You’ve just leveled up your travel documents game by locking down confirmations and copies. You’ll never again rely on airport Wi-Fi to find a hotel name you forgot.

    🚫 Next: Don’t Get Denied at the Border

    Next, we tackle local entry rules and restrictions. Because getting turned away at customs for not reading the fine print? That’s a real kick in the passport.

    Step 4: Know the Local Entry Rules and Restrictions

    overhead shot of a camera and flowers near a map

    🛃 Customs Doesn’t Care If You’re Confused

    Every country has its own rules, and they don’t give a damn if you “didn’t know.” One wrong move and you’re stuck explaining yourself to a bored border agent while your bag circles baggage claim alone.

    📌 How to Not Get Turned Away at the Gate

    Do yourself a favor and prep like a pro with these steps:

    1. Check official government sites: Don’t trust random blogs from 2019. Go straight to embassy or consulate pages.
    2. Know entry and exit requirements: Return ticket? Onward travel? Some places demand proof.
    3. Look into local COVID or health rules: Yeah, some still exist. And they’ll fine your ass if you ignore them.
    4. Learn about restricted items: That jerky in your bag could land you in quarantine. Seriously.
    5. Understand your visa type: Tourism, business, transit, it matters. Don’t wing it.

    🧠 You’re Now Border-Ready

    You just saved yourself from airport drama, surprise denials, and awkward calls to your embassy. Your travel documents now come with brains attached.

    🔐 Next: Keep Your Stuff Safe

    Now let’s talk about keeping your documents safe and within reach. Because it’s not enough to have your papers in order, you’ve got to know where the hell they are.

    Step 5: Store Documents Safely and Accessibly

    close up photo of a person s hand holding a flash drive

    🔒 If You Can’t Find It, It Doesn’t Exist

    Losing your passport in a sketchy hostel or dropping your phone in a tuk-tuk isn’t just inconvenient, it’s a one-way ticket to chaos. Your travel documents are only useful if you can actually find them when shit hits the fan.

    📦 Smart Ways to Keep Your Docs Safe and Handy

    Here’s how to keep your stuff protected without turning into a paranoid mess:

    1. Use a travel wallet or organizer: Keep everything in one place, not scattered like a toddler’s toy box.
    2. Stash digital copies: Email them to yourself and upload to Google Drive or Dropbox.
    3. Pack a backup USB: Yeah it’s old school, but it works offline and doesn’t run out of battery.
    4. Divide and conquer: Don’t keep all your documents in one bag. Spread the risk.
    5. Use hotel safes wisely: If the place looks shady, maybe don’t trust it with your passport.

    🧠 You’re Now a Document Ninja

    You’ve got your travel documents backed up, locked down, and ready for anything short of a volcano. Which means you can focus on what actually matters, having the trip of your damn life.

    🧳 Paperwork Isn’t Sexy, But It’ll Save Your Ass

    You made it. You’ve wrestled the beast that is travel documents and came out the other side smarter, tougher, and way less likely to cry at an airport.

    You’ve got your passport checked, health docs sorted, confirmations backed up, and your paperwork stashed like a pro.

    Now you can spend less time freaking out and more time chasing sunsets, street food, and the good kind of chaos.

    Drop a comment if this guide helped or if I missed something that saved your ass on the road. Travelers help travelers. Always. ✌️

  • How to Get Around While Traveling (2026): The Complete Guide

    How to Get Around While Traveling (2026): The Complete Guide

    a purple and black pattern

    How to Get Around While Traveling: The Complete Guide

    iconic lisbon tram under arco da rua augusta teaching people how to get around while traveling

    Written By:

    Published On:

    Last Modified:

    You’ve just landed in a new city, jet-lagged and hangry, and the first thing you see is a subway map that looks like a plate of spaghetti. Welcome to the adventure.

    Getting from A to B shouldn’t feel like decoding ancient runes or auditioning for The Amazing Race: Confused Tourist Edition.

    How to get around while traveling is the difference between sipping wine by the Seine or sweating bullets on the wrong bus to nowhere.

    This guide will show you how to navigate like a local, avoid rookie mistakes, and skip the scams that make your wallet cry.

    Whether you’re hoofing it through cobbled streets, hopping metros, or figuring out if that scooter rental is a death trap, we’ve got you.

    Because how to get around while traveling isn’t just logistics. It’s freedom.

    Let’s get you moving like a pro, with zero guesswork and no meltdowns at the ticket machine.

    About the Author

    A man in sunglasses and headphones leaning casually against a column in a European plaza with historic buildings and cobblestone streets, clearly very happy with his travel budget

    I wrote this guide because I’ve been that traveler. The one crying into a vending machine in the Prague metro because I had no coins, no clue, and no damn idea which train was mine. Figuring out how to get around while traveling shouldn’t feel like passing a secret test in every country.

    Over the last 15 years, I’ve zigzagged across 40-plus countries, missed buses, caught the wrong trains, and once ended up at a Turkish wedding instead of the ferry terminal. I’ve learned the hard way so you don’t have to.

    I run a travel agency, write for a living, and have helped thousands of people plan smoother, smarter trips. If there’s a better route, a cheaper fare, or a way to skip the line, I’ve probably found it.

    This guide is for anyone who’s ever stood in a station muttering “What the hell does Zone 3 mean?” under their breath. It’s for solo travelers, slow travelers, fast-packers, budget seekers, and anyone else who wants to master how to get around while traveling without losing their damn mind.

    So buckle up. Or don’t. You’re in control now.

    Step 1: Understand Your Destination’s Transportation Landscape

    jakarta train station at sunset with passengers

    🌍 Know the Lay of the Land Before You Touch Down

    If you don’t know how people move in the place you’re going, you’re already ten steps behind. Transportation is local culture on wheels, and every city has its own rules, quirks, and WTF moments.

    🧠 Do Your Homework Without Losing Your Mind

    Here’s how to get your bearings before you even zip up your backpack:

    • Google “[City] public transportation guide” and read something written this year
    • Watch a few YouTube videos of local commutes to see how it actually feels
    • Search Reddit or local Facebook groups for insider tips
    • Look up airport transfer options so you’re not scrambling after customs
    • Bookmark the transit authority’s website and check for strike alerts or odd schedules

    📚 Know Before You Go = Less Stress on Arrival

    When you understand how to get around while traveling, it’s like unlocking cheat codes. You’ll step off the plane already five moves ahead of every jet-lagged newbie lined up for a cab.

    🧭 Next: Pick the Right Ride for Your Trip

    Now that you’ve scoped out the terrain, it’s time to match your transport to your trip. In Step 2, we’ll break down how to choose the best local ride, whether that’s a metro pass, a rental scooter, or your own two feet.

    Step 2: Choose the Best Local Transport Based on Your Itinerary

    biking through amsterdam during daytime

    🚎 Your Trip, Your Ride: Match Transport to the Plan

    You don’t bring a fork to eat soup, so why the hell would you take a taxi in a city with world-class trams? Picking the right local transport isn’t about being fancy. It’s about making your trip smoother, cheaper, and way less stressful.

    🛠️ Build Your Transport Game Plan

    Here’s how to match your movement style to your itinerary without overthinking it:

    • For cities with tight, walkable neighborhoods (think Florence), your feet are gold
    • For sprawling metros (like Tokyo or London), grab a transit card and learn the lines
    • Going to rural areas? Look into renting a car or checking long-distance bus options
    • Hitting multiple attractions in one day? Map them and check if a bike or scooter saves time
    • If you’ve got early tours or late dinners, figure out what runs 24/7, or doesn’t

    🧩 One Size Doesn’t Fit All, and That’s the Point

    Now you know that how to get around while traveling isn’t a fixed rule. It depends on your plans, the city’s layout, and how much time (or patience) you’ve got.

    🚶‍♂️ Coming Up: Walk It, Ride It, Rent It

    Next, we’ll dig into the gritty truth of when to walk, when to grab wheels, and when to say screw it and rent your own ride. Your legs, your budget, and your sanity will thank you.

    Step 3: Learn When to Walk, Ride, or Rent

    woman in white dress walking by ancient temple

    🚶‍♀️ Walk, Ride, or Rent: Don’t Wing It

    Walking sounds romantic until your feet feel like mashed potatoes and you realize that “just a few blocks” actually meant a vertical hike through medieval alleys. Knowing when to hoof it, hop on wheels, or rent a ride is key to not hating life by 3 p.m.

    🧭 Make the Smart Call for Every Leg of Your Trip

    Use these tips to choose wisely and move like a boss:

    • Walk if the distance is under 20 minutes and you want to actually see the place
    • Ride (bus, metro, tram) if it’s over a mile, raining, or you’re crossing multiple neighborhoods
    • Rent a bike or scooter if the terrain’s flat and the weather doesn’t suck
    • Get a car if you’re heading into the countryside or your plans are just plain weird
    • Don’t forget to check elevation. What looks close might be a sneaky stair-stepping nightmare

    🔄 Choose Based on Reality, Not Vibes

    How to get around while traveling isn’t about always choosing the fastest or cheapest way. It’s about reading the situation and picking what won’t ruin your day or your knees.

    🗺️ Next: Let the Apps Do the Thinking

    In the next step, we’ll dive into the digital tools that make you look like a local even when you’re wildly jet-lagged. Because nothing says “I’ve got this” like knowing which exit to take before you even hit the platform.

    Step 4: Use Transit Apps and Maps to Stay Oriented

    a biker using a cellphone for navigation

    📱 Don’t Guess. GPS That Shit

    Wandering is great when you’re aimless on purpose. But when you’re late, lost, and sweating through your shirt, tech is your best friend. Transit apps and maps are how you survive the chaos and actually enjoy figuring out how to get around while traveling.

    🛠️ Download These Before You Board the Plane

    Here’s how to prep like a legend:

    • Use Google Maps offline so you’re not screwed when the signal disappears
    • Grab Citymapper for big cities. It’s like having a local in your pocket
    • Download local transit apps (like Moovit or Rome2Rio) for route planning and delays
    • Save your hotel, landmarks, and food spots as pins so you’re never truly lost
    • Screenshot important routes or schedules in case your battery dies like a little coward

    🧘 Travel Smarter, Not Dumber

    You don’t need to be a cartographer. You just need to use the apps that already know how to get around while traveling and trust them more than the confusing signage in a foreign subway.

    💸 Up Next: Outsmart the Costs and the Cons

    You’ve got the tech to stay on track. Next, we’ll talk about money. Specifically how not to get ripped off while buying tickets, hopping rides, or falling for “special taxi prices.”

    Step 5: Know the Costs and Common Scams Ahead of Time

    photo classic car parked on a landmark

    💰 Don’t Let Transit Jack Your Wallet

    Getting around a city shouldn’t cost more than your flight. But scams, hidden fees, and tourist traps are everywhere, and they love clueless travelers. If you’re not careful, how to get around while traveling turns into how to get ripped off in under five minutes.

    🚨 Scam-Proof Your Transit Game

    Here’s how to stay sharp and save your cash:

    • Research typical fare prices before you go so you know what’s normal
    • Avoid unlicensed taxis, especially the ones that “just happen” to be waiting for you
    • Validate your tickets in systems that require it, or get fined like a chump
    • Watch for fake ticket sellers near bus and train stations
    • Ask locals or hotel staff about legit transit passes and whether they’re worth it

    🦊 Travel Like You’ve Done This Before (Even If You Haven’t)

    You just learned how to avoid looking like fresh meat at the station. Knowing the real costs and dodging scams is a crucial part of how to get around while traveling like a seasoned pro.

    🧳 Next Stop: Getting To and From the Airport Without Screaming

    Next, we’re tackling airport transfers and intercity travel. Because the trip’s not over when the plane lands or the bus pulls in. You still need to actually get where you’re going without losing your cool or your luggage.

    Step 6: Plan for Airport Transfers and Intercity Connections

    futuristic architecture with indoors waterfall and rail link train

    ✈️ Don’t Screw Up the First or Last Ride

    Landing in a new country is thrilling right up until you realize you have no clue how to get to your hotel. And leaving? Even worse. Miss one connection and you’re suddenly starring in Home Alone: Backpacker Edition. Planning airport transfers and intercity travel is a huge part of how to get around while traveling without chaos.

    🧳 Get From A to B Without Losing Your Sanity

    Here’s how to handle the big legs of your journey like a legend:

    • Research airport transfers before you land so you don’t get fleeced by cab sharks
    • Book shuttle buses or train tickets online in advance when possible
    • Know the departure point for buses or trains. It’s not always at the airport itself
    • Leave buffer time when transferring between cities or catching flights
    • Pack snacks and download stuff in case your ride breaks down, stalls, or disappears

    🎯 Finish Strong, Start Smooth

    Now you know how to get around while traveling not just within cities, but between them and from the damn airport too. That means fewer headaches and more time doing the stuff you actually came for.

    🧳 You’ve Got Places to Be, Let’s Get You There

    Travel isn’t just about where you go. It’s also about not losing your shit trying to get there.

    You learned how to get around while traveling by actually thinking ahead. Choosing smart transport, dodging scams, using apps that work, and planning transfers like a boss.

    No more showing up clueless at a train station or overpaying for some sketchy tuk-tuk ride that “includes a free gem shop.”

    Drop a comment if this guide saved your ass, or if there’s something I missed. I want to hear your best (or worst) transit story too.

  • How to Book Tours (2026): The Complete Guide

    How to Book Tours (2026): The Complete Guide

    a purple and black pattern

    How to Book Tours: The Complete Guide

    taj mahal and the four minarets is an attraction being used as an example for how to book tours.

    Written By:

    Published On:

    Last Modified:

    You didn’t cross an ocean just to get herded around like cattle or book a “hidden gem” that smells suspiciously like a tourist trap. Tours can elevate a trip or tank it faster than a lukewarm hostel shower.

    Knowing how to book tours the smart way means fewer regrets, more real experiences, and zero hours wasted chasing someone else’s bucket list. The wrong tour leaves you broke and bored. The right one? It’s the stuff of travel legend.

    This is your complete guide to getting it right. We’re talking strategy, tools, insider tips, and how to spot BS before you pay for it.

    Whether you’re into street food safaris, haunted catacombs, or cheese-making with alpine goats, this guide will show you how to book tours that actually fit your vibe.

    No fluff. No filler. Just everything you need to know before clicking “Book Now.”

    Let’s crack this thing open.

    About the Author

    a person sitting in a chair looking out a window thinking about their travel planning timeline

    I wrote this guide because I’ve been that idiot. You know, the one who paid $120 for a “local” food tour that turned out to be a sweaty van ride with a box of crackers and a bored guide named Jeff.

    After many years on the road, I’ve learned the hard way how to book tours that are actually worth your time and money. I’ve trekked with monks, tasted tequila with grandmas, and yes, fallen for a few overpriced duds so you don’t have to.

    People keep asking me how to book tours without getting ripped off or bored to death. So here it is, finally, all in one place.

    This guide is for the solo backpacker avoiding group selfies, the couple on their first big trip abroad, and the “planner” friend trying to not screw it up. Basically, anyone who wants experiences, not regrets.

    If you want to skip the scams, dodge the snoozefests, and find the stuff that makes your trip unforgettable, this guide’s got your back. 🥾

    Step 1: Decide Which Experiences Are Worth Booking Ahead

    photo of road during dawn

    🗺️ Book Before You Board That Plane

    Not everything should be spontaneous. Some experiences are too epic, too limited, or too damn popular to leave to chance. If you’re serious about learning how to book tours that don’t leave you crying in a café with no reservation, start here.

    ✅ What to Lock In Ahead of Time

    Here’s how to avoid missing out while still leaving room to breathe:

    • Book high-demand stuff early: Think the Colosseum, Machu Picchu, Alhambra, Anne Frank House. If tickets are limited, don’t screw around.
    • Snag unique local tours in advance: Cooking classes, rooftop tango in Buenos Aires, wild food foraging in Finland. These fill up fast.
    • Lock in transportation-heavy tours: Anything that involves a bus, boat, or goat. Logistics matter.
    • Check for free days or closures: Some museums are free once a month. Some are closed Tuesdays. Know before you go.
    • Read refund policies: Life happens. Don’t book stuff you can’t back out of if plans shift.

    🧠 Plan Smart, Regret Less

    You just learned how to spot the experiences worth reserving ahead. By being just strategic enough, you dodge the stress of sold-out signs and overpriced last-minute junk.

    🔍 Next: Pick Your Adventure Style

    Now that you’ve locked in the essentials, it’s time to figure out how you want to experience them. Guided? Self-guided? Freestyle? In the next chapter, we break down how to book tours that match your pace, budget, and curiosity.

    Step 2: Choose Between Guided Tours, Self-Guided Options, and DIY Visits

    the top of a pyramid in chichen itza

    🧭 Pick Your Poison: Guide, App, or Go Rogue

    Not every tour needs a guide in a polo shirt pointing at statues. The best travel days come when you know how to book tours and when to skip them entirely. Some places demand a human expert, others just need good shoes and decent Wi-Fi.

    🧃 Your Tour Style, Your Rules

    Here’s how to figure out what kind of experience fits the moment:

    • Go guided when context matters: Auschwitz, Angkor Wat, or any place with heavy history. A good guide brings it to life and keeps it from being just “a bunch of old stuff.”
    • Choose self-guided when you want structure without the chatter: Apps like VoiceMap or Rick’s audio tours are great for wandering with purpose.
    • DIY it when you want full control: Hit the street food stalls, chase street art, or hike that cliffside path on your own terms.
    • Mix it up: You don’t have to commit to one style for the whole trip. Blend guided deep dives with solo curiosity.
    • Consider your bandwidth: Hungover in Hanoi? Maybe skip the six-hour bike tour and go with a chill museum and your AirPods.

    🧠 Know Yourself, Tour Accordingly

    You’ve got options, and that’s the whole damn point. How to book tours isn’t just about what to book but how you want to experience it. Choose your method like you’d choose your drinking buddies: wisely.

    🔍 Next: Trust, But Verify

    Now that you’ve figured out your vibe, it’s time to vet the people actually running these experiences. In the next chapter, we dig into how to research trusted providers and platforms so you don’t end up on a “sailing tour” that’s actually a guy with a dinghy and a dream.

    Step 3: Research Trusted Providers and Platforms

    horse with trailer in front of petra

    🕵️‍♂️ Don’t Get Catfished by a Tour Company

    Just because a website has pretty photos and the word “authentic” slapped all over it doesn’t mean it’s legit. If you want to know how to book tours without ending up in some sketchy van with mystery meat snacks, you’ve gotta do your homework.

    🔎 How to Vet Like a Pro

    Here’s how to spot the real deal from the travel scams and snoozefests:

    • Google the hell out of them: Look beyond the first page. Check forums, Reddit threads, and blog reviews from real travelers, not PR fluff.
    • Use trusted platforms: Viator, GetYourGuide, and Airbnb Experiences all vet their hosts to some degree. Start there, then dig deeper.
    • Stalk their social media: If the last Instagram post was in 2018 and the Facebook page is full of unanswered complaints, maybe skip it.
    • Check who’s actually leading the tour: Local experts? Great. Interns reading cue cards? Not so much.
    • Look for real contact info: No address, no phone, no face = red flag. You want to know who to yell at if things go sideways.

    🧠 Trust is Earned, Not Assumed

    You just leveled up your bullshit detector. Knowing how to book tours means knowing who to trust, and trust comes from digging deeper than the glossy promo copy.

    🧮 Next: What Are You Actually Paying For?

    Once you’ve got some providers in mind, the next step is figuring out which ones offer real value. Coming up: how to compare price, perks, and group size without getting hustled.

    Step 4: Compare Value, Inclusions, and Group Size

    great sphinx and pyramid of giza egypt

    💸 Price Ain’t Everything, But It Ain’t Nothing Either

    Just because a tour is cheap doesn’t mean it’s a deal. And just because it’s expensive doesn’t mean it won’t suck. If you want to know how to book tours that are actually worth it, you’ve gotta look past the price tag.

    🧾 What to Compare Before You Commit

    Don’t just look at dollars. Look at what you’re getting for them:

    • Check what’s included: Entrance fees? Meals? Transport? Or are they gonna charge you for air and legroom?
    • Size matters: Small groups = more personal, less waiting. Big groups = cheaper, but good luck hearing the guide in a cathedral.
    • Read the fine print: Hidden fees and “optional” upgrades are where they get you.
    • Ask yourself what you actually want: Do you need a hotel pickup or can you walk? Want a 10-hour epic or a breezy two-hour jaunt?
    • See if the vibe fits: Some tours are social and rowdy. Some are chill and nerdy. Pick your flavor.

    🧠 Value Is More Than a Number

    You now know that “cheap” can mean basic, and “premium” might just mean “with snacks.” Learning how to book tours means learning to spot real value and avoid the shiny trash.

    🕰️ Next: Time It Right or Pay the Price

    Now that you’ve picked a winner, it’s time to talk timing. Next up: how to lock in the right day, right time, and enough wiggle room so your trip doesn’t turn into a logistical meltdown.

    Step 5: Look at Timing, Availability, and Flexibility

    part of the great wall of china with stairs to the watchtower on the hill

    🕒 Don’t Let Time Screw You

    You found the perfect tour. Cool. But if it starts at 6 a.m. the morning after a long-haul flight, you’re gonna hate yourself. Knowing how to book tours isn’t just about what you book, it’s about when you book it.

    📅 How to Time It Without Screwing Yourself

    Here’s how to make your schedule work for you, not against you:

    • Avoid back-to-back marathons: Don’t book a 10-hour walking tour right after a red-eye. You’re not a machine.
    • Check availability early: The good stuff sells out fast, especially during festivals, holidays, or peak seasons.
    • Build in buffer time: Leave room for naps, snacks, and the occasional existential crisis.
    • Watch the weather: Booking a kayaking tour in monsoon season? Bold move, but maybe don’t.
    • Look for flexible cancellation: Plans change. Make sure your tour can too.

    🧠 Right Tour, Right Time

    You’ve learned how to think ahead without locking yourself into a prison of Google Calendar alarms. Booking smart means leaving room to breathe.

    🚩 Next: Don’t Get Fooled by Fake Praise

    Up next, it’s time to pull back the curtain on those glowing 5-star reviews. We’ll break down how to read between the lines and spot the red flags before they cost you time, money, and your sanity.

    Step 6: Read Reviews Carefully and Spot Red Flags

    statue of jesus christ on mount in evening

    🧨 Not All 5-Star Reviews Are Holy

    If every review says the tour was “life-changing,” start asking questions. When you’re learning how to book tours, learning how to read reviews without falling for hype is a survival skill.

    🕵️‍♀️ How to Sniff Out the Crap

    Use these tips to separate the real-deal feedback from the polished BS:

    • Read the 3-star reviews first: That’s where the nuance lives. They’re usually honest without being whiny or overhyped.
    • Look for patterns: If ten people mention “confusing meeting spot,” guess what? You’ll be confused too.
    • Watch for vague praise: “Amazing tour!” means nothing. What made it amazing? The guide? The snacks? The flamenco goat?
    • Ignore the one-offs: One angry Karen does not a bad tour make. Unless there are lots of Karens.
    • Trust recent reviews: A glowing review from 2019 doesn’t help if the company changed hands or the guide now works in tech.

    🧠 Believe the Details, Not the Stars

    You just learned how to book tours without getting suckered by sugar-coated nonsense. Honest reviews tell stories. Lazy ones just slap on emojis and call it a day. Look for the story. Trust the specifics. And always trust your gut.

    🎯 Book Smarter, Travel Better

    You’ve got the tools. You know how to book tours without getting scammed, bored, or stuck with Jeff and his “fun facts” about cobblestones.

    You learned when to book, who to trust, what’s actually worth paying for, and how not to get suckered by glittery reviews. That’s half the battle right there.

    Now go plan your trip like a damn pro. Leave a comment if this helped or if there’s something missing. Or just say hi. We like that too.

  • Finding Food While Traveling (2026): The Complete Guide

    Finding Food While Traveling (2026): The Complete Guide

    a purple and black pattern

    Finding Food While Traveling: The Complete Guide

    outdoor dining at signorvino milan as an excellent example on finding food while traveling

    Written By:

    Published On:

    Last Modified:

    Finding food while traveling shouldn’t feel like defusing a bomb with a butter knife. Yet somehow, it does. You’re starving, lost, hangry, and every place looks either suspiciously empty or packed with tourists eating sad pizza.

    This is your passport to never settling for shitty meals again. Whether you’re chasing night market noodles in Taipei or a flaky croissant in Paris, this guide gives you everything you need to eat well without overplanning.

    Because food is more than fuel. It’s culture, it’s memory, it’s the reason you booked the damn trip in the first place.

    We’re not here for mediocre sandwiches and overpriced tourist traps. We’re here for the smoky corner spots, grandma’s secret recipes, the kind of meals that make you question your life choices in the best way.

    Mastering the art of finding food while traveling means fewer regrets, better stories, and way tastier souvenirs. And let’s be honest, it’s half the reason you travel anyway.

    This is your complete guide to finding food while traveling. Let’s get you fed right. 🍜

    About the Author

    a man and woman taking a selfie in front of a pyramid

    I wrote this guide because I used to suck at finding food while traveling. I’m talking limp gas station sandwiches in Naples and regrettable sushi in Prague.

    After a decade of globetrotting, I’ve eaten my way through street carts in Bangkok, wine bars in Lisbon, and one too many questionable kebabs at 2 a.m. I’ve learned what works, what sucks, and how to actually enjoy the process without turning into a neurotic Yelp-scroller.

    People kept asking me the same thing: “How do you always find the good stuff?” So I finally put it all in one brutally honest, no-BS guide.

    Why me? Because I’ve been there. I’ve built trips around meals, blown budgets on tasting menus, and still know how to hunt down a life-changing $3 bowl of soup.

    This guide is for curious travelers who want to eat well without a rigid itinerary. It’s for the food-lovers, the wanderers, the ones who’d rather follow their nose than a checklist. And it’s definitely for anyone sick of tourist-trap menus with laminated photos. 🍲

    Step 1: Define Your Dining Style and Priorities

    charming mediterranean restaurant exterior ideal for finding food while traveling

    🍽️ Know Thyself, Then Feed Thyself

    If you don’t know what kind of eater you are, finding food while traveling turns into a chaotic mess of “I don’t know, what do you want?” conversations and hanger-fueled meltdowns. Figuring out your food priorities before you hit the road saves time, stress, and arguments that end in overpriced pasta near the train station.

    🧭 Find Your Food Personality

    To get fed right, you need a game plan. Not a spreadsheet, but a vibe. Try these:

    • Are you a die-hard foodie chasing Michelin stars, or a street food addict who just wants the local stuff with no frills? Decide now.
    • Do you want one “hell yes” meal a day or three solid but unmemorable ones? Pick your pace.
    • What’s your budget? Are you ballin’ or backpacking?
    • Any dietary stuff? Vegan, gluten-free, allergic to peanuts or pretension?
    • What are your hell nos? Maybe you don’t do raw fish, or you had one traumatic oyster in college. Own it.

    🎯 Eat Like You Mean It

    By defining your dining style, you’re already ahead of most travelers who wander hangrily into the nearest mediocre café. Finding food while traveling gets a hell of a lot easier when you know what you’re looking for in the first place.

    🧭 Up Next: Tools That Don’t Suck

    Now that you’ve figured out what kind of eater you are, it’s time to find the good stuff. Next up, we’re diving into the tools that’ll help you discover food gems without spending three hours doom-scrolling through bad reviews.

    Step 2: Use the Right Tools to Discover Local Food Gems

    person holding hotdog sandwich

    🔍 Stop Guessing, Start Hunting

    Let’s be real. Wandering aimlessly hoping to “stumble upon something good” is how you end up eating sad microwave lasagna next to a bus station. Finding food while traveling means knowing where the hell to look, and using the tools that actually work.

    🛠️ Your Food-Finding Toolbox

    Want to eat like a local and not like a confused tourist? Use these:

    • Google Maps: Save spots with good reviews, then let your stomach choose when you’re nearby.
    • Instagram: Search by location tags and hashtags. If it looks drool-worthy, you’re on the right track.
    • Local blogs and food tours: Locals know what slaps. Steal their recs.
    • HappyCow: If you’re vegan or vegetarian, this app will save your life.
    • Ask actual people: Bartenders, hostel staff, cab drivers, folks who eat out a lot and don’t BS you.

    💡 Trust Your Tools (Not Just the Stars)

    You’ve now got a solid set of digital (and human) tools to sniff out great eats. Finding food while traveling just got a lot less random and a lot more delicious.

    💸 Next: Don’t Blow Your Whole Budget on Brunch

    Now that you know how to hunt down killer spots, let’s talk money. Coming up, how to balance those big splurges with meals that keep both your belly and your wallet full.

    Step 3: Balance Splurges With Budget-Friendly Bites

    white and blue bus near green palm tree under blue sky

    💸 Don’t Eat Your Entire Budget in One Night

    Look, that 12-course tasting menu with wine pairings might change your life. But if you’re doing that every night, you’ll be broke, bloated, and googling cheap flights home by day three. Finding food while traveling should be delicious and sustainable, not a one-way ticket to financial ruin.

    ⚖️ Spend Smart, Eat Smarter

    Here’s how to eat like a king without selling a kidney:

    • Pick your splurge nights: Choose one or two meals worth going all in on. Make it count.
    • Lunch specials are gold: Many fancy spots offer killer midday deals for a fraction of dinner prices.
    • Mix highs with lows: One night it’s fine dining. The next it’s tacos from a cart. That’s balance.
    • Hit up grocery stores: Grab cheese, bread, and local snacks for budget-friendly picnics with a view.
    • Airbnb it smart: Got a kitchen? Cook breakfast or dinner a few times and save your cash for the show-stoppers.

    🧠 Think Like a Traveler, Not a Tourist

    You don’t have to choose between ramen noodles and blowing $200 on steak. With a little planning, finding food while traveling can be both epic and affordable.

    🥟 Next: Where the Real Magic Happens

    Ready to level up? In the next chapter, we’re diving into markets, street eats, and those hidden gems that don’t show up on TripAdvisor, but should.

    Step 4: Explore Markets, Street Food, and Hidden Spots

    vibrant indoor market with busy crowd

    🏪 Welcome to the Soul of the City

    If you’re skipping the markets and street stalls, you’re missing the good shit. This is where the flavor lives. It’s raw, it’s real, and it’s often better than anything with a white tablecloth. Finding food while traveling means going where the locals eat, not just where the tourists Instagram.

    🍢 Eat Where the Action Is

    Ready to dive into the tasty chaos? Start here:

    • Hit the morning markets: Fresh produce, local snacks, and grandma’s secret spice mix all in one place.
    • Follow the locals: If there’s a line of hungry locals at a street cart, get in it.
    • Talk to vendors: Ask what’s best today. They’ll steer you right 99% of the time.
    • Go off-map: Wander a few blocks from the main square. The real gems rarely have a sign in English.
    • Try one weird thing: Fried scorpion? Cow tongue tacos? YOLO, baby.

    🔥 This Is Where Food Gets Fun

    Markets and street food deliver the flavor and the story. Finding food while traveling is a hell of a lot more satisfying when you’re elbow-deep in dumplings instead of waiting for a server to bring you breadsticks.

    🧐 Next: Don’t Trust Every Star You See

    In the next chapter, we’ll talk about navigating reviews like a pro and why your gut instinct matters more than that blogger with 500 emojis and zero taste buds.

    Step 5: Check Reviews, But Trust Your Senses Too

    man standing near food truck

    🧐 Stars Lie and So Do Some Bloggers

    Online reviews can save you from a bad meal or lead you into a tourist trap with pretty lighting and sad soup. Finding food while traveling means learning how to read between the lines and trust your gut, literally and figuratively.

    📲 Swipe Smart, Eat Smarter

    Use the internet, but don’t be its puppet:

    • Ignore 5-star fluff: “Best meal EVER!!!” with no detail? That’s a red flag, Karen.
    • Look at 3 and 4-star reviews: These usually give the real tea: what’s good, what’s meh.
    • Check timestamps: A rave from 2018 doesn’t help if the chef moved to Bali.
    • Use multiple sources: Google, TripAdvisor, local blogs, and food forums. Cross-check like a damn detective.
    • Trust your senses: If it smells good, looks busy, and feels right, go in. If it feels like a tourist trap, it probably is.

    🧠 Let Your Gut Have a Say

    You’re smarter than the algorithm. Finding food while traveling is part logic, part instinct, and part appetite. Trust all three.

    🌀 Next: Roll With It

    Now that you know how to sniff out solid info, it’s time to loosen the grip. In the next chapter, we’re talking about staying flexible and letting those unexpected, glorious meals find you.

    Step 6: Stay Flexible and Leave Room for Spontaneity

    view of raohe st night market arch with kanji texts and group of people

    🌪️ Loosen Your Grip, Hungry Traveler

    You can have all the apps, maps, and plans in the world, but sometimes the best bites show up when you’re not even looking. Learning how to find food while traveling means knowing when to plan, and when to say screw it and follow your cravings.

    🍽️ Say Yes to the Unexpected

    Here’s how to leave space for spontaneity:

    • Plan one meal ahead, max: Leave the rest open. Spontaneity hates a tight schedule.
    • Follow your nose: If something smells amazing down an alley, chase it.
    • Let your mood lead: Craving dumplings instead of that fancy pasta? Pivot.
    • Stay alert for local events: Street fairs, food festivals, random neighborhood BBQs, gold mines.
    • Carry snacks but stay hungry: A granola bar can save your soul between meals, but don’t ruin your appetite for the real stuff.

    🧘‍♂️ Flexibility Feeds the Soul

    Now you know how to find food while traveling without becoming a slave to your own itinerary. Trust the plan, but also trust the magic of wandering into the right place at the right time.

    Your stomach will thank you. Your stories will be better. Your Instagram? Probably smellier.

    🍴Stay Hungry, Stay Curious

    Finding food while traveling isn’t about ticking off a checklist. It’s about feeding your curiosity as much as your stomach.

    You learned how to define your taste, use tools that don’t suck, splurge without going broke, and find flavor in the messy, magical places most people skip. You know when to trust a review and when to trust your gut.

    Now go get lost. Wander into that smoky little shack with the plastic chairs. Follow the scent of grilled meat. Be the weirdo who asks the bartender where they eat.

    And hey, if this guide helped you or missed something juicy, drop a comment. I want to hear your stories and your screw-ups. That’s how we all eat better. 🍜

  • How to Book Flights (2026): The Complete Guide

    How to Book Flights (2026): The Complete Guide

    a purple and black pattern

    How to Book Flights: The Complete Guide

    A snow-covered mountain peak rising above the clouds, viewed from an airplane window with the aircraft wing in the foreground.

    Written By:

    Published On:

    Last Modified:

    Booking flights shouldn’t feel like trying to crack the Da Vinci Code while being pickpocketed. Yet somehow, it always does. Airlines play mind games, prices yo-yo like a caffeinated stockbroker, and one wrong click can screw your whole travel budget. 💸

    This is not just another list of half-baked hacks. You just landed on the real deal. An in-depth, no-BS guide on how to book flights like a seasoned travel ninja. No fluff, no fluffers.

    Flights are the first big move in any trip. Get it wrong, and you’re either broke, stuck in Newark for 12 hours, or both. Get it right, and suddenly your trip feels smooth, smart, and damn near effortless.

    I’ll break down how to book flights without losing your mind or your savings. Let’s fix this mess together.

    About the Author

    A smiling man taking a selfie while seated on an airplane, with overhead compartments and lighting visible above, contemplating how to book flights.

    I wrote this guide because I got sick of watching good people get absolutely hosed by bad flight deals. You think you’re getting a bargain, then Boom! six layovers, no legroom, and your “budget” flight cost more than your rent.

    Once upon a time, I was just another broke traveler Googling how to book flights and falling into algorithm traps. I’ve missed connections, slept on airport floors, and overpaid like an idiot so you don’t have to.

    Why me? I’ve spent many years chasing cheap flights across five continents, tweaking strategies, and teaching others how to do it without losing their soul or their sanity. I’ve helped hundreds of travelers stop flying blind and start flying smart.

    This guide is for the dreamers with tight wallets, the planners with too many tabs open, and the adventurers who want more travel for less cash. If you’ve ever typed how to book flights and ended up more confused than when you started, this one’s for you. ✈️

    Step 1: Know When to Start Searching and Booking

    A view of the air traffic control tower at Schiphol Airport in Amsterdam, with terminal buildings and airplanes on the tarmac.

    ✈️ Timing Is Everything

    You want to know how to book flights like a pro? Start with timing. Booking too early is like peaking in high school. Booking too late is financial self-sabotage.

    🧠 When to Search and When to Pull the Trigger

    Here’s how to stop throwing darts in the dark:

    💡 What You Just Mastered

    You just learned when to start hunting, when to click “buy,” and how to avoid both panic-booking and analysis paralysis. You’re not just winging it anymore.

    🌍 What’s Next

    Now that you’ve got timing down, it’s time to learn where the hell you should fly into. Up next: how to book flights by comparing airports, routes, and airlines without losing your mind.

    Step 2: Compare Airports, Routes, and Airlines

    Row of check-in counters at an airport terminal, illuminated by colorful lighting and overhead signage.

    🛬 Choose Your Battlefield

    Not all airports are created equal. Some are overpriced nightmares, others are sneaky cheap and two train stops away from where you actually want to be.

    If you want to learn how to book flights without getting played, comparing your options is key. A little extra research can save you hundreds and a whole lot of swearing at gate agents.

    🔍 How to Compare Like a Travel Ninja

    • Check nearby airports within a 100-mile radius, especially in Europe and Asia
    • Mix and match airlines. One-way with one carrier, return with another
    • Look at alternate routes that might include a short layover but save you big
    • Use open-jaw tickets if your trip starts and ends in different cities
    • Cross-check low-cost carriers that often don’t show up on major booking engines

    🧳 What You Just Nailed

    You now know how to compare routes and airports like a travel detective with a mission. You’re no longer at the mercy of the default search result.

    🔧 What’s Next

    Now that you’ve got a grip on geography and strategy, it’s time to gear up. Next, we dive into the tools that actually help you find these killer deals. Let’s talk about how to book flights using tech that doesn’t suck.

    Step 3: Use the Right Tools to Find the Best Deals

    Flight search result showing two identical direct flights from Boston (BOS) to London Heathrow (LHR) with drastically different prices, highlighting a pricing discrepancy.

    🛠️ Your Toolbox for Cheap Flights

    Knowing how to book flights is one thing. Doing it without scrolling through 47 tabs and rage-quitting? That’s a damn art form.

    You need tools that work smarter than the airline’s pricing AI. The right platforms will do the dirty work so you can sip your coffee and feel smug. 😎

    🧰 Best Tools to Find Deals Without Losing It

    • Google Flights: Fast, flexible, lets you stalk prices like an ex on Instagram
    • Skyscanner: Great for whole-month views and finding dirt-cheap global routes
    • Momondo: Finds weird little fares most others miss
    • Hopper: Tells you when to book or wait (like a psychic but for plane tickets)
    • Flight alerts: Set ‘em and forget ‘em on sites like Airfarewatchdog or Going

    🎯 What You Just Mastered

    You’ve now got the tech stack to outwit airlines and win the airfare game. No more crossing your fingers and hoping for mercy.

    🧾 What’s Next

    But wait. Before you smash that book button, we need to talk about the sneaky shit that turns a cheap flight into an expensive regret. Next up: how to book flights without getting burned by fees, fine print, or flexibility traps.

    Step 4: Watch for Fees, Fine Print, and Flexibility

    Infographic showing standard carry-on and personal item bag dimensions for airline travel, including illustrations of a suitcase and backpack.

    ⚠️ The Devil’s in the Fine Print

    So you found a $99 flight to paradise? Cool. Now check if it comes with a seat, a carry-on, and the right to breathe.

    Knowing how to book flights means reading the damn details. Airlines are masters at hiding fees like Easter eggs full of regret.

    🕵️‍♂️ How to Avoid the Hidden Traps

    • Always check if luggage is included, even a carry-on
    • Watch for change and cancellation fees, especially on budget carriers
    • Double-check the airport codes. You don’t want to fly into the “wrong” Paris
    • Compare final prices, not just the sexy headline fare
    • Look for flexible ticket options if your plans might shift

    🎒 What You Just Unlocked

    You now see past the smoke and mirrors. You’re not just chasing cheap flights, you’re chasing smart ones.

    ⏳ What’s Next

    Next, we zoom in on timing again. Because knowing how to book flights means knowing when to pull the trigger and when to wait for a better deal.

    Step 5: Decide When to Book and When to Wait

    A person's arm and hand are shown wearing a dark smartwatch, with the face of the watch visible, against the backdrop of a dark airplane window looking out at a twilight sky.

    ⏰ Timing the Kill Shot

    You’ve stalked the flights, sniffed out the fees, and now you’re frozen like a deer in the booking headlights. Pull the trigger too soon and you miss a deal. Wait too long and you pay double for a middle seat next to the bathroom.

    Learning how to book flights means knowing when to commit and when to chill. This is part skill, part guts, part Jedi mind trick.

    📅 How to Time It Like a Pro

    • Book domestic flights about 1 to 3 months in advance
    • For international, aim for 2 to 8 months out depending on season
    • If you’re flying during holidays or peak season, book earlier
    • Use Google Flights’ price history tool to spot patterns
    • Trust your gut. If it looks good and fits, snag it before it disappears

    🎯 What You Just Sharpened

    You just learned how to spot the sweet spot. You’re not panic-buying or waiting for a magical deal that doesn’t exist. You’re hunting smart.

    🤦‍♂️ What’s Next

    You’re almost a flight-booking badass. But even pros screw up. Next, we cover the common mistakes that wreck plans and drain wallets, and how to dodge them like a travel ninja.

    Step 6: Avoid Common Mistakes That Cost Time and Money

    A close-up view of a large airport departure board displaying numerous flight numbers, destinations, times, and "Delayed" or "Cancelled" statuses in red and yellow text.

    🚫 Mistakes That’ll Bite You in the Ass

    You can learn how to book flights like a boss and still trip over some rookie mistakes. It’s not always about getting the cheapest fare. It’s about getting the right one without the kind of regret that makes you scream into a neck pillow.

    These blunders cost people time, money, and sometimes their damn sanity. Don’t be that traveler.

    🔥 Flight Booking Fails to Avoid

    • Booking the cheapest flight without checking layover hellscapes
    • Ignoring time zone changes when planning arrivals and connections
    • Forgetting to double-check passport validity and visa rules
    • Using debit cards instead of credit, losing out on insurance and protection
    • Not reading the fine print on basic economy fares (aka “we own your soul” tickets)

    🧠 What You Just Outsmarted

    Now you know how to book flights without stepping into the usual traps. You’ve got foresight, street smarts, and enough edge to book with confidence and not look back.

    Your future self, sitting pretty in 34A with free snacks and no regrets, says thanks.

    🧭 So, You Wanna Fly Smart?

    You’ve learned how to book flights without selling your soul, losing your mind, or ending up stuck in an airport that smells like despair.

    You know when to search, where to fly, what tools to use, when to book, and how to dodge the dumb mistakes that bleed your budget dry.

    It’s not rocket science, but it is a game. And now you’ve got the playbook.

    If this guide helped or made you laugh while saving your travel budget, drop a comment below. If I missed something, call me out. I’m not precious.

  • Building a Travel Budget (2026): The Complete Guide

    Building a Travel Budget (2026): The Complete Guide

    a purple and black pattern

    Building a Travel Budget: The Complete Guide

    anonymous black woman standing near metro ticket machine

    Written By:

    Published On:

    Last Modified:

    Let’s be real. Blowing your savings on a two-week trip and then living off instant noodles for six months isn’t the flex you think it is.

    A smart travel budget is the secret sauce to actually enjoying your trip without spiraling into financial regret. It lets you say yes to the rooftop sangria in Barcelona and no to panic-checking your bank app every morning.

    The truth? Budgeting isn’t about being boring. It’s about being intentional, so you can have more “hell yes” moments and fewer “why did I buy that ugly souvenir” regrets.

    This is not some dry spreadsheet tutorial. This is your no-BS, comprehensive, god-tier guide to building a travel budget that works in the real world.

    Because if you want to travel often, travel well, and travel without selling a kidney, you need to get your money game tight.

    In this guide, I’ll show you how to budget without sucking the soul out of your trip. Let’s turn money stress into freedom, one line item at a time 💸.

    About the Author

    A man in sunglasses and headphones leaning casually against a column in a European plaza with historic buildings and cobblestone streets, clearly very happy with his travel budget

    I wrote this guide because I used to suck at money. I once blew my entire travel budget in Paris on wine, cheese, and a questionable cabaret show, then spent the rest of the trip surviving on hostel toast and shame.

    Over the years, I figured out how to stretch a dollar without strangling the fun. Friends kept asking how I was affording so many trips without a sugar daddy or tech salary, so I started writing it all down.

    I’ve spent the last decade hopping continents, planning thousands of dollars in adventures, and obsessively tracking how to make a travel budget work for different personalities and lifestyles.

    If you want cookie-cutter tips and beige advice, you’re in the wrong damn place. But if you want real talk, tested strategies, and a little sass with your savings, I got you.

    This guide is for the broke dreamers, the spreadsheet avoiders, the planners who love a good deal but also want to say yes to stupid-fun shit.

    Whether it’s your first big trip or your tenth, this guide is designed to help you own your budget like a boss and still have one hell of a time 🌍.

    Step 1: Know Your Overall Travel Priorities

    pexels-photo-30277082.jpeg

    🎯 Figure Out What Actually Matters to You

    Before you start tossing numbers into a spreadsheet or panic-Googling “cheap hostels in Europe,” slow the hell down. Your travel budget should reflect what you actually give a damn about, not what Instagram says is cool.

    🛠️ How to Define Your Travel Priorities Without Losing Your Mind

    Here’s how to nail down what really matters so your money goes where it counts:

    1. Pick your vibe: Do you want luxury hotels, hole-in-the-wall eats, or wild outdoor adventures? Know your vibe before you blow your budget.
    2. List your top 3 non-negotiables: Maybe it’s good coffee, a comfy bed, and one big experience like scuba diving or a cooking class.
    3. Cut the fluff: Be honest about what you don’t care about. If you’re not into nightlife, stop budgeting for overpriced cocktails.
    4. Ask “Why the hell am I going?”: Culture? Escape? Flex on your ex? Clarify your why and your spending will follow it.
    5. Match money to meaning: If something isn’t going to make your trip memorable, it probably doesn’t need to eat your cash.

    📌 Priorities Make the Plan

    When you know your travel priorities, you stop spending reactively and start budgeting with purpose. That means fewer regrets and more hell-yes moments.

    ✈️ Next: Budget the Big Four Like a Boss

    Now that your values are driving the bus, it’s time to break down the major expenses. In Step 2, we’ll dig into the big four: flights, accommodation, food, and activities, and how to estimate them without guessing like a drunk fortune teller.

    Step 2: Estimate the Big Four – Flights, Accommodation, Food, and Activities

    woman walking on pathway while strolling luggage

    💸 The Big Four Will Eat Your Wallet Alive If You Let Them

    If your travel budget were a band, flights, accommodation, food, and activities would be the diva frontliners. These four categories will swallow most of your cash, so estimating them right means you’re not crying into your hostel pillow on day three.

    📊 How to Break Down the Big Four Without Losing Your Cool

    Here’s how to size up each of the Big Four so your numbers aren’t total bullshit:

    1. Flights: Use tools like Google Flights and Hopper to track prices. Book early unless you like paying triple for the same cramped seat.
    2. Accommodation: Decide if you’re a hostel rat, hotel snob, or Airbnb addict. Compare prices across platforms and always read the damn reviews.
    3. Food: Research average meal costs for your destination. Pad your food budget if you’re a snacker or plan on eating your feelings.
    4. Activities: Prioritize 1-2 big-ticket experiences and fill in the rest with low-cost or free stuff. Museums, hikes, street food tours. Whatever gets you jazzed.
    5. Be real: Look at sample itineraries or ask travelers what they actually spent. Guesstimating blindly is how you end up broke and bitter.

    🧠 Smart Estimates Mean Less Stress Later

    Once you’ve mapped out the Big Four, your travel budget starts to feel real. It’s not perfect yet, but it’s got bones. And bones are good.

    🕵️‍♀️ Up Next: The Sneaky Stuff That Blows Budgets

    Next, we’ll talk about the hidden costs that love to ambush you when you’re distracted by gelato or gondolas. Step 3 is all about spotting and prepping for the sneaky expenses that wreck even the best-laid budgets.

    Step 3: Factor in the Hidden Costs

    red double deck bus on road

    🧾 Surprise! Your Wallet Just Got Mugged (Again)

    So you nailed the Big Four. Great job. But your travel budget is still one surprise taxi ride away from disaster if you forget about the sneaky stuff.

    🚨 Sneaky Expenses That Love to Ruin Vacations

    Here’s where travelers screw up, and how you can outsmart the bullshit:

    1. Foreign transaction fees: Your bank is probably charging you every time you tap your card. Get a no-fee travel card and stop feeding the money monsters.
    2. Transport to and from airports: That $12 flight? Amazing. The $45 Uber to get there? Not so much. Always check transit options.
    3. Luggage fees: Budget airlines will sell you a seat for peanuts and charge your soul for a carry-on. Read the fine print.
    4. Tips, taxes, and tourist fees: Some places tack on charges like they’re seasoning a steak. Don’t get caught off guard.
    5. Sick days or screw-ups: Missed trains, food poisoning, or just needing a day to hide in your room. Budget for the unexpected because life happens.

    🧠 Know the Traps So You Can Dodge Them

    When you factor in hidden costs, your travel budget becomes honest. Not sexy, but solid. And solid keeps you sane when shit goes sideways.

    🧬 Next Up: Budgeting That Actually Matches You

    Now that your numbers are closer to reality, it’s time to build a budgeting method that won’t make you want to scream. In Step 4, we’ll match your travel budget style to your actual personality so you don’t sabotage yourself before takeoff.

    Step 4: Choose a Budgeting Style That Matches Your Personality

    charming mediterranean alleyway with colorful facades

    🧠 Budgeting Isn’t One-Size-Fits-All, and That’s a Good Thing

    Some people love spreadsheets. Others break into hives at the word “Excel.” Your travel budget should fit the way you think, not force you into a system you’ll abandon halfway through Rome.

    🧩 Find Your Budgeting Personality and Make It Work for You

    Here’s how to match your style so budgeting doesn’t feel like punishment:

    1. The Spreadsheet Nerd: You get off on cells and formulas. Build a detailed tracker and color-code the hell out of it. Respect.
    2. The Envelope Lover: Go analog. Divide your cash into envelopes by category. Old-school but effective, especially in countries that still run on cash.
    3. The App Juggler: Use apps like Trail Wallet, or TravelSpend. Let your phone babysit your travel budget so you can focus on the fun.
    4. The Daily Checker: Set aside five minutes each night to log your spending. It’s low effort, high impact, and pairs well with a glass of wine.
    5. The Loose Cannon (But Trying): If budgeting feels like a straightjacket, just set a daily limit and track your total spend. It’s not perfect, but it’s better than nothing.

    🧭 Build a Budget You’ll Actually Stick To

    Choosing the right method means you’re way more likely to stay on track. A travel budget is only useful if you use the damn thing.

    🔧 Next Up: Tools That Actually Help

    Now that you’ve picked your style, let’s make it easy to follow through. In Step 5, we’ll dive into tools and tricks to help you track, tweak, and not lose your shit when plans change.

    Step 5: Use the Right Tools to Track and Adjust

    man working on laptop while woman takes notes

    🛠️ If You Can’t Track It, You Can’t Fix It

    Look, your travel budget is only as useful as your ability to keep it updated. Flying blind might feel freeing until you’re broke in Budapest wondering where your beer money went.

    📱 Tools That Make Budgeting Suck Less

    Here’s how to keep your spending in check without losing your sanity:

    1. Trail Wallet: Built by travelers for travelers. Tracks expenses in real time and works offline, because Wi-Fi isn’t always a thing.
    2. TravelSpend: Super simple, good-looking, and helps you see where your money’s bleeding out.
    3. Splitwise: Traveling with others? Use this to dodge awkward “who owes what” convos.
    4. Google Sheets: For the DIY crowd. Build a budget tracker that does exactly what you want and nothing you don’t.
    5. Notebook and pen: Seriously. If all else fails, just write it down. Old-school still works.

    📊 Track, Adjust, Repeat

    The point isn’t to micromanage every cent. It’s to know where your money’s going so you can shift gears before your travel budget crashes and burns.

    🎯 Next Stop: Save Smart, Not Sad

    You’ve got the tools. Now let’s talk strategy. In Step 6, we’ll break down how to save cash without killing the vibe or skipping the good stuff.

    Step 6: Find Smart Ways to Save Without Sacrificing Joy

    portrait of a woman by a train

    🧃 Joy > Penny Pinching

    Saving money doesn’t mean you have to travel like a monk on a juice cleanse. A smart travel budget lets you cut the crap and still splurge on what matters, like tacos, not trinkets.

    🧠 Spend Less Without Hating Your Life

    Here’s how to save cash without making your trip feel like a punishment:

    1. Hack flights like a pro: Use tools like Skyscanner, set alerts, and fly midweek or off-season. No one cares if you arrive on a Tuesday.
    2. Sleep smarter: Mix it up with hostels, guesthouses, or even house-sitting gigs. You’re there to explore, not rate the thread count.
    3. Eat like a local: Street food is cheap, delicious, and way more interesting than another sad tourist restaurant.
    4. Do free shit: Parks, street art, beaches, hiking trails, and museums with free days. Culture doesn’t always cost.
    5. Skip the tourist traps: If it involves matching shirts, a megaphone, or a waiting line that wraps around a block, it’s probably overpriced.

    🍕 Save on the Boring Stuff, Splurge on the Good Stuff

    When you save where it doesn’t hurt, you can spend where it does count. Your travel budget should feel like freedom, not a financial straightjacket.

    🎟️ Budget Like You Give a Damn

    You don’t need to be rich to travel well. You just need to stop spending like a drunk pirate with a credit card.

    A solid travel budget helps you ditch the stress, make smarter choices, and still say yes to the magic moments. The rooftop bars, the cooking class in Chiang Mai, the random ferry to somewhere weird and wonderful.

    You learned how to align your money with your priorities, break down the big stuff, dodge hidden costs, pick a budgeting style that doesn’t make you want to scream, and track it all without losing your mind.

    Basically, you’ve got the tools to travel like a badass without going broke 💥.

    If this guide helped, drop a comment below and let me know. Or tell me what I missed. Someone’s always got a smarter hack.

  • Choosing Travel Experiences (2026): The Complete Guide

    Choosing Travel Experiences (2026): The Complete Guide

    a purple and black pattern

    Choosing Travel Experiences: The Complete Guide

    duncansby stacks en ecosse paysage de fallaise dans la mer

    Written By:

    Published On:

    Last Modified:

    You didn’t spend all that money just to wait in line for a half-assed view of the Mona Lisa. You came for something real.

    The kind of travel experiences that make your spine tingle or your stomach growl or your playlist suddenly make sense. The stuff that makes a trip yours.

    But finding those moments? It’s harder than it looks. Algorithms shove you toward overpriced walking tours and cookie-cutter museum days.

    This is your trip, not a box-checking contest. So let’s cut the bullshit.

    This is your complete, no-fluff guide to choosing travel experiences that matter. It’s packed with strategies, tools, and insights to help you stop scrolling and start feeling something.

    Because when it comes to travel, doing less but feeling more is the whole damn point.

    Stick with me, and by the end, you’ll know exactly how to build a trip around the experiences that actually light you up. 🔥

    About the Author

    a man and woman taking a selfie while realizing they did a great job picking travel experiences

    I wrote this guide because I was tired of watching smart travelers waste their trips on lukewarm landmarks and overpriced “must-do” bullshit. I’ve been that person with a packed itinerary and zero stories worth telling.

    Over the years, I’ve learned how to hunt down travel experiences that actually stick with you. The kind that smell like wood-fired pizza or sound like a jazz solo in a basement bar. Not just tourist traps dressed up with filters.

    I’ve been planning, screwing up, and re-planning trips for over a decade. I’ve logged thousands of miles, eaten things I couldn’t pronounce, and helped hundreds of travelers turn their vague ideas into unforgettable days.

    This guide is for the curious, the overthinkers, and the easily overwhelmed. It’s for the people who crave meaning but also kinda want to drink wine at 2 p.m. without feeling guilty. 🍷

    If you’ve ever felt paralyzed while trying to pick what to do on a trip, or wondered if you were doing travel “wrong”, this one’s for you.

    Because travel experiences should leave you awestruck, not just exhausted.

    Step 1: Define What Types of Experiences Make You Feel Alive

    person bungee jumping over valley

    🔍 Why You Need to Know What Lights You Up

    If you don’t know what you actually enjoy, you’re gonna end up on a hop-on-hop-off bus tour wondering why you flew 4,000 miles to feel dead inside. Travel experiences only work when they hit that nerve. The one that makes you feel alive, curious, hungry, or even slightly afraid.

    Before you start Googling “things to do in [insert city here],” stop. Figure out what kind of stuff makes you grin like an idiot.

    🧭 How to Pinpoint What You Actually Care About

    1. Look at your last few “hell yes” moments: Food? Art? Getting lost in street markets? That’s your travel DNA.
    2. Check your YouTube history: If you’ve watched 15 videos on Viking ruins, maybe your trip needs more longboats and less brunch.
    3. Ask yourself what you’d do with one perfect day off: No emails, no chores. Just vibes.
    4. Scroll through your saved Instagram posts or bookmarks: There’s gold in that random photo of a Tokyo ramen shop or a Lisbon alleyway.
    5. Write a list called “Weird Shit I Love”: Could be cemeteries, vintage bookstores, or flaming cheese. Don’t judge it. Follow it.

    🎯 What You Just Did

    You just mapped out the raw ingredients for an unforgettable trip. No more blindly following “Top 10” lists written by someone who’s never left their desk. These are your travel experiences, and they should be as specific and bizarre as your Spotify algorithm.

    🔗 What’s Next: Turning Cravings into Concrete Options

    Now that you’ve got a feel for what makes your travel heart beat faster, it’s time to find the tools that’ll help you sniff those experiences out. In Step 2, we’re diving into trusted platforms that don’t suck. Let’s get you some options.

    Step 2: Use Trusted Tools and Platforms to Find Options

    close up of a person pointing at a globe

    🛠️ Why You Need Better Tools Than Google

    If you’re still typing “things to do in Rome” and clicking the first TripAdvisor link, we need to talk. The internet is a minefield of generic crap, SEO-churned sludge, and paid listings that will lead you straight to mediocrity.

    Finding legit travel experiences means knowing where the good stuff hides. Hint: it’s not page one of Google.

    🧰 Where to Actually Look for Good Sh*t

    1. Reddit: Dive into subreddits like r/solotravel or r/travel for brutally honest, first-hand recs. No filters, just facts.
    2. Instagram Geotags: Stalk the location tag, not the influencer. That weird cafe in the background? That’s your spot.
    3. Niche Blogs: Find blogs run by people who geek out on the same stuff you do. Wine nerds, ruin hunters, street food purists.
    4. Atlas Obscura: For when you want your travel experiences to involve taxidermy, Soviet relics, or sinkholes.
    5. Local Experience Platforms: Try Airbnb Experiences, EatWith, or Withlocals to find small-group stuff run by actual humans.

    🧪 What You Just Unlocked

    You now know where to dig for gold. Forget the tourist bait and start filling your list with travel experiences that don’t involve souvenir shops and slow-moving tour groups.

    🧩 What’s Next: Finding Balance Between Bucket List and You List

    Now that you’ve got options flying in hot, it’s time to sort the classics from the deeply personal. In Step 3, we’ll figure out how to mix your must-sees with the stuff that makes you weirdly giddy.

    Step 3: Mix Must-Sees With Personal Passions

    facade of the temple of ramesses ii luxor egypt

    🎭 Why You Don’t Have to Choose Between the Louvre and That Weird Niche Museum

    Just because you want to see the Eiffel Tower doesn’t mean your trip has to become a postcard collection. The best travel experiences happen when you blend the big names with the stuff that screams you.

    It’s not about skipping the must-sees. It’s about making sure they don’t steamroll your personality in the process.

    🧩 How to Mix Bucket List with Personal Bliss

    1. Pair iconic sights with personal rewards: Eiffel Tower in the morning, vinyl digging in Le Marais by afternoon.
    2. Alternate days: One day touristy, one day weird and wonderful. Keeps things fresh and keeps your sanity intact.
    3. Theme your trip days: Food day, art day, “walk until your legs hate you” day.
    4. Book one thing for the ‘gram and one thing for your soul: Your followers get their sunset shot, you get a ghost tour in an alley.
    5. Use must-sees as anchors, not chains: See the Colosseum, sure, but eat that back-alley carbonara afterward like a local god.

    🧠 What You Just Mastered

    You figured out how to blend mainstream with meaningful. Travel experiences should feel like a mixtape, not a top 40 playlist.

    🔦 What’s Next: Finding the Hidden Stuff That Hits Hard

    Next up, we’re getting off the beaten path. In Step 4, you’ll learn how to dig deeper and uncover the stuff that never makes it into glossy brochures, but should.

    Step 4: Look Beyond the Obvious for Deeper Finds

    narrow whitewashed alleyway in a sunlit old town

    🕵️ Why the Obvious Isn’t Always the Best

    If everyone’s doing it, it’s probably watered down. The most soul-stirring travel experiences usually aren’t front and center on a brochure, they’re hiding behind a dive bar, a closed gate, or someone’s grandma’s kitchen.

    Touristy spots are fine, but if you only follow the crowds, you’ll come home with the same stories as everyone else. And let’s be honest, nobody wants to hear another Eiffel Tower anecdote.

    🧙 How to Unearth the Good Weird Stuff

    1. Talk to bartenders and baristas: They know what’s cool and what’s a tourist trap wrapped in Instagram filters.
    2. Explore neighborhoods, not just landmarks: Spend time where locals live, shop, argue, and eat.
    3. Follow your senses: Smell something amazing in a back alley? Hear music from a basement? Investigate.
    4. Use offline maps to wander without Googling: Getting lost on purpose is an art form.
    5. Say yes to the unexpected: Art opening? Basement jazz club? Underground speakeasy run by a retired magician? Yes.

    🧠 What You Just Learned

    You don’t need a guidebook to find unforgettable travel experiences. You need curiosity, a bit of courage, and a willingness to veer off the damn path.

    🔍 What’s Next: Sorting Truth from Trash in Online Reviews

    Now that you know how to sniff out the deep cuts, it’s time to get savvy with research. In Step 5, we’ll break down how to read reviews without falling for the hype.

    Step 5: Read Reviews, But Know What to Filter Out

    people sitting on boat

    🧐 Why You Should Read Reviews with a Salt Shaker

    Online reviews are like Tinder profiles for travel experiences. Everyone’s trying to look hot, even when the reality is a lukewarm plate of disappointment.

    Some reviews are gold. Some are written by people who think Olive Garden is “authentic Italian.” You gotta know the difference.

    🧹 How to Separate Insight from Internet Trash

    1. Ignore 1-star meltdowns and 5-star love letters: Look for the 3s and 4s. That’s where the honesty hides.
    2. Check the reviewer’s vibe: If they complain about “too many locals” at a local spot, run.
    3. Look for repeated themes: If three people say the host made them feel like family, that’s a green flag.
    4. Watch the date: A glowing review from 2016 means nothing if the chef left and the vibe died.
    5. Use reviews to confirm your gut, not replace it: If you were excited and one grump hated it, go anyway.

    🧠 What You Just Learned

    You now know how to mine reviews for real talk and skip the noise. Travel experiences are too precious to waste on bad intel from cranky tourists.

    🌀 What’s Next: Plan Like a Rebel, Not a Robot

    Next up, we’re ditching rigid schedules. In Step 6, you’ll learn how to keep a flexible list that gives your trip structure without strangling the fun.

    Step 6: Keep a Flexible List, Not a Fixed Agenda

    women wearing activewear doing stretching on a cliff

    🧘 Why Rigidity Kills the Vibe

    Planning every second of your trip is a great way to miss the best part. The magic of travel experiences lives in the unexpected, the wrong turn, the long lunch, the stranger who hands you a flyer to something wild.

    You’re not running a boot camp. You’re on an adventure. Loosen your grip a little.

    📋 How to Plan Just Enough Without Smothering the Fun

    1. Make a “hell yes” list, not an hour-by-hour plan: Know what you want to do, not when exactly you’ll do it.
    2. Leave space every day: One unscheduled afternoon can turn into your favorite memory.
    3. Batch locations, not moments: Group stuff by neighborhood, not by time slot.
    4. Expect delays, and be cool about them: Trains run late. Gelato lines get long. Roll with it.
    5. Say yes when the plan goes off-script: If someone invites you to a backyard concert or an underground dinner party, you say yes. Always.

    🧠 What You Just Learned

    You don’t need a rigid plan. You need a loose framework that lets the best travel experiences sneak in through the side door.

    Let the list guide you, not chain you to your phone.

    🏁 What’s Next: Wrap It All Up with a Damn Good Plan

    Now that you’ve built your travel experience arsenal, it’s time to pull it all together. Let’s head to the conclusion and talk about how to actually use all this without burning out or losing your mind.

    🧳 Make It Yours or Why Bother

    You just built a way better trip than most people ever will. No tour buses. No “meh” museums. Just travel experiences that actually mean something to you.

    You learned how to figure out what makes you tick, find the weird and wonderful, dodge basic tourist traps, and keep your plans loose enough to say yes to whatever the hell shows up.

    This guide wasn’t about perfection. It was about building a trip that feels like yours from the inside out.

    Now I want to hear from you. What did this guide spark? What’s missing? Drop your thoughts below. I read every single one. 👇

  • Choosing a Travel Home Base (2026): The Complete Guide

    Choosing a Travel Home Base (2026): The Complete Guide

    a purple and black pattern

    Choosing a Travel Home Base: The Complete Guide

    charming outdoor cafe at hotel agli alboretti

    Written By:

    Published On:

    Last Modified:

    So you’ve finally picked a country, and now you’re knee-deep in travel destination research, asking yourself the eternal question: Where the hell do I stay?

    Your “home base” is more than a place to sleep. It shapes your mornings, dictates your energy, and decides whether you’re sipping espresso in the piazza or rage-scrolling train timetables from a bus stop in the middle of nowhere.

    Choose wrong and you’re stuck spending half your trip commuting beside a sweaty guy eating egg salad with his hands. Choose right and the whole journey flows like a local pouring wine at lunch. 🍷

    This isn’t just another blog post. It’s a complete guide to choosing the right travel home base for your adventures.

    The location you sleep in affects your time, your mood, and your wallet. Yet most travelers skip this part during their travel destination research, then wonder why their trip feels like a logistical nightmare.

    Here’s the fix. This guide will teach you how to pick a spot that works for you: central, connected, and completely vibe-checked.

    About the Author

    a man and woman taking a selfie while enjoying how well they picked a travel home base

    I wrote this guide because I got sick of hearing the same horror story from smart travelers: “We picked the cutest Airbnb and spent three hours a day just getting to the city center.” I’ve made the same dumb mistake, back when my travel destination research was basically just scrolling through Instagram and praying.

    After many years of backpacking, misadventuring, and running a travel business, I’ve learned the hard way that where you sleep changes everything. I’ve stayed in mountain huts, city hostels, five-star hotels, and one unforgettable night on a ferry floor next to a guy who snored like a dying goat.

    People listen to me because I actually do this stuff. I’ve helped thousands of travelers build smarter trips that don’t suck the life out of their legs or wallets.

    This guide is for the curious traveler who wants more from a trip than box-checking and bus-hopping. If you’re tired of vague advice and want real tools for your travel planning timeline, you’re in the right place. 🧭

    Step 1: Understand What a “Home Base” Really Means

    enchanting castle in bilbao spain

    🧠 What the Hell Is a Travel Home Base?

    Before you can pick the right one, you need to actually know what the hell a travel home base is. It’s not just where you crash at night, it’s the launchpad for your whole damn adventure.

    This spot becomes your anchor, your morning coffee zone, your late-night stumble-back HQ. If you screw this up, your trip turns into a logistical mess with more stress than fun.

    🛠️ How to Wrap Your Head Around It

    Here’s how to really get what a travel home base is and why it matters:

    • Think of it like a backstage pass. It gives you access to the stuff you came to see, without waiting in line every morning.
    • It’s where you drop your bags and recharge. If it’s not comfortable or convenient, you’ll burn out fast.
    • You want somewhere that matches your vibe. Party animal? Book near the action. Zen seeker? Pick peace and quiet.
    • Avoid spots that are “close-ish” to everything. That usually means they’re close to nothing.
    • Picture your mornings and evenings. Will you be climbing hills with luggage? Stuck on slow trains? That’s your real itinerary.

    🧳 Why This Step Matters

    Understanding the role of your travel home base saves you from travel fatigue, wasted money, and the kind of cranky mornings where nothing feels fun. It sets the tone for everything else.

    🚉 Up Next: Get Smart About Location

    Now that you get what a home base really is, it’s time to get strategic. In Step 2, we’ll break down how to find one that’s central, well-connected, and won’t make you curse Google Maps before breakfast.

    Step 2: Look for Centrality, Connectivity, and Convenience

    london underground train at waterloo station

    📍Why Location Isn’t Just a Buzzword

    Your travel home base can be beautiful, cheap, and filled with charm, and still completely suck. If it takes 90 minutes to get anywhere, you’ll spend more time on buses than actually experiencing the place.

    You want centrality, connectivity, and convenience. Not in theory, but in the actual, boots-on-the-ground, “can I get to stuff easily without losing my mind” kind of way.

    🚦How to Nail the Right Location

    Here’s how to make sure your travel home base isn’t in the middle of nowhere with a view of nothing:

    • Check the map, not the marketing. Listings lie. “Close to the action” could mean a 45-minute death march uphill.
    • Look for transit hubs. Nearby metro, tram, or train stations? Gold. Ubering everywhere adds up fast.
    • Time your routes. Literally use Google Maps to see how long it takes to get to key places from your stay.
    • Walkability matters. If you can grab breakfast, a coffee, and catch a bus within 5 minutes, you’re golden.
    • Avoid scenic isolation. That cliffside villa? Gorgeous. Also one landslide away from ruining your whole trip.

    🗺️ Why This Step Saves Your Sanity

    Central, connected spots mean less frustration, more spontaneity, and no more missing out because you’re stuck on a delayed regional train. The right travel home base makes everything easier.

    🧩 Up Next: Make It Match Your Trip

    Now that you’ve got location and logistics locked down, it’s time to zoom in. In Step 3, we’ll figure out how to pick a base that fits your actual plans, not just the travel brochure version of your trip.

    Step 3: Consider Your Daily Plans and Priorities

    scenic view of grand canal in venice italy

    🕶️ Your Itinerary Should Shape Your Base

    Not all trips are created equal. If you’re hitting sunrise hikes, late-night jazz clubs, and museum marathons, your travel home base better keep up with your chaos.

    Choosing where you stay without thinking about your daily plans is like packing a tux for a beach trip. Looks sharp, totally useless.

    ✅ How to Align Your Base With Your Days

    Here’s how to make sure your base supports your actual trip and not some imaginary travel fantasy:

    • List your must-do spots. Then plot them on a map. If they’re all in the same zone, that’s your area.
    • Match your rhythm. Night owl? Stay where bars don’t close at 9. Early riser? Avoid neighborhoods that wake up at noon.
    • Consider return trips. If you’ll be coming back for naps or outfit changes, proximity matters a lot more.
    • Think about your feet. If your plan includes a ton of walking or biking, base yourself somewhere flat and accessible.
    • Factor in fatigue. Ambition fades fast. If everything’s far, you’ll start skipping stuff. And that sucks.

    🧭 Why This Step Keeps You On Track

    When your travel home base works with your priorities, your trip flows. You hit more of what matters and spend less time chasing your tail or rage-hailing taxis.

    🌆 Up Next: Vibe Check and Street Smarts

    Now that you’ve lined your base up with your plans, it’s time to look deeper. In Step 4, we’ll size up different neighborhoods by their energy, character, and whether they feel like a place you’d actually want to walk home to at midnight.

    Step 4: Compare Neighborhoods or Areas Based on Vibe and Safety

    small yard with flowers by house in town

    🎭 Vibe and Safety Aren’t Optional

    A good travel home base should feel like home… if your home had better food, cooler people, and didn’t smell like Febreze. But it also needs to not feel like you’re going to get mugged on your way back from dinner.

    The right neighborhood has energy that fits your style and streets that feel safe at midnight. Because no sunset view is worth sleeping with one eye open.

    🧩 How to Find the Right Fit

    Here’s how to size up an area before committing:

    • Google the hell out of it. Look at blogs, forums, and Reddit. People will tell you straight if a place is sketchy or just misunderstood.
    • Use Street View. If every storefront has bars on the windows and zero humans in sight, maybe skip it.
    • Search for nightlife, cafés, or markets. A lively area usually means it’s safe enough for locals to hang around.
    • Check crime maps or expat groups. They’re not foolproof but can help you avoid obvious bad calls.
    • Ask yourself: “Would I want to walk here drunk?” If the answer is no, move on.

    🛑 Why This Step Keeps You Sane

    You’ve already mapped your trip. Now make sure your travel home base doesn’t kill the vibe or make you clutch your keys like Wolverine every night.

    💰 Up Next: The Price of Convenience

    You’ve got a spot that matches your energy and feels safe. In Step 5, we’ll figure out how to balance cost with comfort and location so you’re not blowing half your budget just to sleep near decent tacos. 🌮

    Step 5: Balance Cost With Location and Comfort

    bunk beds with drawers

    💸 Why Price Isn’t the Whole Story

    Yeah, budget matters. But choosing the cheapest bed in the city and calling it your travel home base is like picking a surgeon because he offers coupons.

    A few bucks saved per night can cost you hours in transit, sketchy vibes, or paper-thin walls next to a couple loudly discovering each other at 2 a.m.

    🧮 How to Spend Smart, Not Stupid

    Here’s how to keep your money working for you without tanking comfort or convenience:

    • Decide your “non-negotiables.” Wi-Fi, air conditioning, walking distance to food? Know what you need before filtering by price.
    • Look at the total cost, not just the nightly rate. Factor in taxis, transit, or your sanity if the place is a pain to reach.
    • Check what’s included. Free breakfast or kitchen access can save serious coin if you’re on a tight budget.
    • Be flexible on room type. A private room in a hostel might cost less than a grim hotel in the same area and feel way nicer.
    • Avoid “too good to be true.” If it looks amazing and is dirt cheap, there’s probably a catch. Mold, noise, haunted energy… something.

    💼 Why This Balancing Act Pays Off

    Finding the sweet spot between price, location, and comfort is what turns a place to sleep into a legit travel home base. You save time, stay relaxed, and don’t dread going “home” every night.

    🔍 Up Next: Don’t Trust Everything You Read

    Now that you’ve figured out how much to spend and what you need, it’s time to dig deeper. In Step 6, we’ll talk about how to read reviews like a pro traveler so you can spot red flags before you check in and regret everything.

    Step 6: Read Reviews With a Traveler’s Eye

    vintage wooden hotel with woman seated outside

    🕵️ Why Reviews Are Your Sneak Peek

    You wouldn’t buy a car without checking if the brakes work. So why would you book a travel home base without seeing what other poor souls have lived through?

    Reviews are the receipts. But you have to know how to read between the lines, because not all complaints are created equal.

    🔍 How to Spot the Truth in Reviews

    Here’s how to read reviews like a seasoned traveler, not a wide-eyed rookie:

    • Ignore the drama queens. One-star reviews from people angry about “too many locals” or “not enough English” say more about the guest than the place.
    • Scan for patterns. If three people mention paper-thin walls, believe it. If one guy complains about the color of the curtains, skip it.
    • Search keywords. Use CTRL+F for “noise,” “wifi,” “bed,” and “location” to find what actually matters to you.
    • Check recent reviews first. That glowing post from 2018 is useless if the place fell apart during the pandemic.
    • Watch out for overhyped vibes. If everyone says it’s “super cute” but no one mentions comfort, you might be sleeping in a Pinterest board.

    📝 Why This Step Sharpens Your Gut Instinct

    Learning how to read reviews properly means fewer nasty surprises and more hell-yes moments when you show up. A strong travel home base starts with knowing what you’re walking into.

    🧳 Up Next: Wrap It All Up

    You’ve now got the full toolkit. Next, we’ll pull it all together so you can lock in a home base that feels like it was made for your trip.

    🧭 Pick Smart, Sleep Better, Travel Easier

    A great travel home base is part art, part science, and a little bit luck. But mostly, it’s knowing what the hell you’re doing before you hit “Book.”

    You’ve learned how to pick a spot that fits your plans, cuts down the chaos, and doesn’t leave you stranded in some picturesque purgatory an hour from life. You know what to look for, what to skip, and how to spot BS from a mile away.

    Smart travelers don’t just wing it. They plan like it matters, because it does.

    Got thoughts? Drop a comment and tell me what helped, what sucked, or what I missed. I read them all, especially the spicy ones. 🔥

  • Travel Planning Timeline (2026): The Complete Guide

    Travel Planning Timeline (2026): The Complete Guide

    a purple and black pattern

    Travel Planning Timeline: The Complete Guide

    close up og pins in a world map

    Written By:

    Published On:

    Last Modified:

    Planning a trip should feel like the beginning of an adventure, not a slow descent into spreadsheet hell. But let’s be real, screw up your timing, and your “dream trip” becomes a chaos casserole of missed deals and bad hostels.

    Europe doesn’t wait around for indecisive travelers. Want a room in Munich during Oktoberfest? Better not blink.

    This Travel Planning Timeline is your backstage pass to getting it all right. It’s the most no-BS, step-by-step breakdown of how to time your travel moves like a seasoned pro.

    We’re talking real milestones, no fluff, and just enough sass to keep things spicy. Whether you’re booking a backpacking loop or planning your honeymoon, you’ll know exactly when to hit “confirm.”

    Because winging it sounds cool until you’re sleeping in a train station. Let’s make sure that doesn’t happen.

    Here’s how to plan smarter, stress less, and actually enjoy the ride. I hope you enjoy this Travel Planning Timeline.

    About the Author

    a person sitting in a chair looking out a window thinking about their travel planning timeline

    I wrote this guide because I was once that dumbass refreshing flight prices at 2 a.m. and wondering why my dream trip was turning into a logistical nightmare. Planning a trip shouldn’t feel like assembling IKEA furniture with missing instructions. That’s why I wrote this Travel Planning Timeline.

    Over the years, I’ve helped thousands of travelers plan smarter and screw up less. I’ve led tours, booked clients across six continents, and yes, I’ve even survived booking Paris in August without crying.

    This guide is for anyone who’s ever said “I’ll figure it out later” and paid the price. It’s for the overthinkers, the procrastinators, the checklist lovers, and the “I just want it to go smoothly” crew.

    Whether you’re plotting a gap year, a revenge trip, or just trying to make the most of your PTO, I got you. Grab a coffee or a cheap bottle of red and let’s get your timeline dialed in. 🍷

    6+ Months Out: Set Your Foundation

    logs used as boardwalk posts

    🌍 Dream It Before You Screw It Up

    Six months out is when you plant the damn seeds. This is the moment where the trip still smells like potential and none of your friends have booked the same week for their wedding yet.

    This is where you sketch the outlines of your adventure without committing to the whole mural. Think big picture. Are you chasing cherry blossoms in Kyoto or beach-hopping through Croatia? Nail down your travel dates, double-check work time off, start budgeting like an adult, and research the “hell yes” destinations that give you goosebumps. Bonus points if you make a vision board and don’t tell anyone.

    🧠 Lock In the Non-Negotiables

    1. Decide your travel window and block it on your calendar like it’s a damn sacred ritual.
    2. Set a rough budget. Be honest. Don’t pretend you can stay at a five-star hotel on a beer budget.
    3. Research weather, festivals, and peak season insanity in your dream spots. Know what you’re walking into.
    4. Start tracking flight prices. Use Google Flights or Hopper and let them do the stalking for you.
    5. Check your passport. If it expires in less than six months after your return, you’re already screwed.

    🧳 You Just Laid the Groundwork

    You’ve got your dates, a skeleton itinerary, and a general idea of where your money is going. Congrats, you’re now more organized than 90% of travelers out there.

    ✈️ Ready to Commit

    Next up: three to six months out. That’s when the real decisions start dropping: flights, big-ticket events, maybe even locking in your Machu Picchu permits. Shit’s about to get real.

    3 to 6 Months Out: Make the Big Decisions

    young diverse lost couple finding route in map

    🛫 Book the Stuff That Sells Out

    Welcome to the danger zone. This is when dream trips die because you waited too long and now your “cute Airbnb” is a basement near the train tracks.

    If you’re going to Oktoberfest, Glastonbury, or running with bulls like a maniac, you book it now or you don’t go. Same goes for flights before they start acting like crypto prices. Lock in your accommodations for high-demand spots, reserve once-in-a-lifetime experiences (looking at you, Inca Trail), and start watching visa and vaccine requirements like a hawk. Also, tell your boss. You’d be surprised how many people forget that part.

    🏨 Reserve the Irreplaceables

    1. Book your international flights. Prices creep up fast. Do it before you regret it.
    2. Reserve lodging in high-traffic areas. Charming and cheap places disappear quick.
    3. Lock in any required permits or tickets: national parks, trains, events. No, you can’t just show up.
    4. Check entry requirements: visas, vaccinations, and anything that’ll screw you at the border.
    5. Grab travel insurance. Because nothing says fun like a medical bill in a foreign language.

    🎯 You’re Past the Point of No Return

    You’ve made the grown-up decisions. Big stuff is booked. Your trip’s skeleton is now fully upright and walking.

    🧾 Time to Dial It In

    Next, we zoom into the juicy details. One to three months out is when you build the actual itinerary, start locking in transport, and make sure your plans don’t contradict themselves. Let’s make it all fit together without losing your mind.

    1 to 3 Months Out: Lock in the Details

    photography of brown and grey concrete building under white sky during daytime

    🚆 Make It Make Sense

    This is when your trip goes from “a fun idea” to “holy hell this is happening.” It’s also where sloppy planning turns a vacation into a logistical dumpster fire.

    Now’s the time to connect the dots. Book your trains, buses, and ferries so you don’t end up stuck in some forgotten depot with a bag of chips and no Wi-Fi. Reserve tours, restaurants, or anything that needs planning ahead. Start building your itinerary like a loose puzzle, not a prison sentence. Download offline maps and apps like you’re prepping for the travel apocalypse. Double-check your documents and make sure your passport isn’t hiding a nasty surprise.

    📅 Stitch It All Together

    1. Reserve transportation between cities. Rail passes, flights, ferries, get it sorted.
    2. Pre-book popular tours and activities. Think Colosseum, cooking classes, or anything “skip-the-line.”
    3. Build a flexible itinerary. Slot in plans but leave space for wandering and wine.
    4. Download essential apps: Google Maps offline, currency converters, translator tools.
    5. Back up your documents. Cloud, email, photocopies, don’t tempt fate.

    🧠 You’ve Got a Working Plan

    Congrats, your trip now has a spine and maybe a few sexy abs. You’re no longer winging it, but you’ve left room for magic.

    🔍 Double-Check Before You Jet

    Next stop: two to four weeks out. That’s when you fine-tune everything, confirm what you booked, and catch the tiny details that love to blow up last minute. Let’s keep the chaos at bay.

    2 to 4 Weeks Out: Prep and Confirm

    pexels-photo-2305761.jpeg

    📞 Confirm or Cry Later

    This is when the anxiety dreams start. Did you actually book that hotel or just think about booking it while half-asleep with Netflix on?

    You’re two to four weeks out, which means it’s time to play travel detective. Confirm every damn thing: flights, hotels, tours, train tickets. Print it, screenshot it, tattoo it if you must. Notify your bank so they don’t think someone stole your card in Lisbon. Buy travel-sized stuff, make a packing list, and remember: no one needs six pairs of shoes. Also, figure out your phone situation unless you enjoy roaming charges that make you weep.

    📋 Do a Pre-Trip Audit

    1. Confirm all bookings: flights, hotels, activities, transport. Seriously, double-check.
    2. Notify your bank and set up international access if needed. Avoid that “card declined” drama.
    3. Make a packing list. Start setting aside essentials you don’t want to forget.
    4. Handle your phone plan. Buy a SIM card or eSIM, or unlock your phone if it’s chained to a carrier.
    5. Review your itinerary. Look for conflicts, gaps, or that one day you accidentally planned zero meals.

    ✅ You’re Almost Go-Time Ready

    By now, everything should be locked in tighter than airport security. You’ve dodged the rookie mistakes and prepped like a damn legend.

    🎒 Time to Pack Like a Pro

    Next up: one week out. That’s when the bags get packed, your documents get triple-checked, and you officially start sweating the small stuff. Let’s finish strong.

    1 Week Out: Final Checks and Packing

    blue travel luggage

    🧳 Pack It or Panic

    One week out and it’s starting to feel real. This is the final stretch where excitement meets a sudden, irrational fear that you’ll forget underwear.

    It’s time to pack smart, not like you’re prepping for exile. Lay out your gear, then cut it in half. Print your travel docs and stash backups in your bag and your brain cloud. Confirm airport rides, check the weather again, and for the love of snacks, don’t forget adapters. This is also your last chance to test your gear. Yes, that “travel pillow” might actually suck.

    📦 Lock It Down

    1. Pack your bag and wear your shoes around the house if they’re new. No blisters in Barcelona.
    2. Double-check the weather and adjust your packing so you don’t freeze or sweat like a beast.
    3. Print your tickets, confirmations, and a hard copy of your itinerary. Tech dies. Paper doesn’t.
    4. Set up airport transport and leave buffer time like a paranoid genius.
    5. Charge all your devices and throw in a power bank. Your phone is your lifeline, not a paperweight.

    🔒 You’re in the Final Countdown

    You’re packed, prepped, and one minor panic attack away from wheels up. This is what calm confidence tastes like. Kind of like cheap wine, but earned.

    ✈️ Tomorrow, It Gets Real

    Next: 24 hours to go. We’ll go over your last-minute checklist, what to do before you lock the door, and how to channel your inner airport ninja. Let’s bring it home.

    24 Hours to Go: Get Ready to Leave

    closed up photography of two iphones

    🛫 Don’t Blow It at the Finish Line

    You made it. One more sleep before liftoff and now’s not the time to get cocky or forget your damn passport in the sock drawer.

    This is your pre-launch sequence. Check in for your flight. Weigh your bags so you don’t pay $75 to fly your fifth pair of jeans. Empty the fridge, take out the trash, and set your out-of-office like a boss. Put your passport, wallet, and boarding pass in a spot so obvious even your half-asleep self can find them. Go to bed early if you can, or at least stop watching TikToks by 2 a.m.

    ✅ Your Final Pre-Trip Moves

    1. Check in online and screenshot your boarding pass. No one trusts airline apps at the gate.
    2. Lay out your airport outfit. Comfortable, layered, and without a belt if you hate TSA.
    3. Clear perishables, lock windows, and text your mom if she’s the worry type.
    4. Set an alarm. Then set two more. Morning brain is not to be trusted.
    5. Put all essentials in your carry-on: passport, meds, chargers, and your “I’m not a tourist” playlist.

    🎉 You’re Cleared for Takeoff

    The bags are packed. The checklist is checked. You’re about to walk out the door like a damn legend.

    Now let’s wrap this thing up and make sure you know exactly what to take away from it all. Time to go.

    🧭 Your Calendar Is Now Your Co-Pilot

    Planning a trip shouldn’t feel like filing taxes during a caffeine crash. But yeah, without a solid timeline, it turns into chaos real fast.

    You walked through the whole damn journey from “maybe I’ll go somewhere” to “holy hell, I’m on the plane.” Flights, stays, visas, shots, backups—it’s all in there.

    The key? Start early, break it up, and don’t try to do everything in one night while half-drunk on boxed wine. Trust me. I’ve tried.

    Need to double-check your list? This checklist from Drift Cville lays it out easy. Or grab Hippie in Heels’ version if you want it with a side of real talk. For the Type-A souls, WeGetOutOfTown’s printable timeline is your new best friend.

    If something in this guide didn’t hit right, tell me. If something was missing, yell it into my inbox. I don’t bite. Usually.

  • Defining Your Travel Priorities (2026): The Complete Guide

    Defining Your Travel Priorities (2026): The Complete Guide

    a purple and black pattern

    Defining Your Travel Priorities: The Complete Guide

    person mountain climbing

    Written By:

    Published On:

    Last Modified:

    You’ve been Googling “planning a trip” for hours and still don’t know if you should be chasing waterfalls in Iceland or drinking wine in Lisbon. Welcome to the mind-numbing paralysis of choice, my friend.

    The truth? Most people plan trips completely backwards. They pick a place that looks sexy on Instagram, then scramble to justify why they’re going.

    But travel isn’t a damn checklist. It’s a mirror. And if you don’t know what you actually want out of a trip, you’re just spending a lot of money to stay confused in a different time zone.

    This no-BS guide is all about defining your travel priorities so you can stop wasting time, money, and PTO on trips that don’t fit.

    We’ll help you figure out the why before the where, and steer you toward experiences that don’t just look good in photos but feel good in your bones.

    By the end, you’ll have a clear vision for your travels, and the perfect foundation for building your itinerarybudgethome base, and everything else in between.

    Let’s cut the crap and design trips that actually mean something.💥

    About the Author

    a man and woman taking a selfie in front of a pyramid after having successfully taken part in defining your travel priorities

    I used to plan trips the same way I shop when I’m stoned. Aimlessly, irrationally, and usually with some regret.

    That’s how I found myself in Berlin on a Tuesday, sobbing into a cold currywurst, wondering how the hell I flew 5,000 miles just to feel completely lost.

    On paper, the trip looked perfect: great sights, cool cafes, and a tight itinerary. But none of it actually meant anything to me.

    Because I hadn’t done the one thing that matters before booking a flight. I never stopped to think about what I really needed from the trip.

    So yeah, this guide exists because I was that guy. The one spending thousands of dollars to escape something. I’m not sure what.

    Defining my travel priorities saved my ass. It stopped me from planning Instagrammable breakdowns and helped me build trips that actually fed my soul instead of just draining my bank account.

    I’ve spent over a decade on the road. Sometimes solo and broke, sometimes fancy and fed, sometimes sleeping in train stations or drinking champagne in castles.

    I’ve built itineraries for wide-eyed rookies, overwhelmed honeymooners, and friends calling from train stations crying into croissants.

    People always ask where to go. I ask why. That’s where the real trip begins.

    Defining your travel priorities is the difference between a vacation you forget and a journey you remember for the rest of your damn life.

    So why listen to me? Because this isn’t theory. I’ve been in the trenches. I’ve made the mistakes. And I’ve helped thousands of others avoid them.

    This guide is for anxious overthinkers, wanderlust junkies, spreadsheet nerds, and people who just realized they booked a whole trip but don’t really want to go.

    If that’s you, kick off your shoes, pour something strong or sweet, and let’s figure this out together. ✌️

    Step 1: Define Why You’re Taking This Trip

    waterfall on rocks

    🎒 Don’t Pack Your Bags Without This

    Before you start flirting with flight deals or impulse-buying packing cubes, hit the brakes. If you skip this step, you’re basically throwing darts at a map and hoping it heals your soul.

    Defining your travel priorities gives your trip purpose, direction, and a reason to exist beyond looking cool in photos. It’s the anchor for everything that comes next. From your travel planning timeline to your budget, itinerary, and even the snacks you stash in your backpack.

    🧭 Get Specific or Get Lost

    Here’s how to cut through the noise and figure out why the hell you’re going anywhere:

    • Pick your vibe: Do you want peace and solitude or chaos with cocktails? Be honest.
    • Set your pace: Is this a slow-burn getaway or a sprint across six countries and fourteen museums?
    • Name your non-negotiables: What three experiences would make this trip unforgettable?
    • Feel your feels: Are you running away from something or toward something?
    • Know your limits: You can’t see Japan, Bali, and New Zealand in one trip unless you’re Doctor Strange.

    When you define your “why,” the rest gets easier. It filters your options so you’re not lured into someone else’s dream trip.

    🎯 Purpose Makes Everything Easier

    You’re not here to check boxes. You’re here to create memories you actually give a damn about. When you know your priorities, picking where to go, how to get around, or what to splurge on becomes a hell of a lot easier.

    🛤️ From Why to What

    Now that your purpose is clear, let’s get real about what kind of trip matches your vibe. Are you craving food tours, jungle hikes, rooftop bars, or all of the above? We’ll cover that in the next section on choosing travel experiences, so you can start building a trip that feels like you, not some filtered version of what travel is “supposed” to be.

    Step 2: Choose the Type of Trip That Fits Your Current Life

    family enjoying sunset on sandy beach

    📅 Real Life Doesn’t Pause for Vacay

    You’ve got job shifts, family drama, maybe a pet that gets anxious. Your trip has to fit into your life, not the other way around. Timing is everything.

    🛠️ How to Pick What Works For You

    1. Check your schedule: Got a week or two? Maybe don’t go halfway around the world unless you’re cool with jet lag for days.
    2. Pick your travel buddies: Solo, couple, crew, or your weird cousin? Make sure everyone’s on the same vibe.
    3. Match your budget bracket: Roughing it in a tent or splurging on boutique stays? Set a realistic number and own it.
    4. Factor in responsibilities: Kids, pets, work emails—plan around them unless you want callbacks from your boss.
    5. Consider your energy level: Ready for long days of hiking or do you want brunch and museums? That’s your trip tone.

    🧩 What You’ve Just Nailed

    You’re no longer dreaming in a vacuum. You’ve shaped a trip that fits your life, your wallet, your people and your pace. That’s solid groundwork.

    ⏭️ What’s Coming Up

    Next we dive into Step 3: Match Your Travel Style to Your Needs and Values. That’s where you shape the vibe, activities and soul of your trip.

    Step 3: Match Your Travel Style to Your Needs and Values

    a woman looking at a world map

    🧬 Why Your Style Matters

    A trip without a matching style is like wearing ski boots to the beach. Sure, it technically works—but you’re gonna be cranky fast.

    Your travel style should reflect what actually lights you up, not what TikTok says is cool this week. Otherwise, you’ll spend your “dream trip” wishing you were somewhere else.

    🎛️ Find the Style That Fits You

    1. Introvert or extrovert? If people drain you, don’t book a hostel dorm and a bar crawl itinerary.
    2. Need structure or freedom? Love lists and plans? Embrace spreadsheets. Prefer to wing it? Build in room for chaos.
    3. Luxury or grit? Boutique hotel with a rooftop pool or hammock in the jungle? Know your comfort threshold.
    4. Cultural immersion or full recharge? Are you hunting for meaning or just trying to not scream at coworkers for a week?
    5. Values check: Care about sustainability, local businesses, slow travel? Let that shape where and how you spend.

    🧠 What You’ve Learned

    Your trip should match who you are and what you care about, not what some influencer thinks you should want. Otherwise, it’s just another filtered fantasy with a side of regret.

    👯‍♂️ What’s Next

    In Step 4, we get into the glorious chaos of other humans. Because who you travel with can either elevate your soul or make you fake a sprained ankle to escape.

    Ready? Let’s talk about them.

    Step 4: Consider Who You’re Traveling With

    group of people walking beside the road

    🧑‍🤝‍🧑 Choose Your People, Choose Your Trip

    The people you travel with can make or break the entire damn thing. It’s not just about who’s fun. It’s about who can roll with you when things get weird, hot, or delayed in a sketchy bus station.

    Just because you like someone doesn’t mean you should travel with them. That includes partners, besties, siblings, and your favorite yoga buddy who’s never left the state.

    🔍 How to Vet Your Travel Crew

    1. Discuss expectations early: Fancy dinners or street tacos? Sunrise hikes or blackout nights? Get aligned.
    2. Talk money: If one of you’s on a champagne budget and the other’s on gas station sandwiches, it’s gonna get awkward fast.
    3. Know your roles: Is someone the planner? Who books stuff? Who’s the “let’s just see what happens” wildcard?
    4. Test it first: A weekend trip can reveal more than ten dinner hangouts ever will.
    5. Make a breakup plan: Sometimes you gotta split for a day or two so no one gets stabbed over museum fatigue.

    💡 What You’ve Just Learned

    Choosing your travel crew is part chemistry, part logistics, and part survival strategy. Good travel partners respect your vibe and don’t lose their minds when the Wi-Fi dies.

    ⏭️ What’s Coming Up

    In Step 5, we’re digging into budget and time. Because no matter how chill your crew is, if you don’t match money and schedules, you’ll all end up stressed, broke, or both.

    Step 5: Align Your Budget and Time With Your Goals

    banknotes and coins on brown wooden surface

    💸 Don’t Plan Champagne Dreams on a Beer Budget

    You can’t fly first class for two weeks on a ramen budget unless you win a game show. Same goes for time. Cramming five countries into seven days isn’t a trip, it’s a sprint through exhaustion.

    You’ve got to match your money and your calendar to the kind of trip you actually want. Otherwise, you’ll either overspend or burn out before you hit day three.

    🧮 How to Make It All Add Up

    1. Start with your total budget: Be brutally honest. What can you actually afford, including food, transport, fun, and fuck-ups?
    2. Break it down daily: Divide your budget by trip length. That’s your daily allowance. Don’t blow it all on day one.
    3. Factor in time zones and recovery: A 10-hour flight eats two days with jet lag. Build in breathing room.
    4. Budget for spontaneity: Leave room (money and time) for the “screw it, let’s do it” moments.
    5. Match cost to priorities: If you care about food, splurge on meals. If you just want sunsets and silence, skip the fancy hotel.

    💡 What You’ve Just Learned

    You’ve figured out how to build a trip that your wallet and your PTO can actually handle. When your budget and schedule align with your goals, your trip runs smoother and feels a hell of a lot better.

    ⏭️ What’s Coming Up

    In Step 6, we get even sharper. You’ll learn how to prioritize what really matters on this trip, so you can stop cramming your itinerary like a hungover college student before finals.

    Step 6: Prioritize What Matters Most on This Trip

    greek presidential guard ceremony in athens

    🧭 Don’t Let Time and Money Run the Trip

    Here’s the truth most people ignore: your trip is only as good as your budget and your time allow. Blow either, and it’s stress, regret, and credit card bills that haunt you like a bad Tinder date.

    Too many travelers build dream itineraries without checking their bank accounts or their PTO balance. That’s not wanderlust. That’s delusion.

    💼 How to Plan Like You Mean It

    1. Set a real budget: Total up what you can spend, not what you wish you had. Then subtract 10 percent for surprises and late-night beer decisions.
    2. Figure your time per stop: Don’t rush. A three-city trip in eight days sounds sexy until you’re spending half of it on trains and check-ins.
    3. Match pace to purpose: If the goal is rest, don’t stack every minute. If it’s an adventure, plan for recovery days unless you like limping.
    4. Use travel calculators: Plug in transport, food, and daily costs so you don’t have to guess. Wanderlog and TravelSpend are solid tools.
    5. Invest where it matters: Spend more on what brings you joy. Cut back on the stuff you don’t give a damn about.

    🔑 What You’ve Just Learned

    You’ve built a framework that respects your wallet and your calendar. When your budget and your time match your intentions, everything clicks, no panic, no overdraft, no FOMO.

    🧭 Next: Bring It All Home

    You’re almost there. In the conclusion, we’re pulling all these pieces together into something real. You’ll learn how to build a trip that fits you. Not some fantasy travel blogger’s highlight reel.

    ✈️ No One Cares About Your Bucket List, Unless You Do

    Here’s the truth: nobody’s handing out medals for most countries visited or most stamps in a passport. What matters is why you’re going and how it fits into the life you’re trying to build.

    If your travel priorities are clear, the rest falls into place. You’ll spend less time scrolling hostel reviews at 2 a.m. and more time actually living the trip.

    You learned to cut through the noise, dodge the Instagram hype, and make decisions that serve you, not some algorithm. That’s real power, my friend.

    Now go get specific. Pick a damn goal. Want inspo? Read Travel goals: inspiring ideas and how to achieve them, or level up with this step-by-step breakdown that makes planning suck a little less.

    Still feel like something’s missing? Maybe it’s you. Hit up Travel With Purpose: 7 Examples of Intentions for Memorable Travel and stop chasing vibes, start creating them.

    Was this guide helpful? Did I leave something out? Got a rant, rave, or random emoji to send? Email me. I actually read them.